Mixing: Compression

What is Compression?
Compression is used to manage dynamics in music, which plainly means it changes difference between the loudest and quietest parts of audio. You can use compression to affect a single recording, a group of instruments, or a full track. It is used in music production for specific audio engineering purposes, as well as a creative tool.
In this article we’ll explain exactly what a compressor does, how they work, how to use them and the different ways each type of compression affects audio.
How do I use Compression?
Compression is generally used to reduce the dynamic range of audio, which professional audio engineers and producers say makes the track sound ‘tighter’ or ‘glued together’. By reducing the dynamic range of an audio track, the audio sounds more consistent, balanced and is more engaging to listeners.
When using a compressor, they usually have these 4 simple controls:
Ratio, Threshold, Time (Attack + Release) and Output.
Compression allows you to make the quieter parts of a recording louder. This is very helpful with live instruments and vocals, where some parts may be unintentionally quieter within the recording.
Compression also helps reduce the volume of parts of a recording or track that might be too loud and stand out. This is what we mean by ‘reducing the dynamic range’ - the loudest and quietest parts of a recording become closer together, reducing the overall difference in volume.
Here’s the basic stock compressor you can find in Ableton Live 11:

Ableton Live 11’s stock basic compressor, called ‘Compressor’. credit: Ableton
A compressor will always have these 4 controls:
Threshold
The compressor’s ‘threshold’, in simple terms, is the limit you set for the compressor to start affecting the audio.
When the audio goes over the ‘threshold’ limit (for example -14.9dB), the threshold for compression will be passed and the audio will be affected. This is when the audio running through the compressor starts being ‘compressed’.
Audio beneath the ‘threshold’ limit will not be affected by the compressor. However, because the peaks (highest volume bits) of the audio have now been turned down by the compressor, the quieter parts will now sound like they are louder.
This is because the difference between the quietest parts, and the loudest parts of the audio, have been reduced.

The threshold value (top left) is represented by the blue line.
The volume reduction by the compressor is represented by the yellow line. The total volume reduction at any time can be seen in the bottom right corner, also in yellow.
2. Ratio
The ratio determines how much the audio signal above the threshold will be turned down.
For example, if the ‘ratio’ of the compressor is ‘4.00 : 1’, it means this: if a signal exceeds the threshold by 4dB, it gets turned down to only 1dB above the threshold.
A higher ratio will mean the audio is more heavily compressed.
A lower ratio means the audio will be more gently compressed.
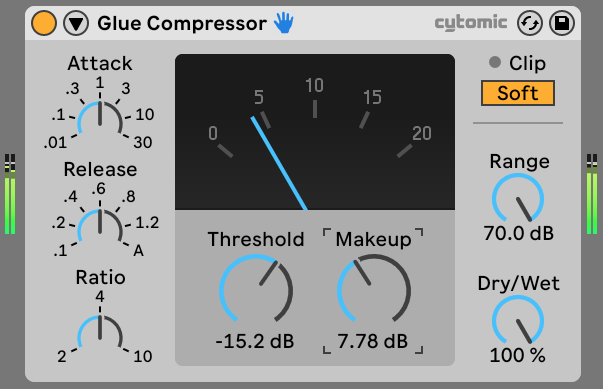
Ableton’s ‘Glue Compressor’ with an example of fast, heavy compression settings.
3. Time (Attack + Release)
The ‘time’ controls set the speed, or rate, that the compressor kicks in. These speed controls determine the time it takes for the audio to be ‘compressed’ when the volume is over the ‘threshold’.
Put simply, the ‘time’ of the attack sets the speed at which the compressor starts compressing, and the ‘release’ is the speed that the compressor stops compressing, or ‘releases’ the audio.
The higher the attack value is, the longer the compression effect is delayed. A lower attack value means the compression kicks in quicker. Attack is measured in ms (milliseconds).
Similarly, the ‘release’ time represents the speed that the compressors stops compressing. A short ‘release’ time means the audio recovers from compression quickly. A longer ‘release’ time meaning there’s a longer delay before the audio returns to it’s pre-compression levels. Release is also measured in ms (milliseconds).
If you’re still having trouble understanding this…
Imagine the compressor as a hand, holding onto something and squeezing it. - the ‘attack’ is how quickly the compressors grabs hold of the audio. The ‘ratio’ is how hard the compressor squeezes. The ‘release’ is how long the compressor takes to let go.
4. Output
After compressing a track, the sound will have lost a little volume, so the output control is used to compensate for this difference in volume.
Remember: compression reduces the peaks in an audio track. You use the ‘output’ to raise the volume of the quieter parts, so the overall volume of parts of the audio is more balanced.
Now, the quieter bits sound louder.
The output is not used to simply increase the volume of audio. It used to recover the volume lost by compression.
Extra:
Compressor Types
VCA (Voltage-Controlled Amplifier)
This compressor is known for its precise, clean and rather gentle compression. Its purpose is to give a "glue" effect on the track or on an instrument bus. The settings offered are generally: threshold, ratio, attack, release and output gain.
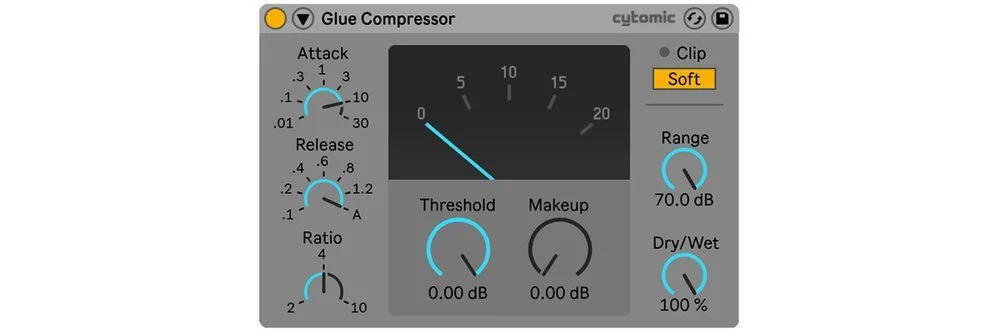
Ableton’s Glue Compressor is a basic VCA compressor. It offers a basic, easy-to-use VCA emulation - perfect for any compression needs.
2. FET (Field Affect Transistor)
FET compression was essentially designed to emulate the sound that a tube could make but with greater reliability. Instead of using tubes as detectors, it uses field-effect transistors. It's a compressor with rather fast time parameters which makes it perfect for use on high transient sounds (like drum sounds). They generally offer input, output, ratio, attack and release controls.

the most famous FET compressor - the 1176. This is UAD’s 1176 plug-in, widely considered to be the best digi emulation. credit: UAD
3. Optical Compression (Opto)
An optical compressor uses a bulb and a photocell to reduce the gain. As sound passes through the bulb, the photocell detects audio above the threshold and triggers a reduction in gain. The amount of gain reduction depends on the strength of the signal level.
The speed of the Optical Compressor is much slower than the FET, which makes it much more suitable for sounds with less transients, such as bass or string instruments.
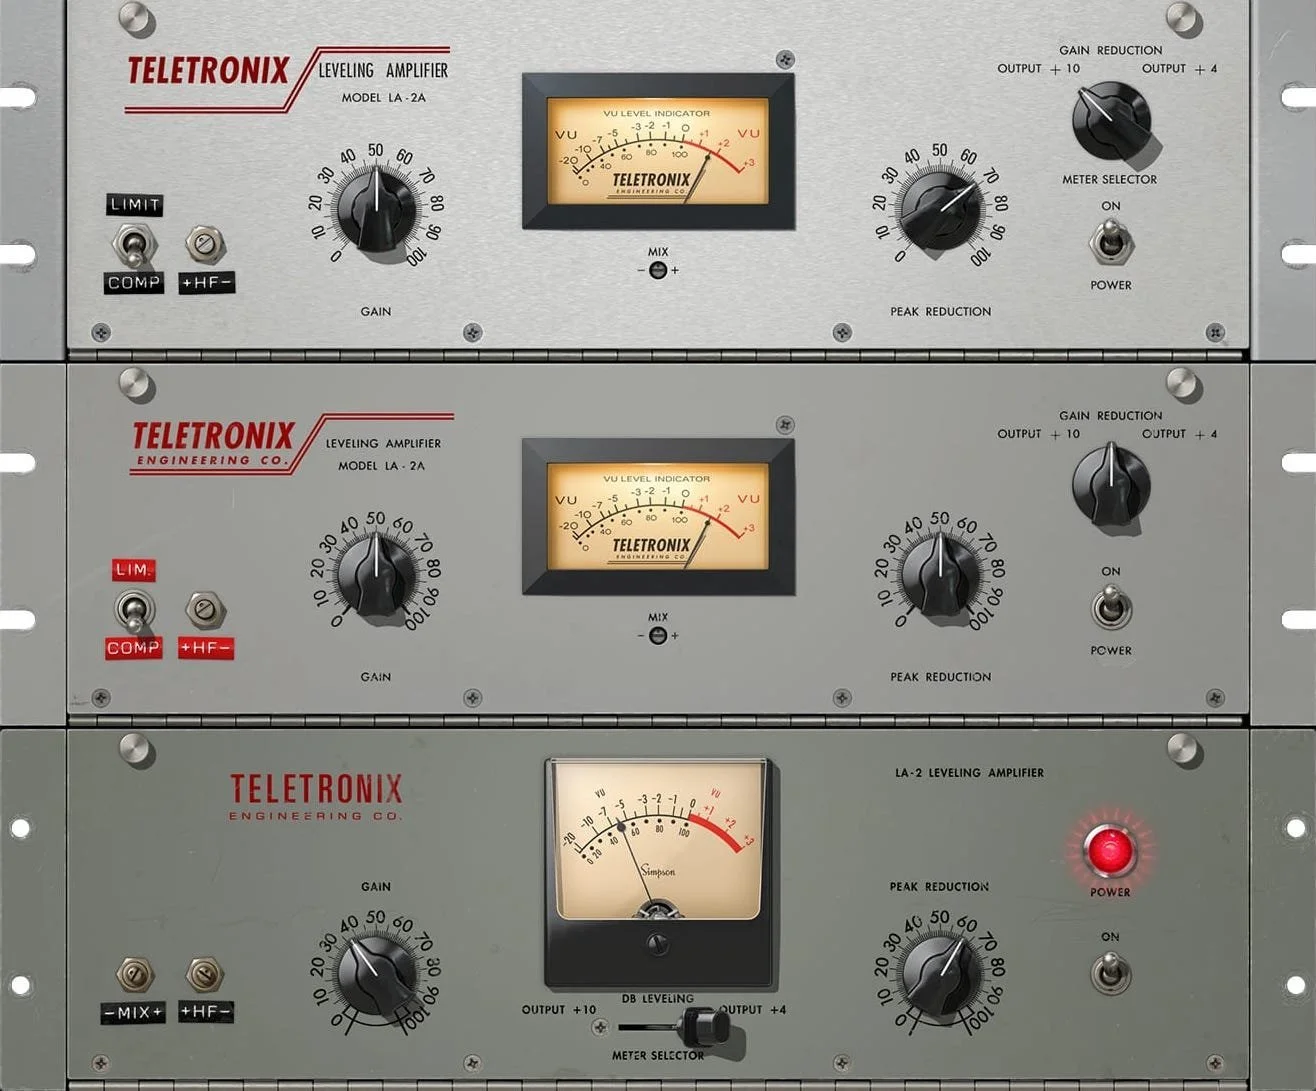
The most famous Opto compressor - Teletronix LA-2A. This compressor, famous for vocals, bass and drums, has been used on records such as ‘Hips Don’t Lie’ by Shakira and the ‘Nevermind’ album by Nirvana. credit: UAD/Teletronix
4. The VARI MU Compressor
This compression uses tubes in the detection circuit. The attack is slower than the FET or VCA, but it can be adjusted as required using the "time constant" parameter. The best known compressor is the Fairchild Model 660 or 670. It is most widely know and popular for use in audio mastering.

Final Thoughts
How do you apply all that theory then?
The best way to learn how to use compression quickly is simply to play with a compressor. Find a song that you know uses a lot of compression, like this one by Flying Lotus, and check your own track alongside it. Using this technique, called ‘Reference Mixing’, you can quickly figure out what sounds right, and what doesn’t.
And lastly, compression is difficult to master. Don’t worry if you can’t figure it all out straight away. Just keep experimenting, reference your mixes against other tracks, and after some practice, you’ll have the key to more energy and loudness in your tracks.
Written by Valentin Cavanna & Saul Bell
Edited by Saul Bell