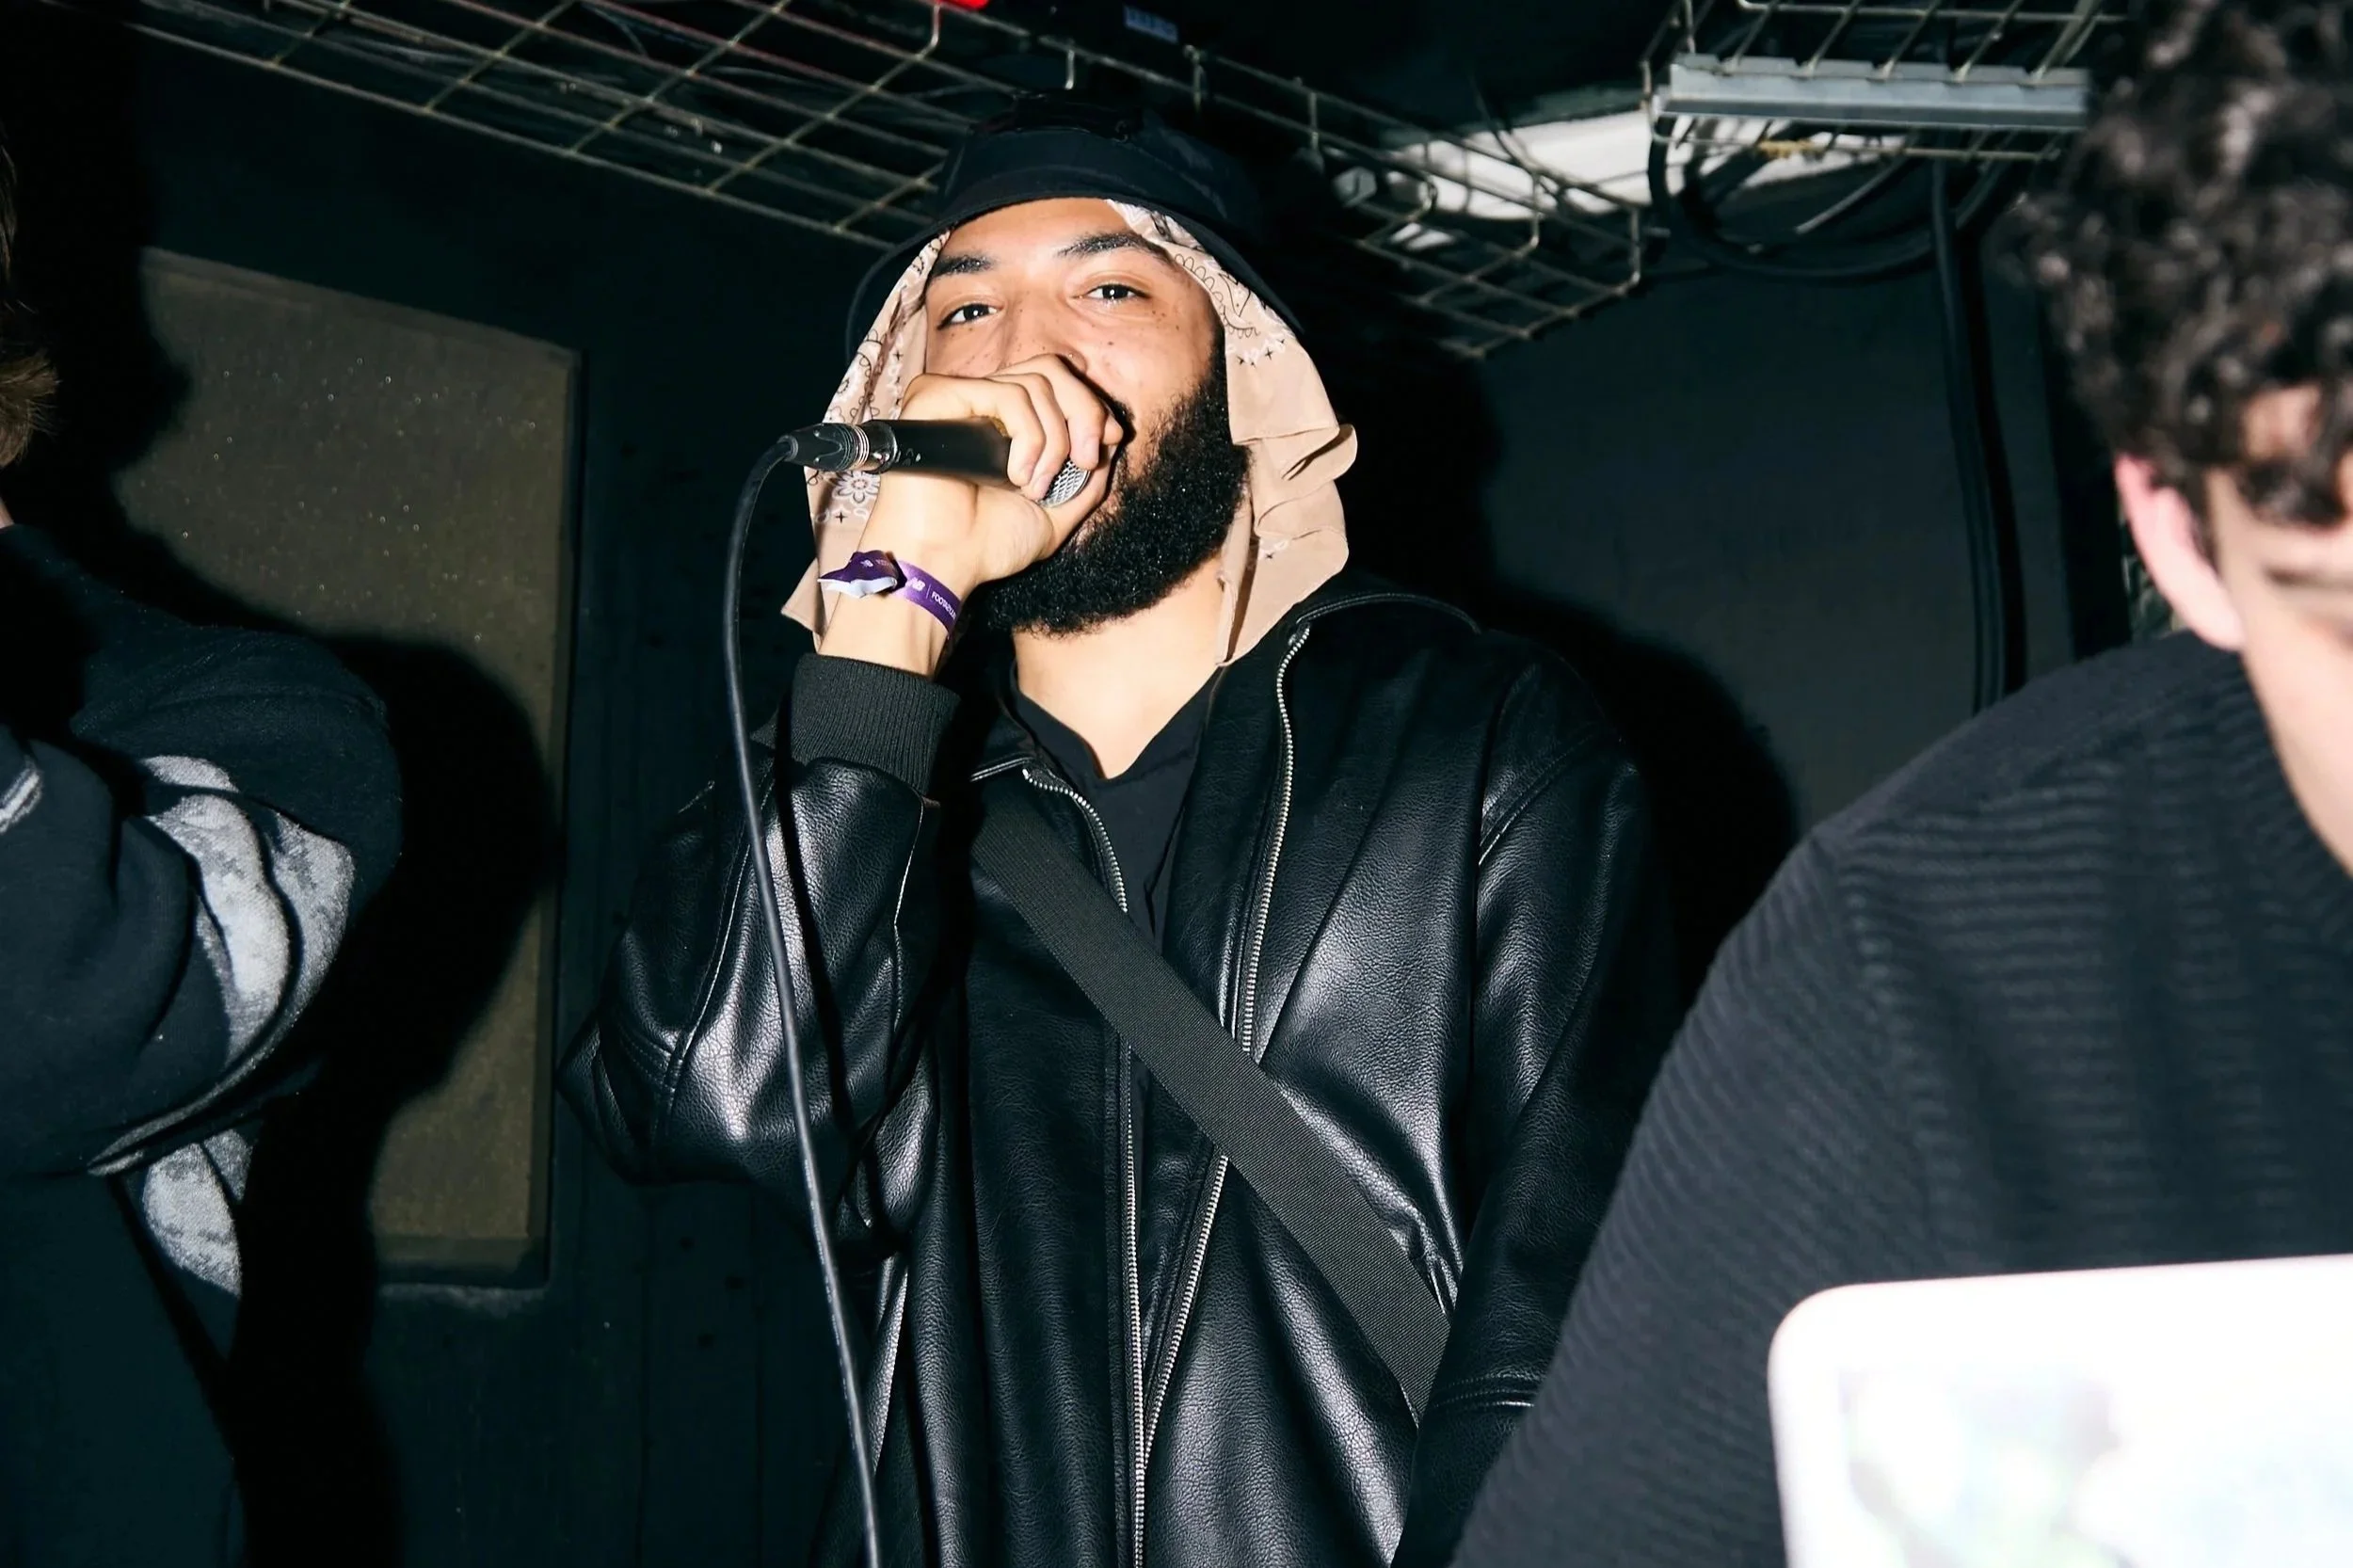
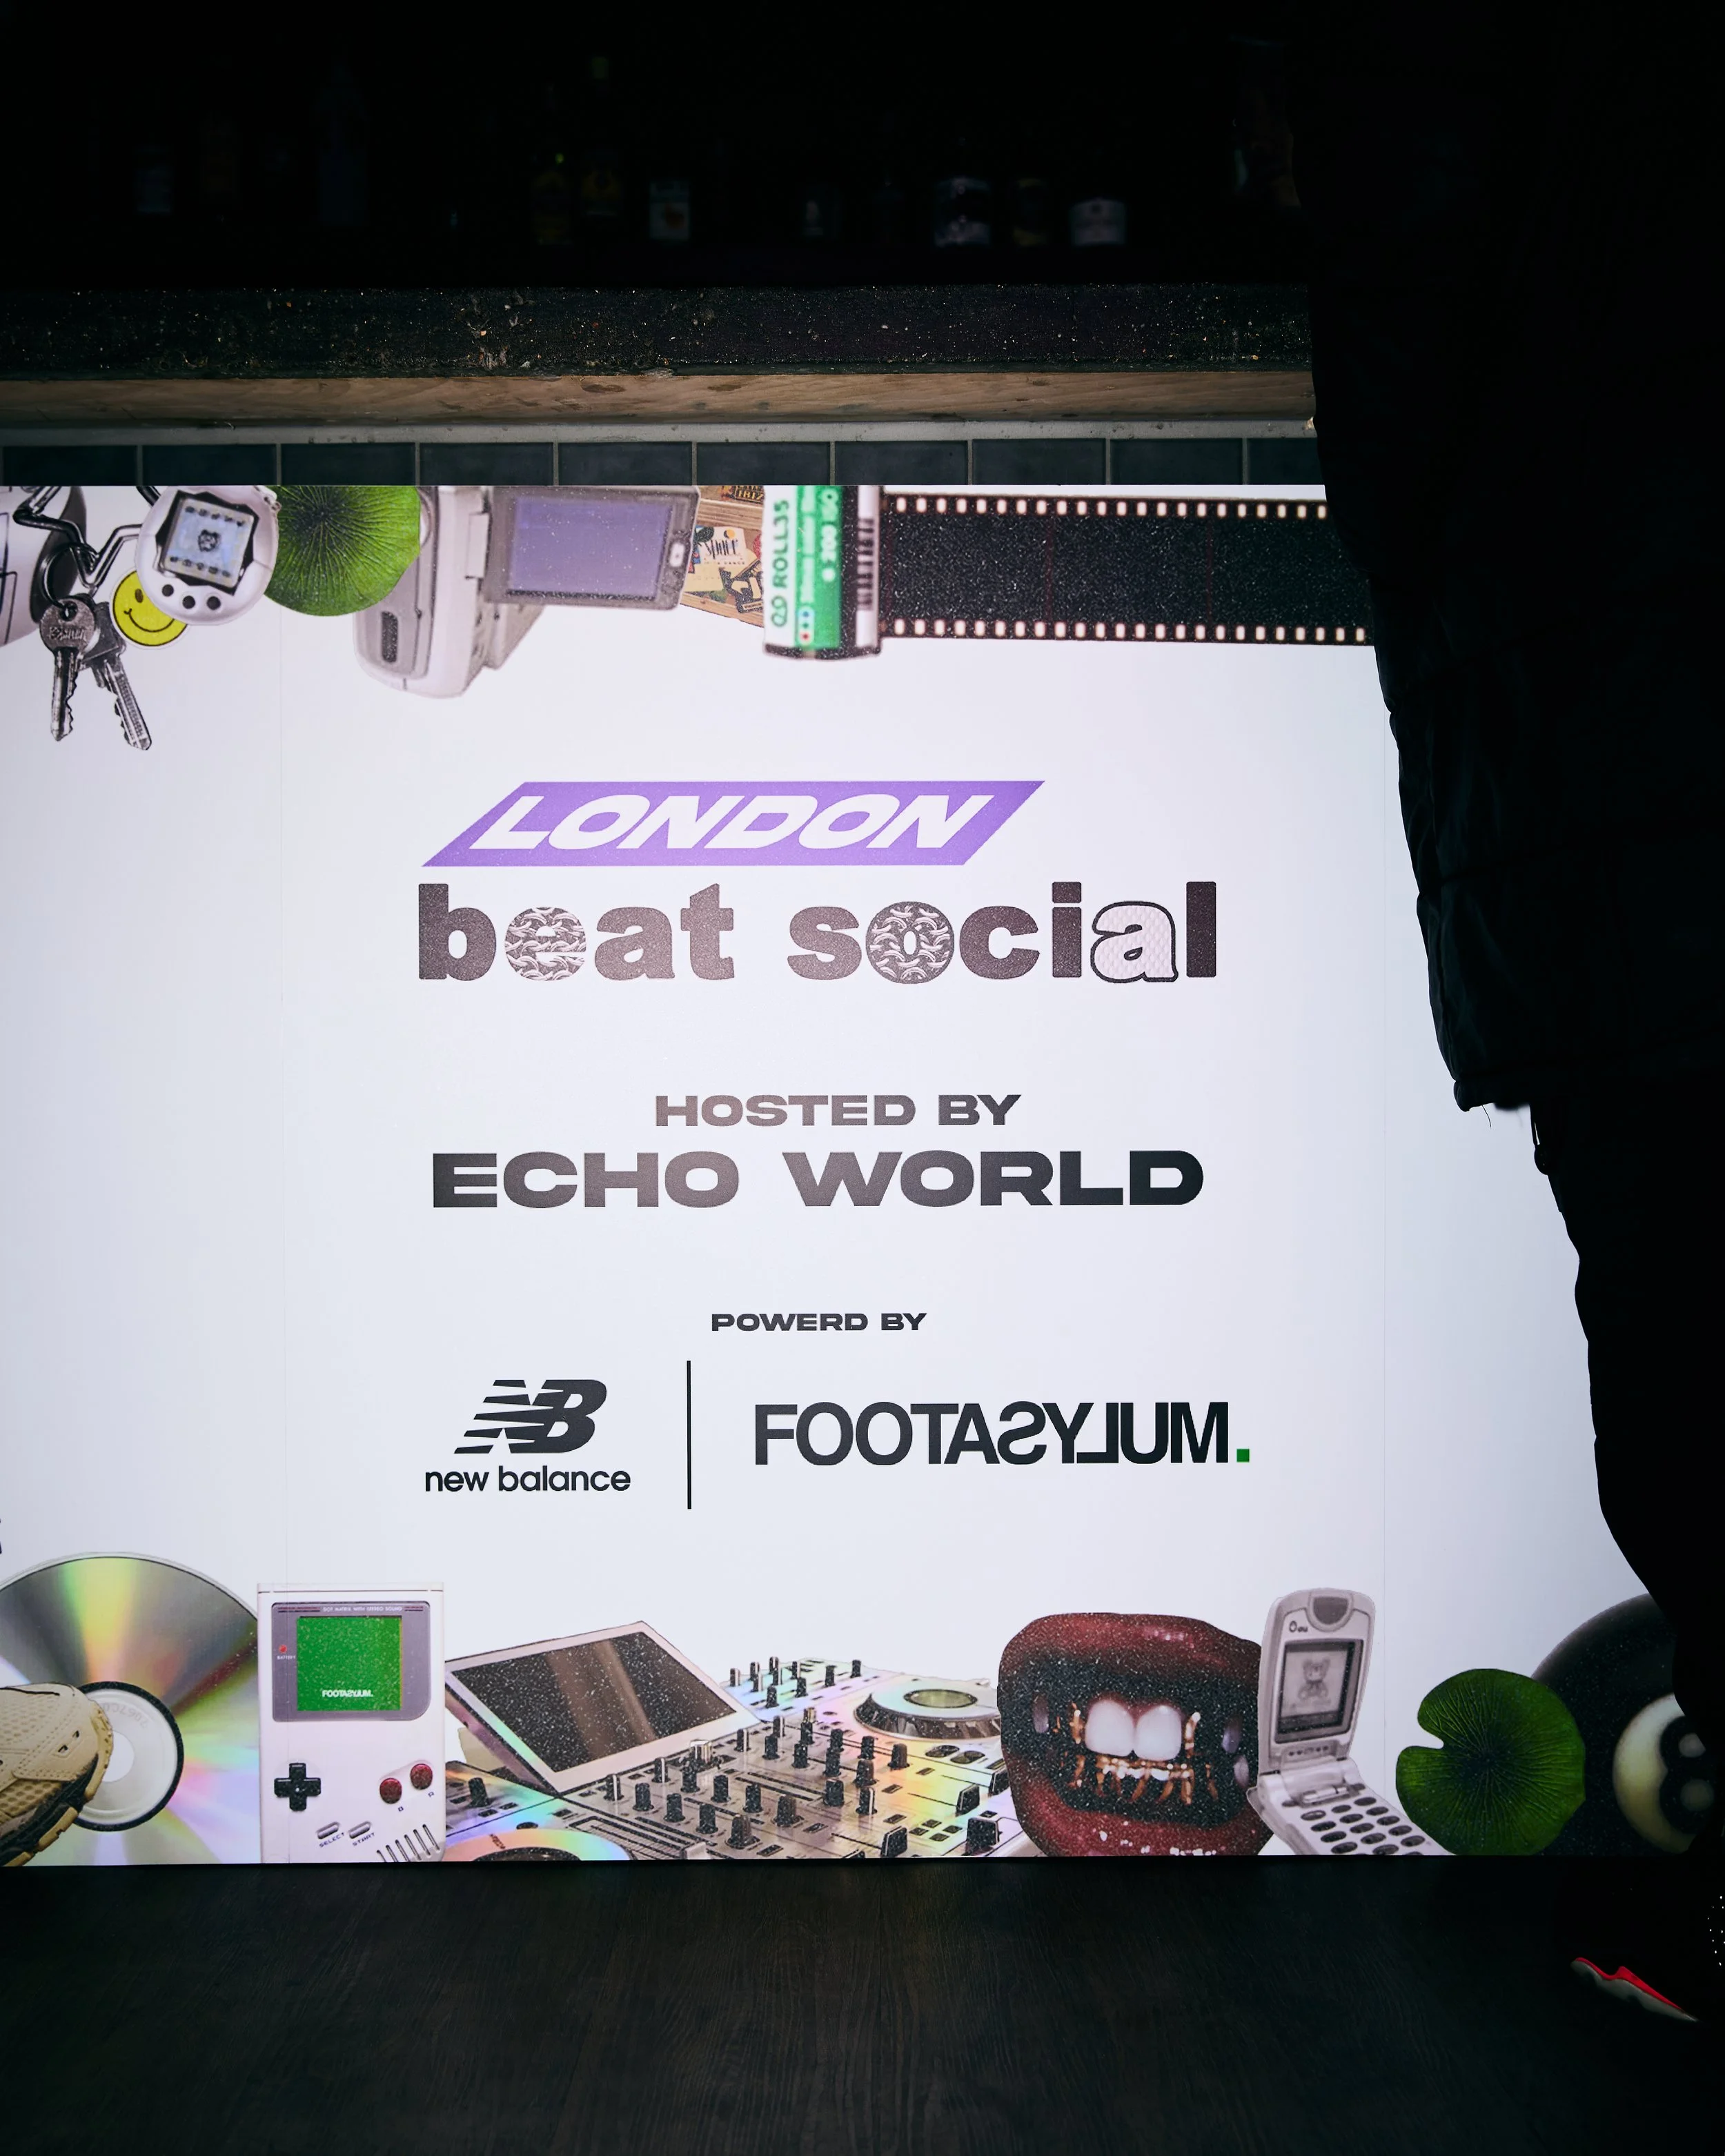
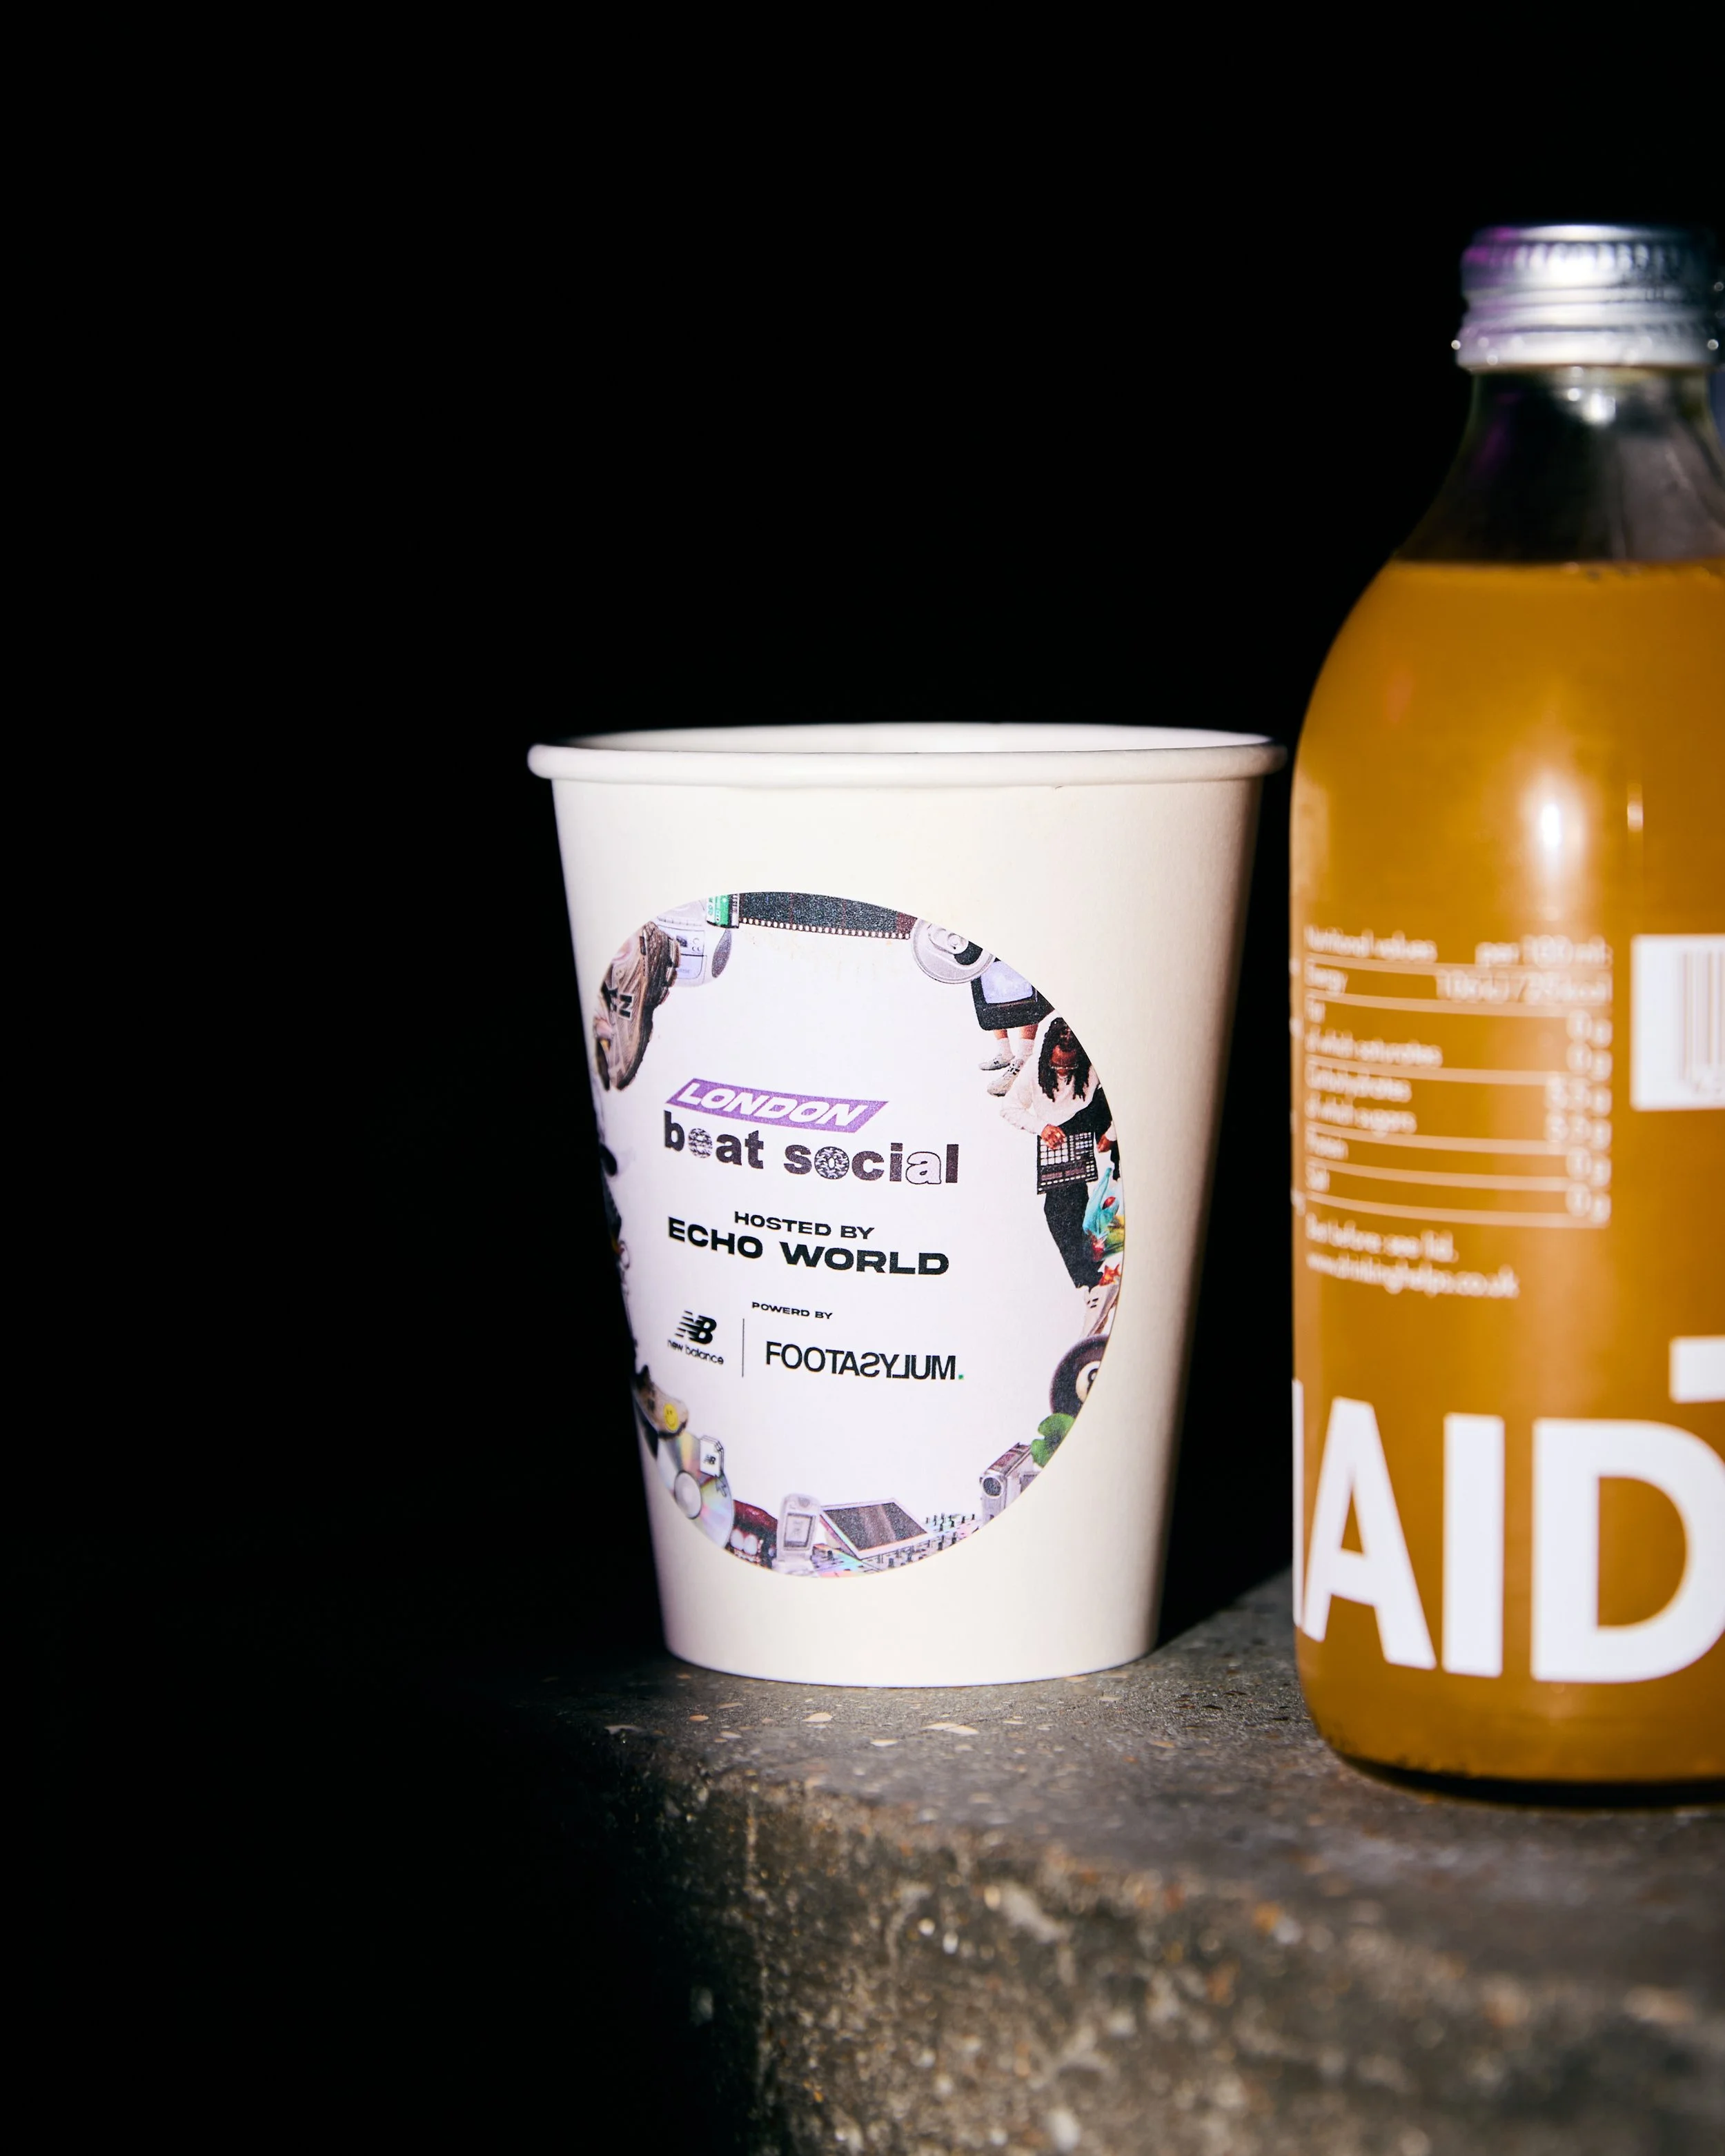
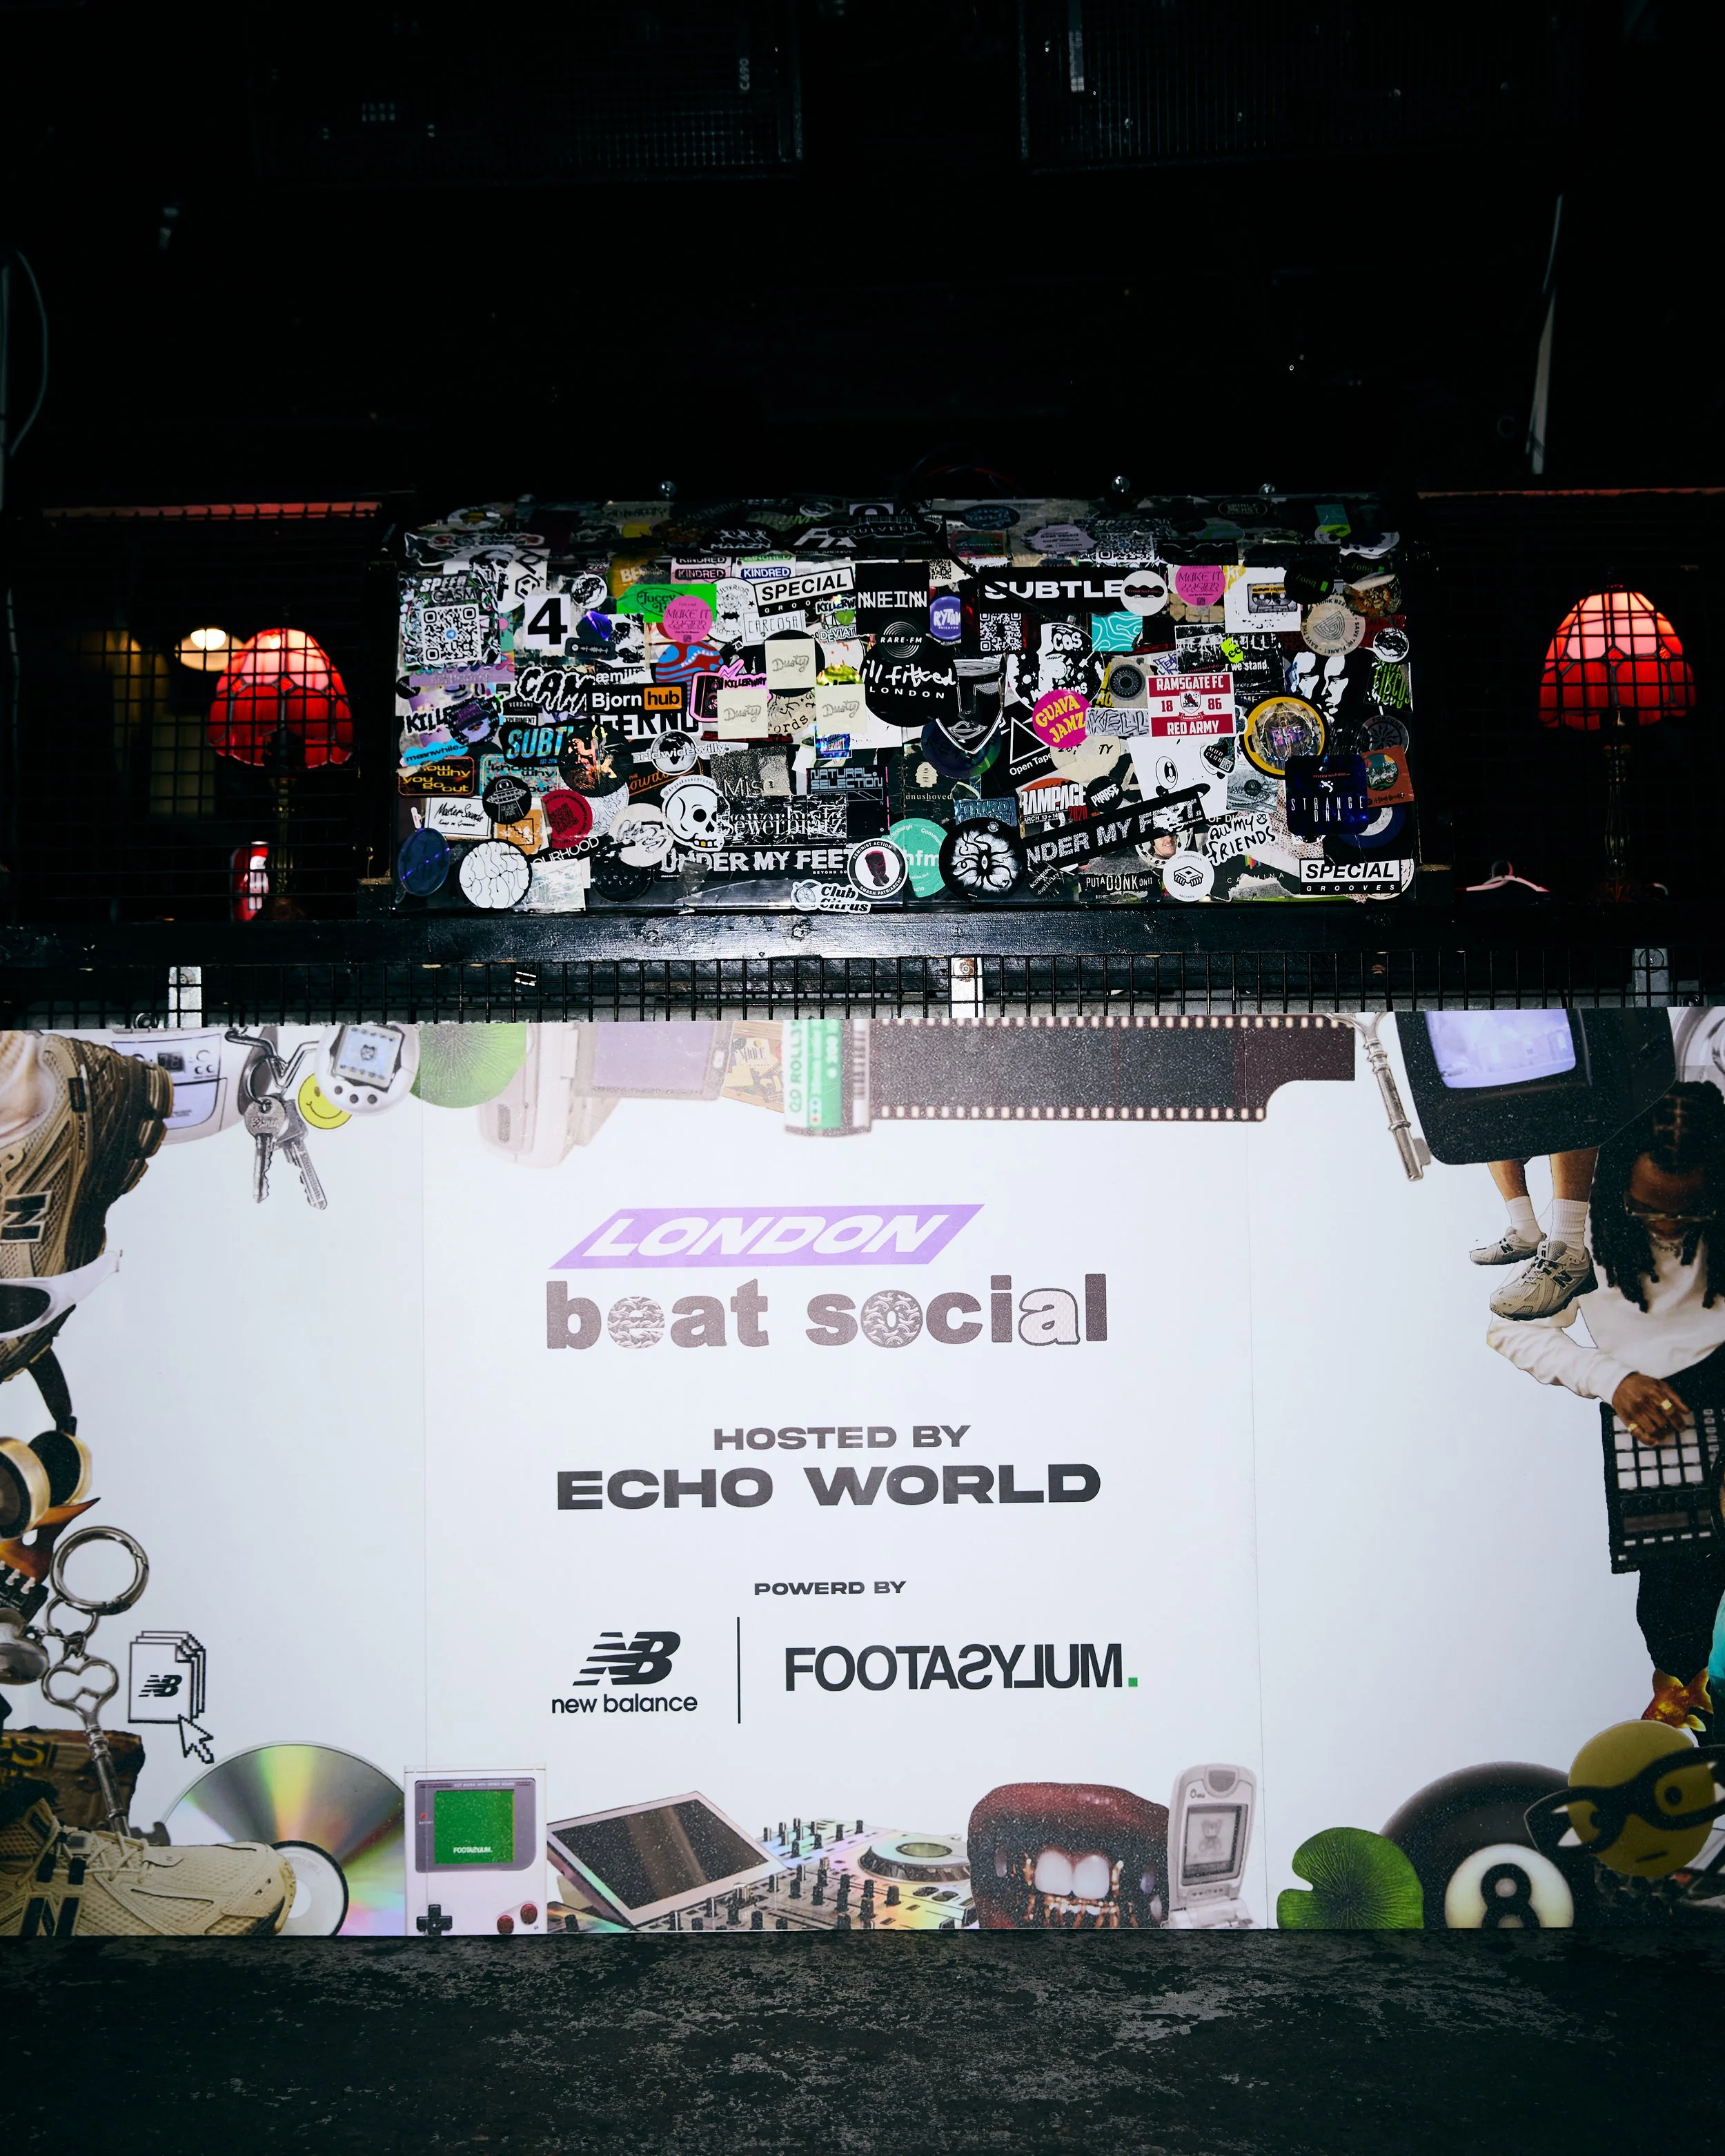
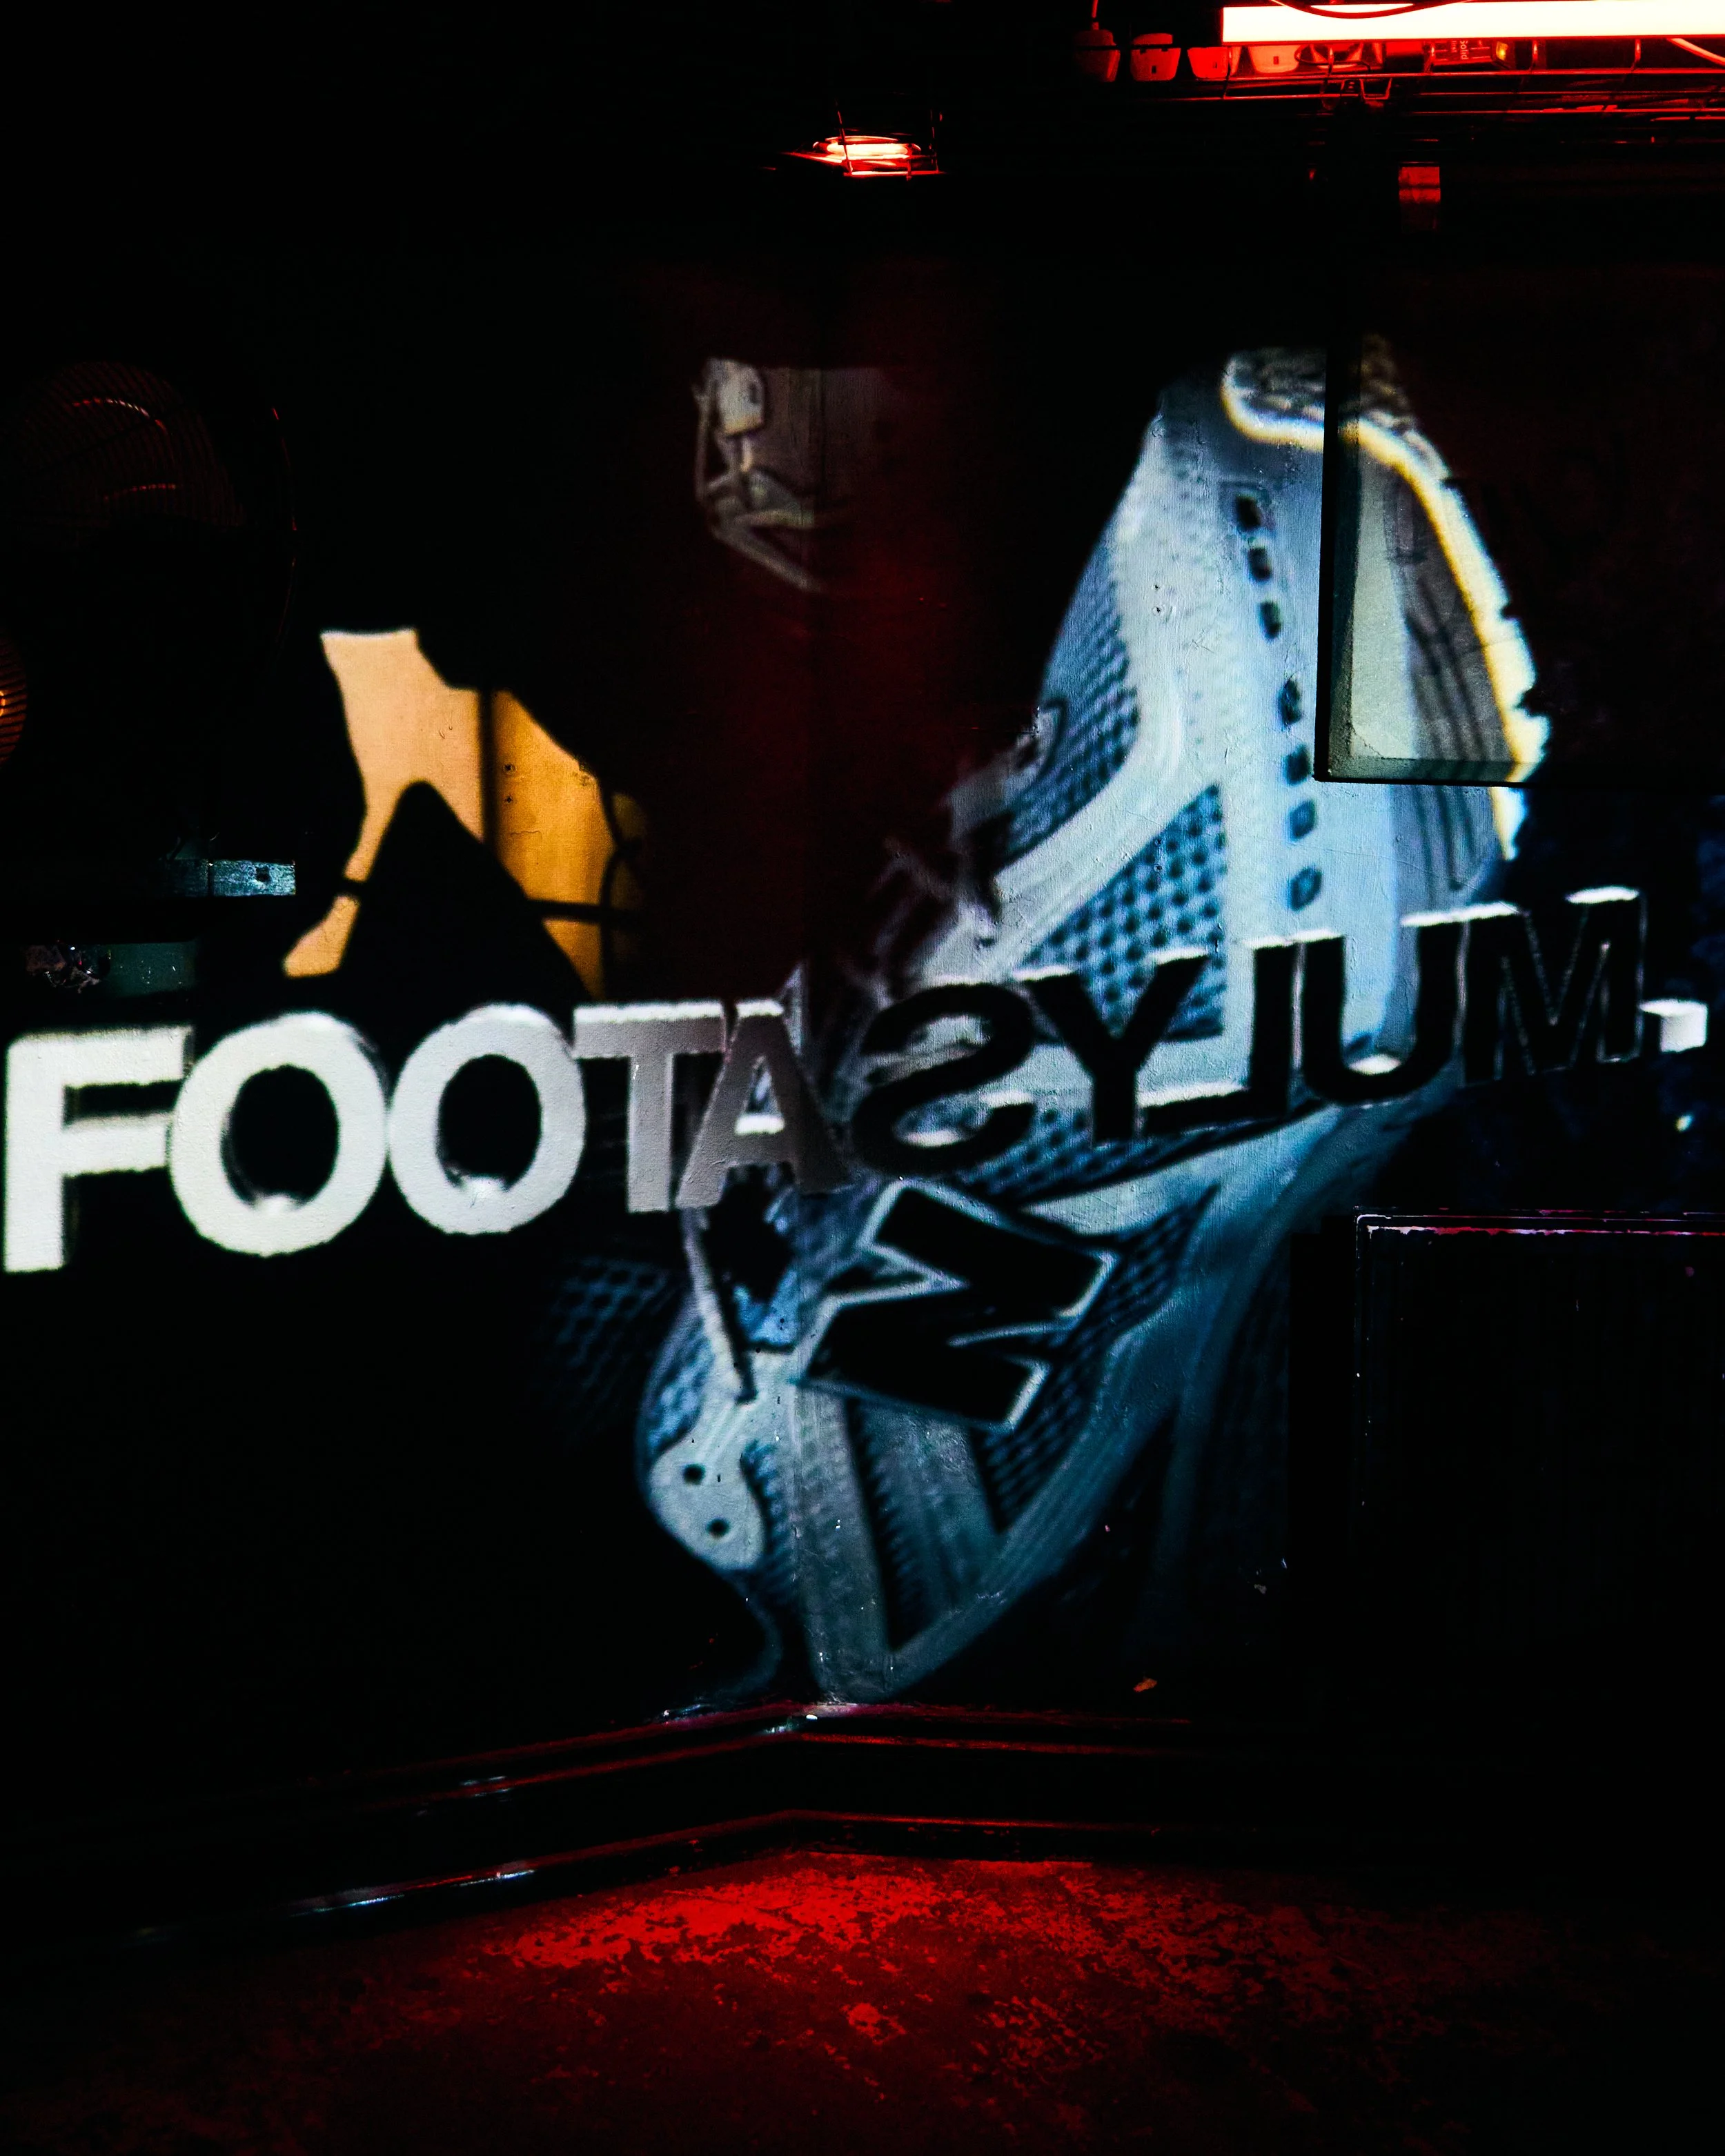
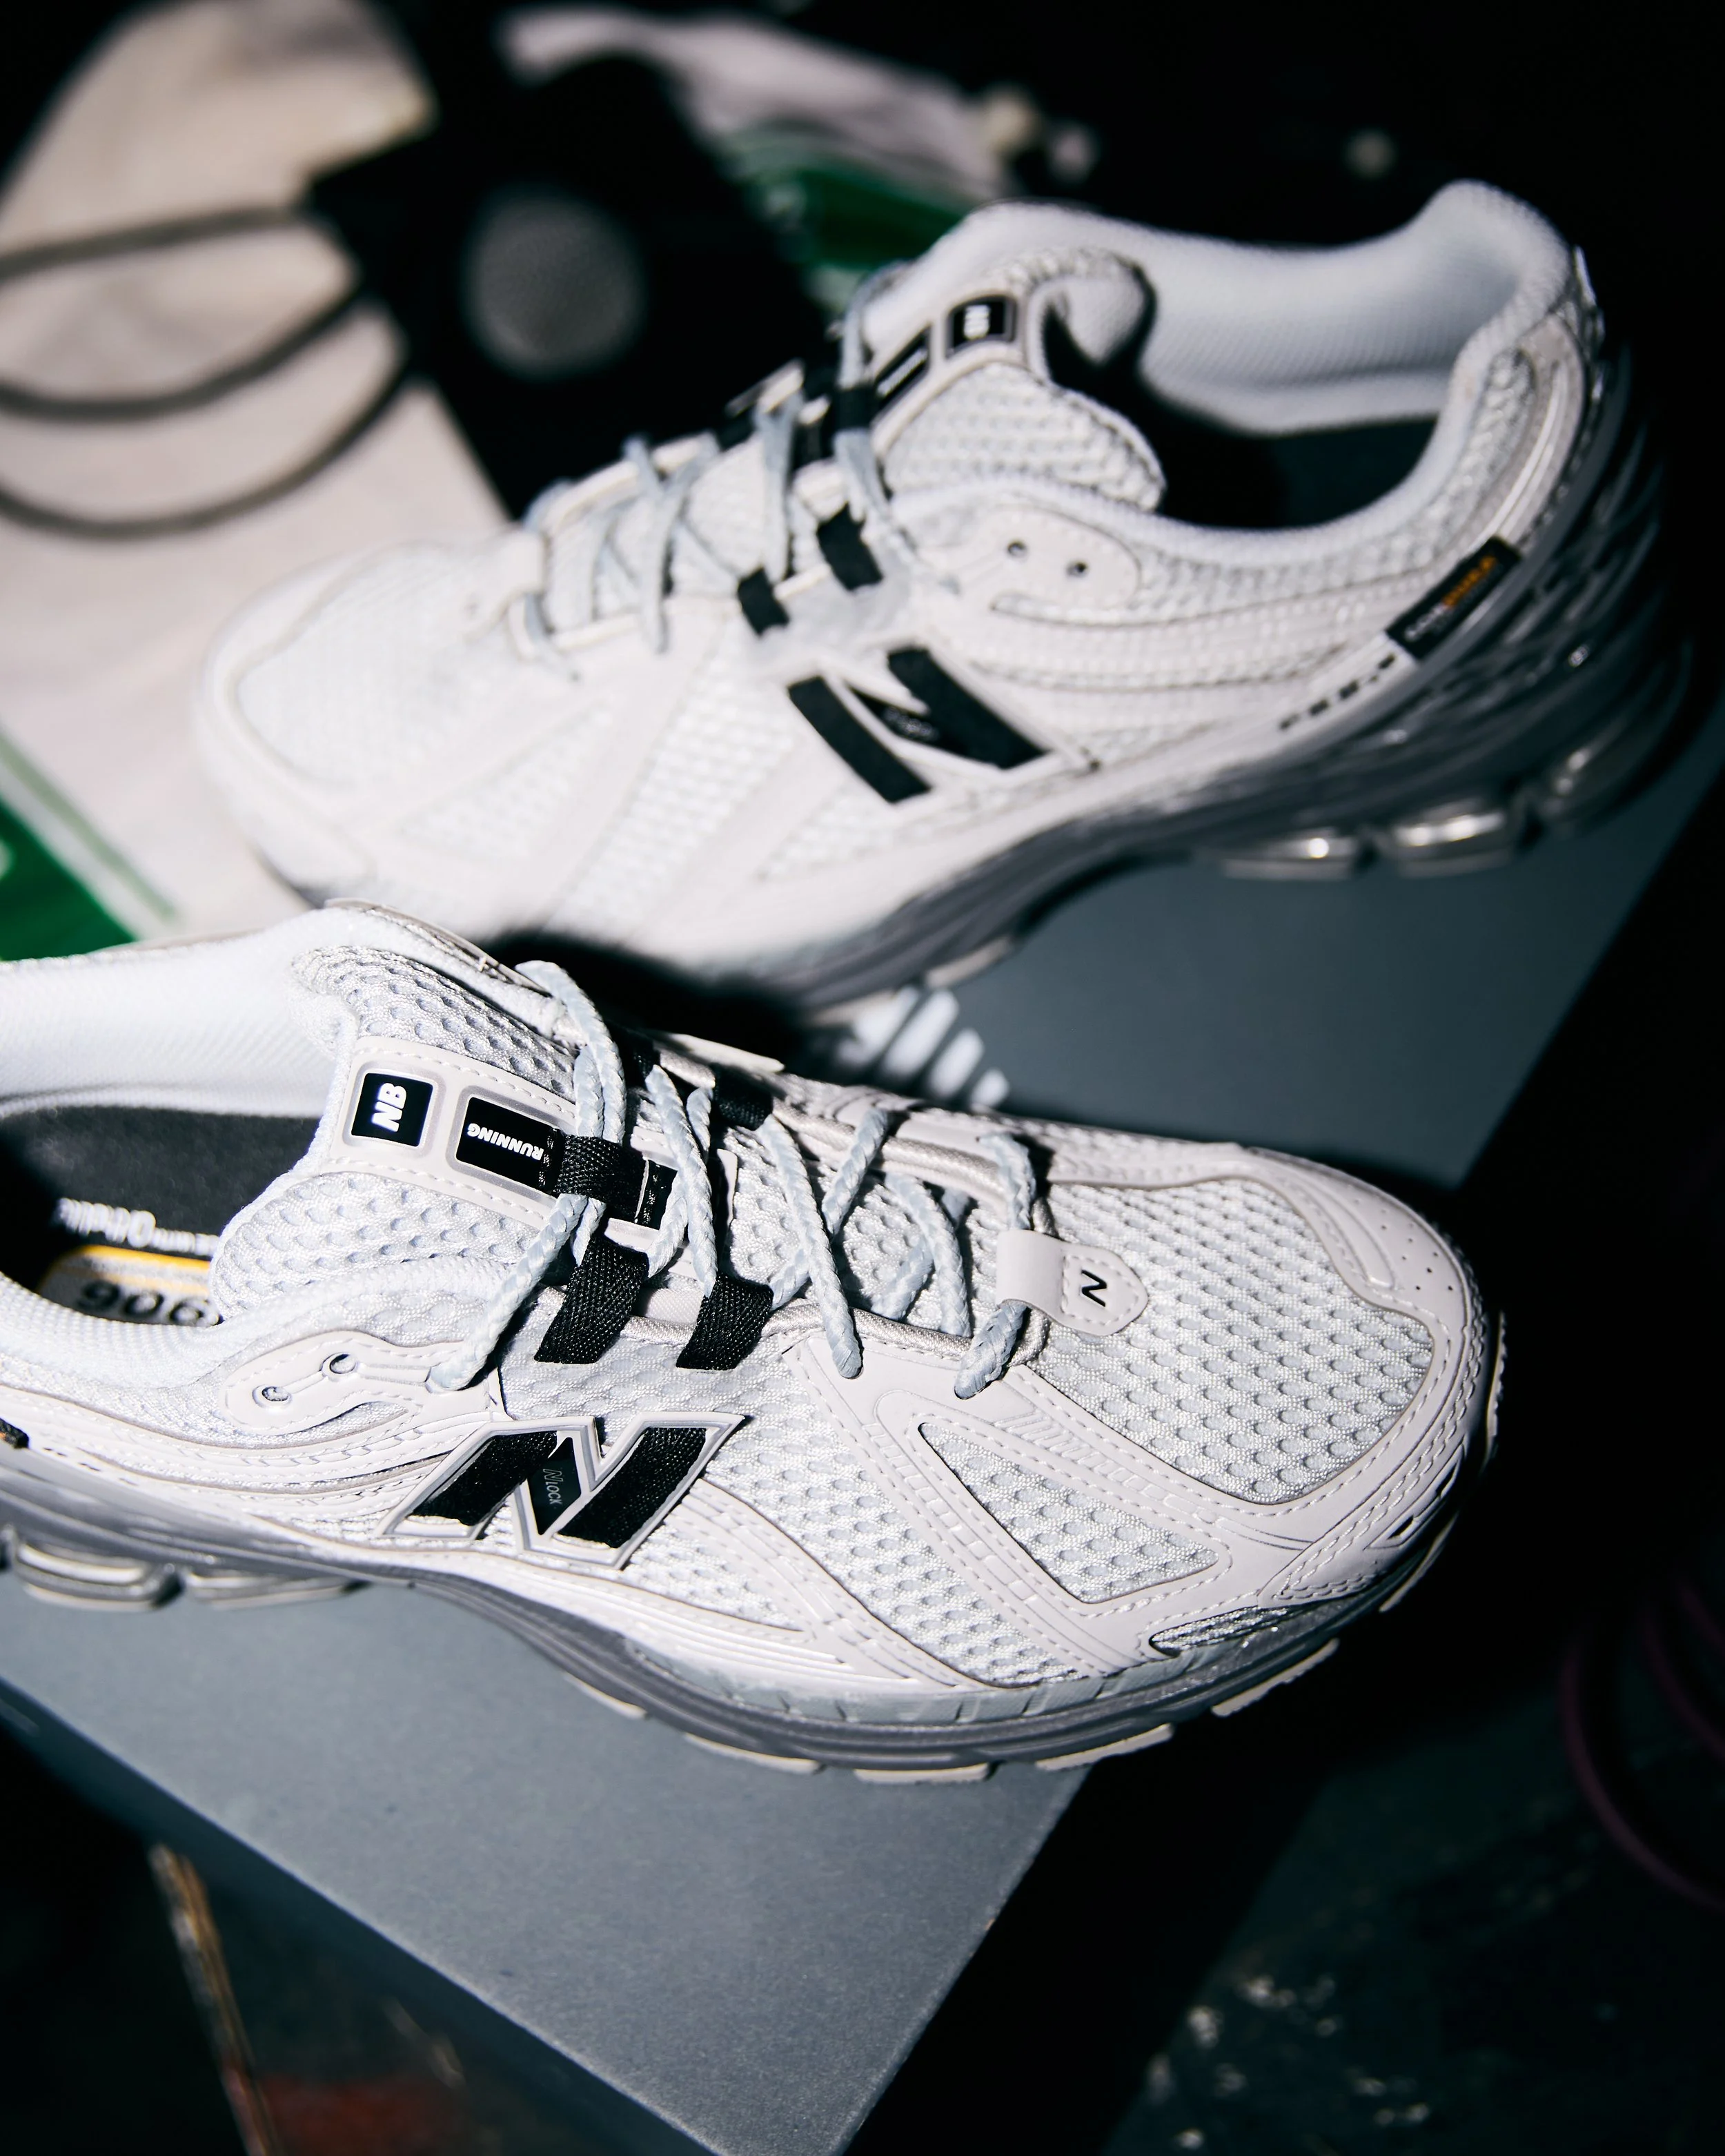
ECHO WORLD x NEW BALANCE x FOOTASYLUM
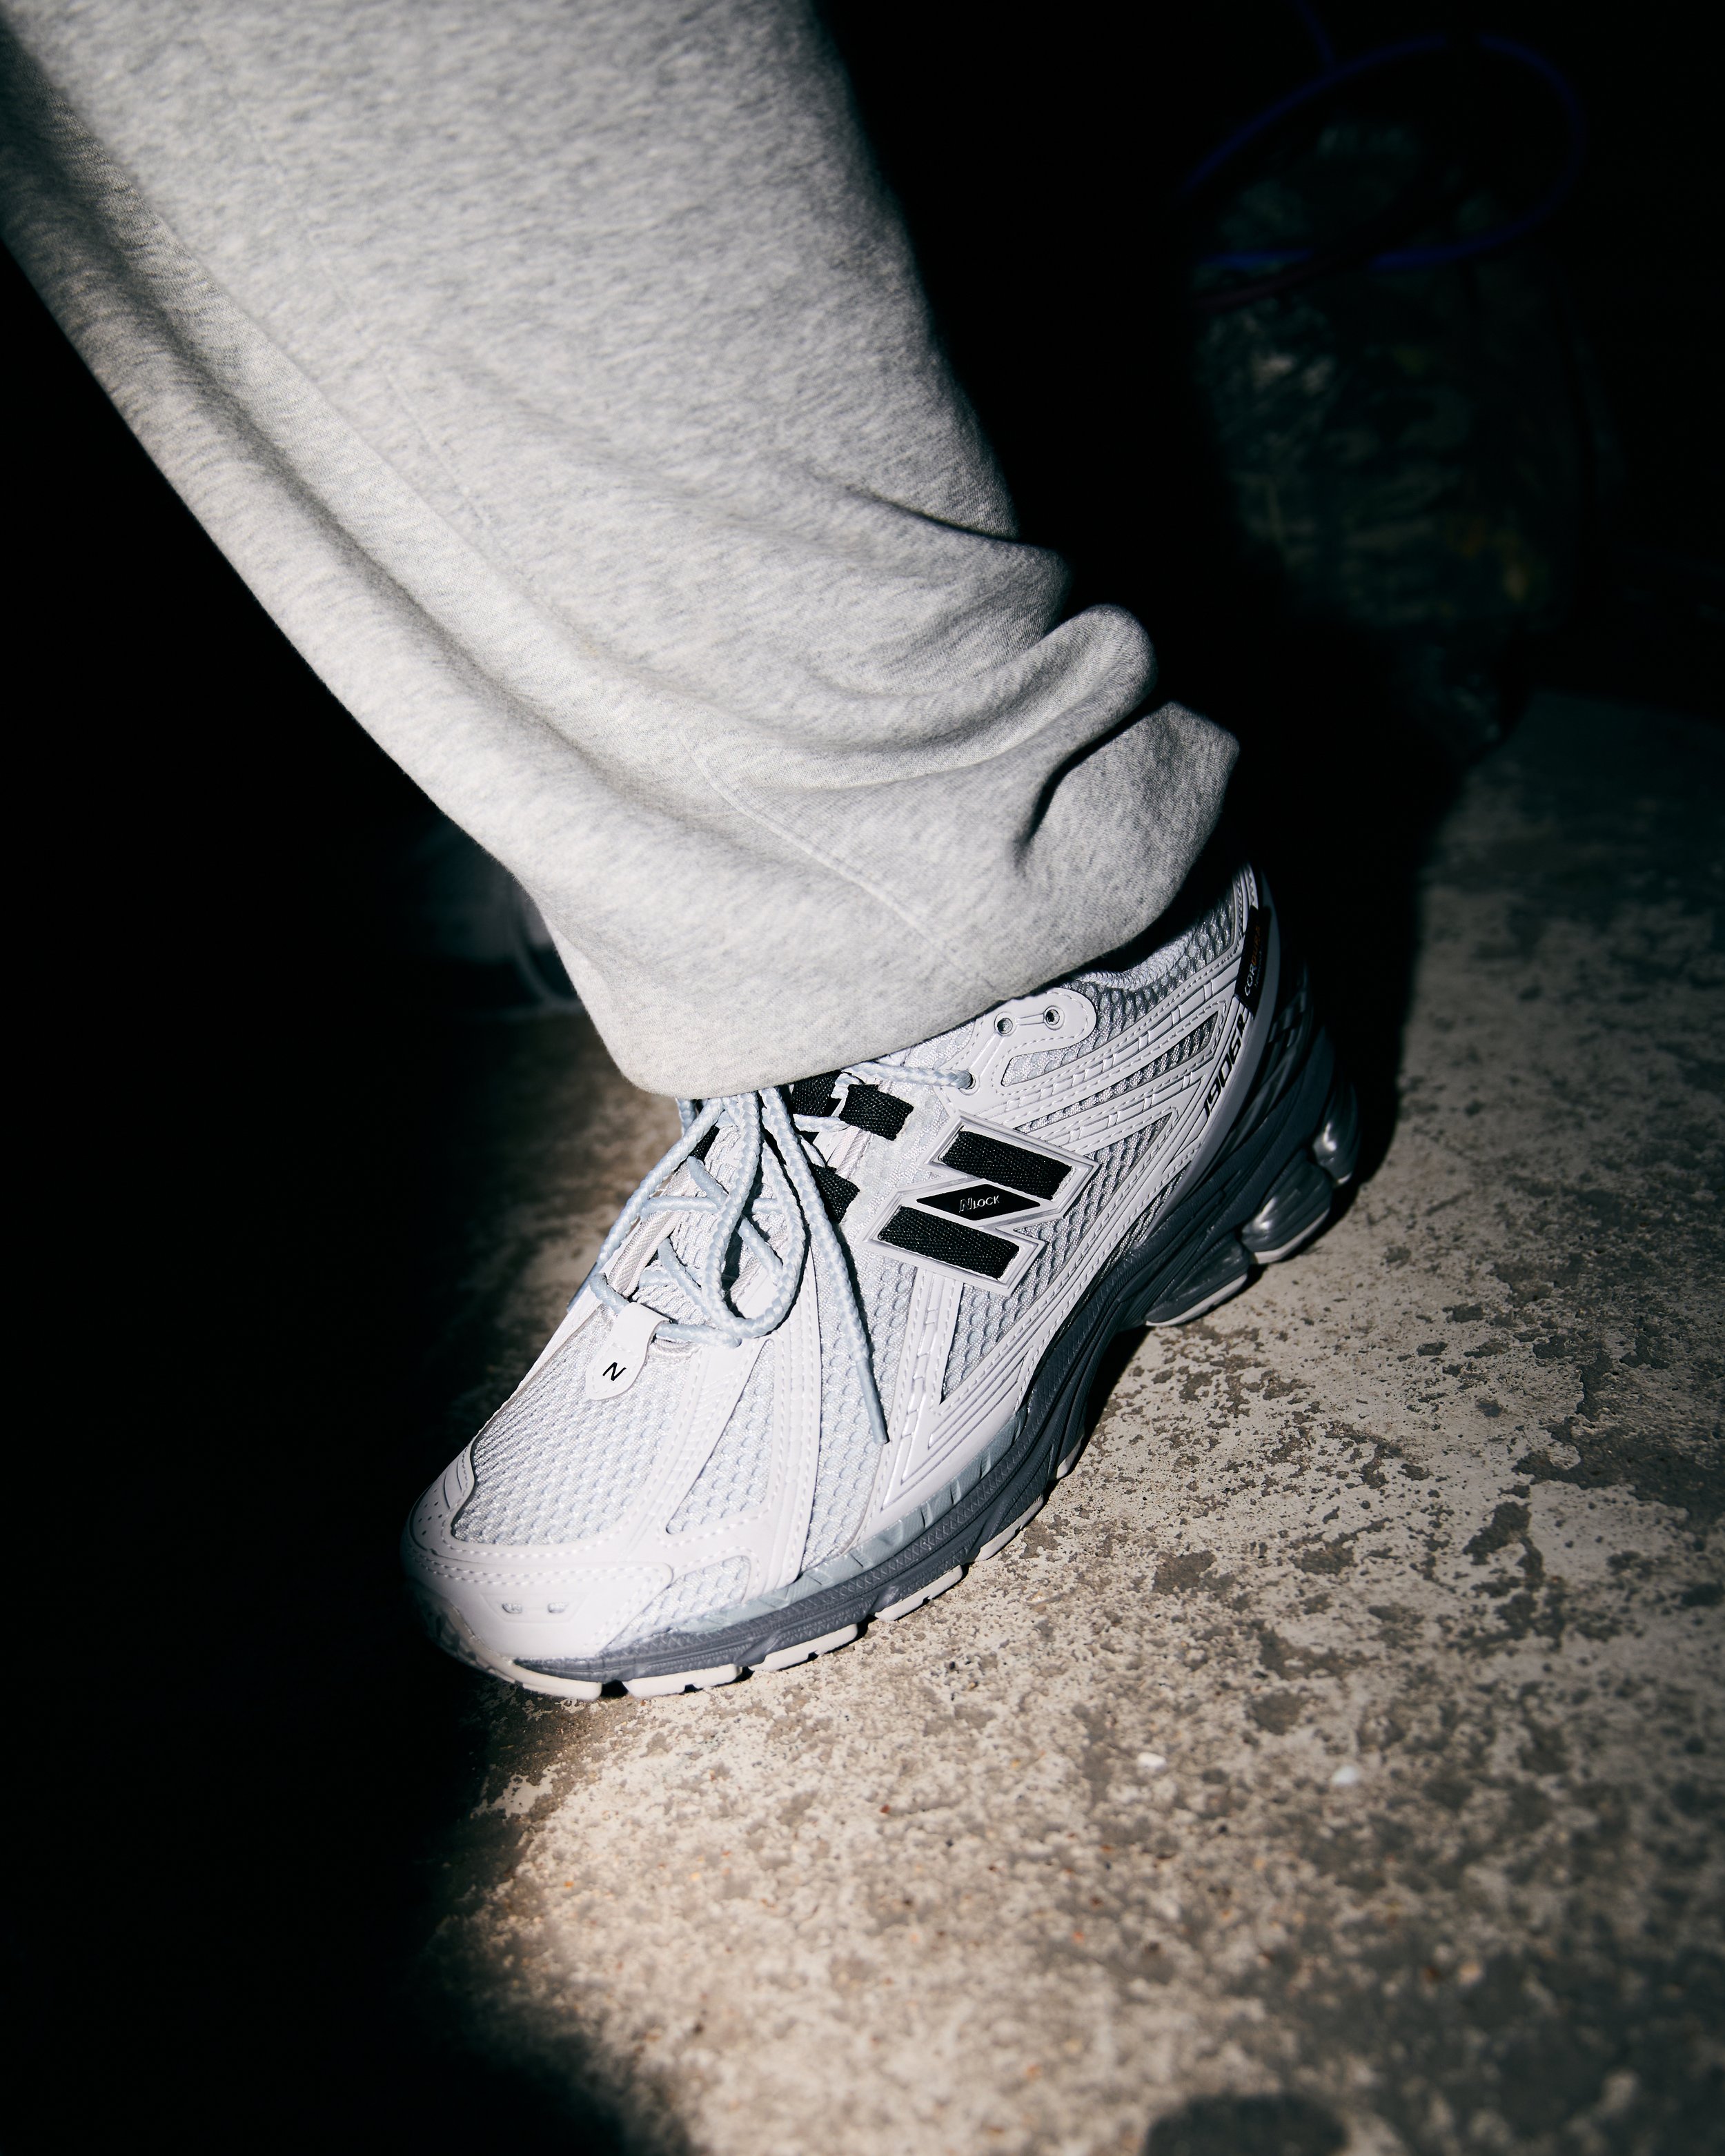
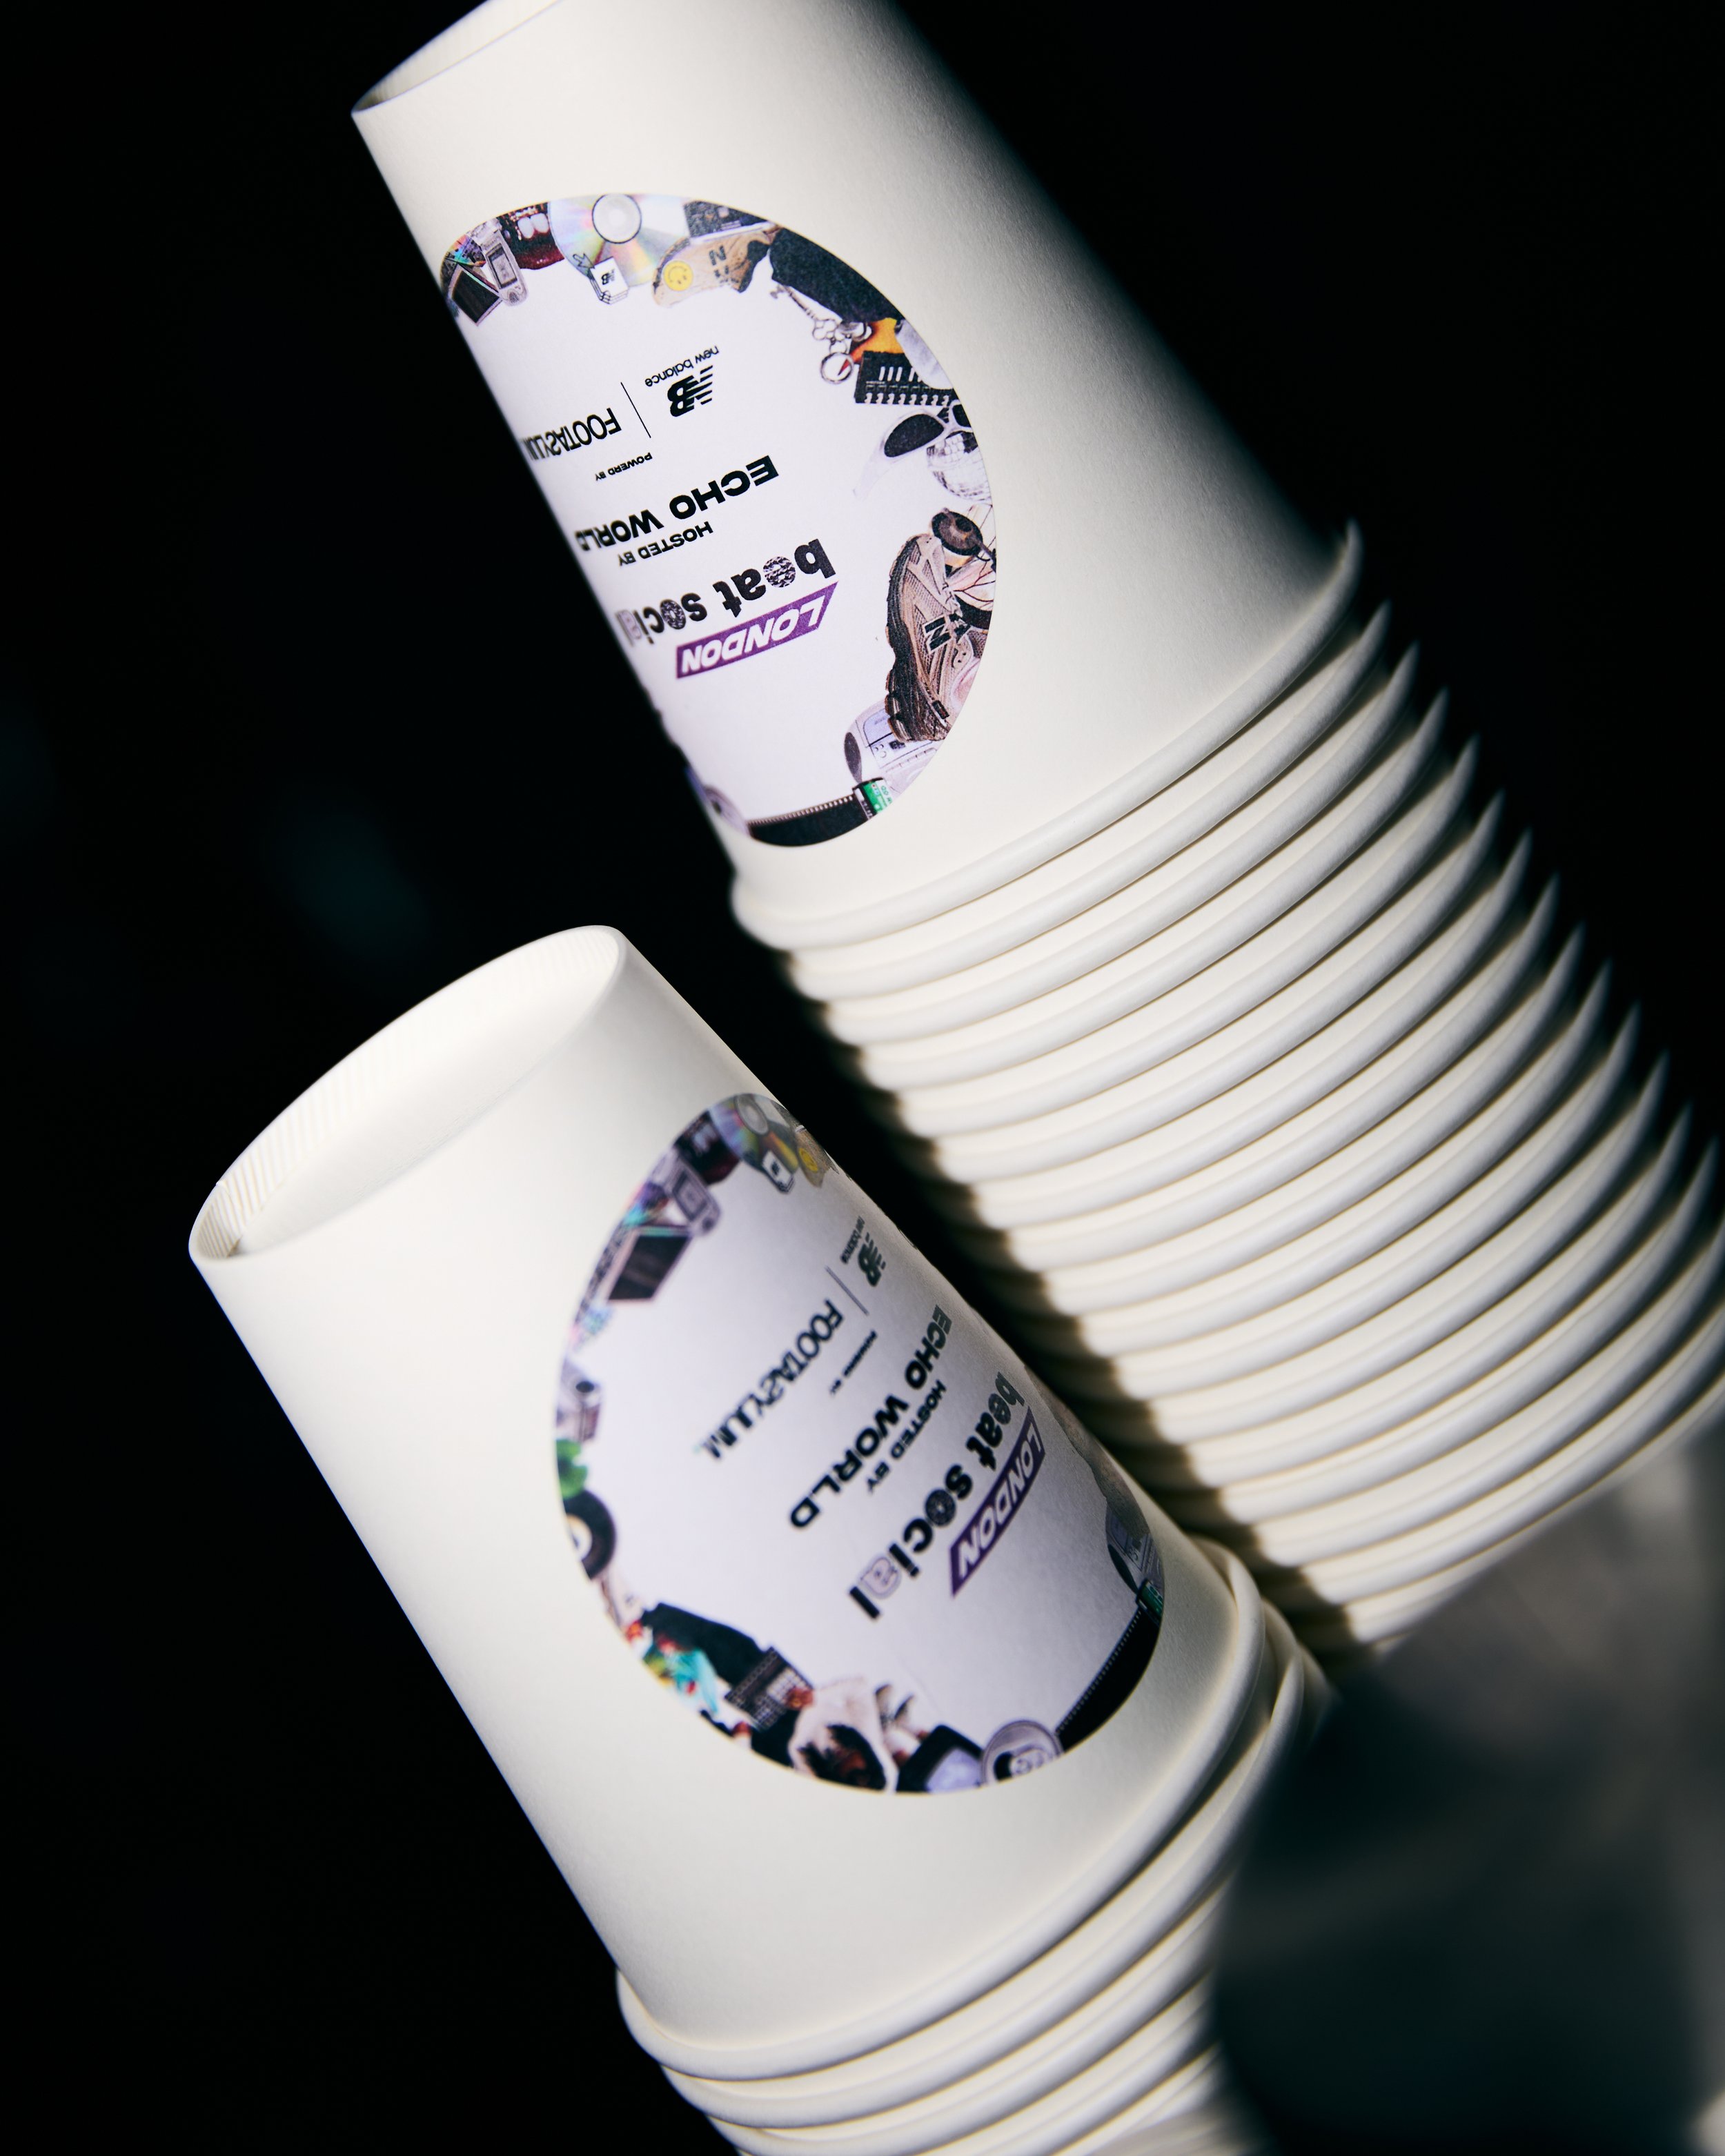
To celebrate the release of the New Balance 1906, Echo World partnered with New Balance and Footasylum on a Beat Social™ event in London rooted in collaboration, community and underground music culture.
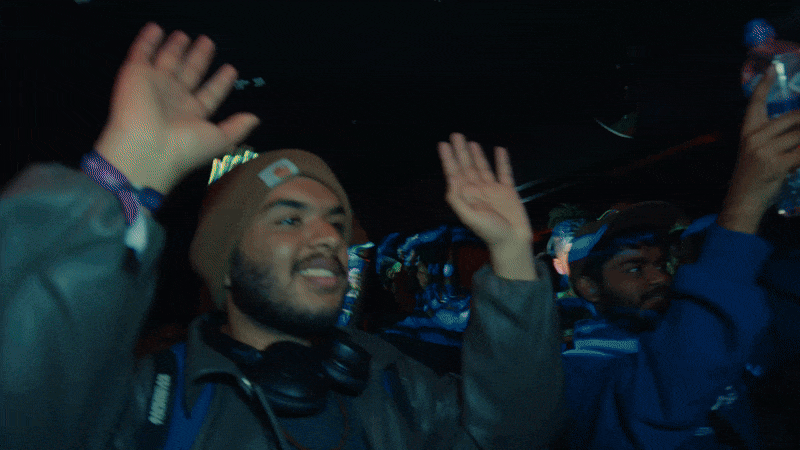
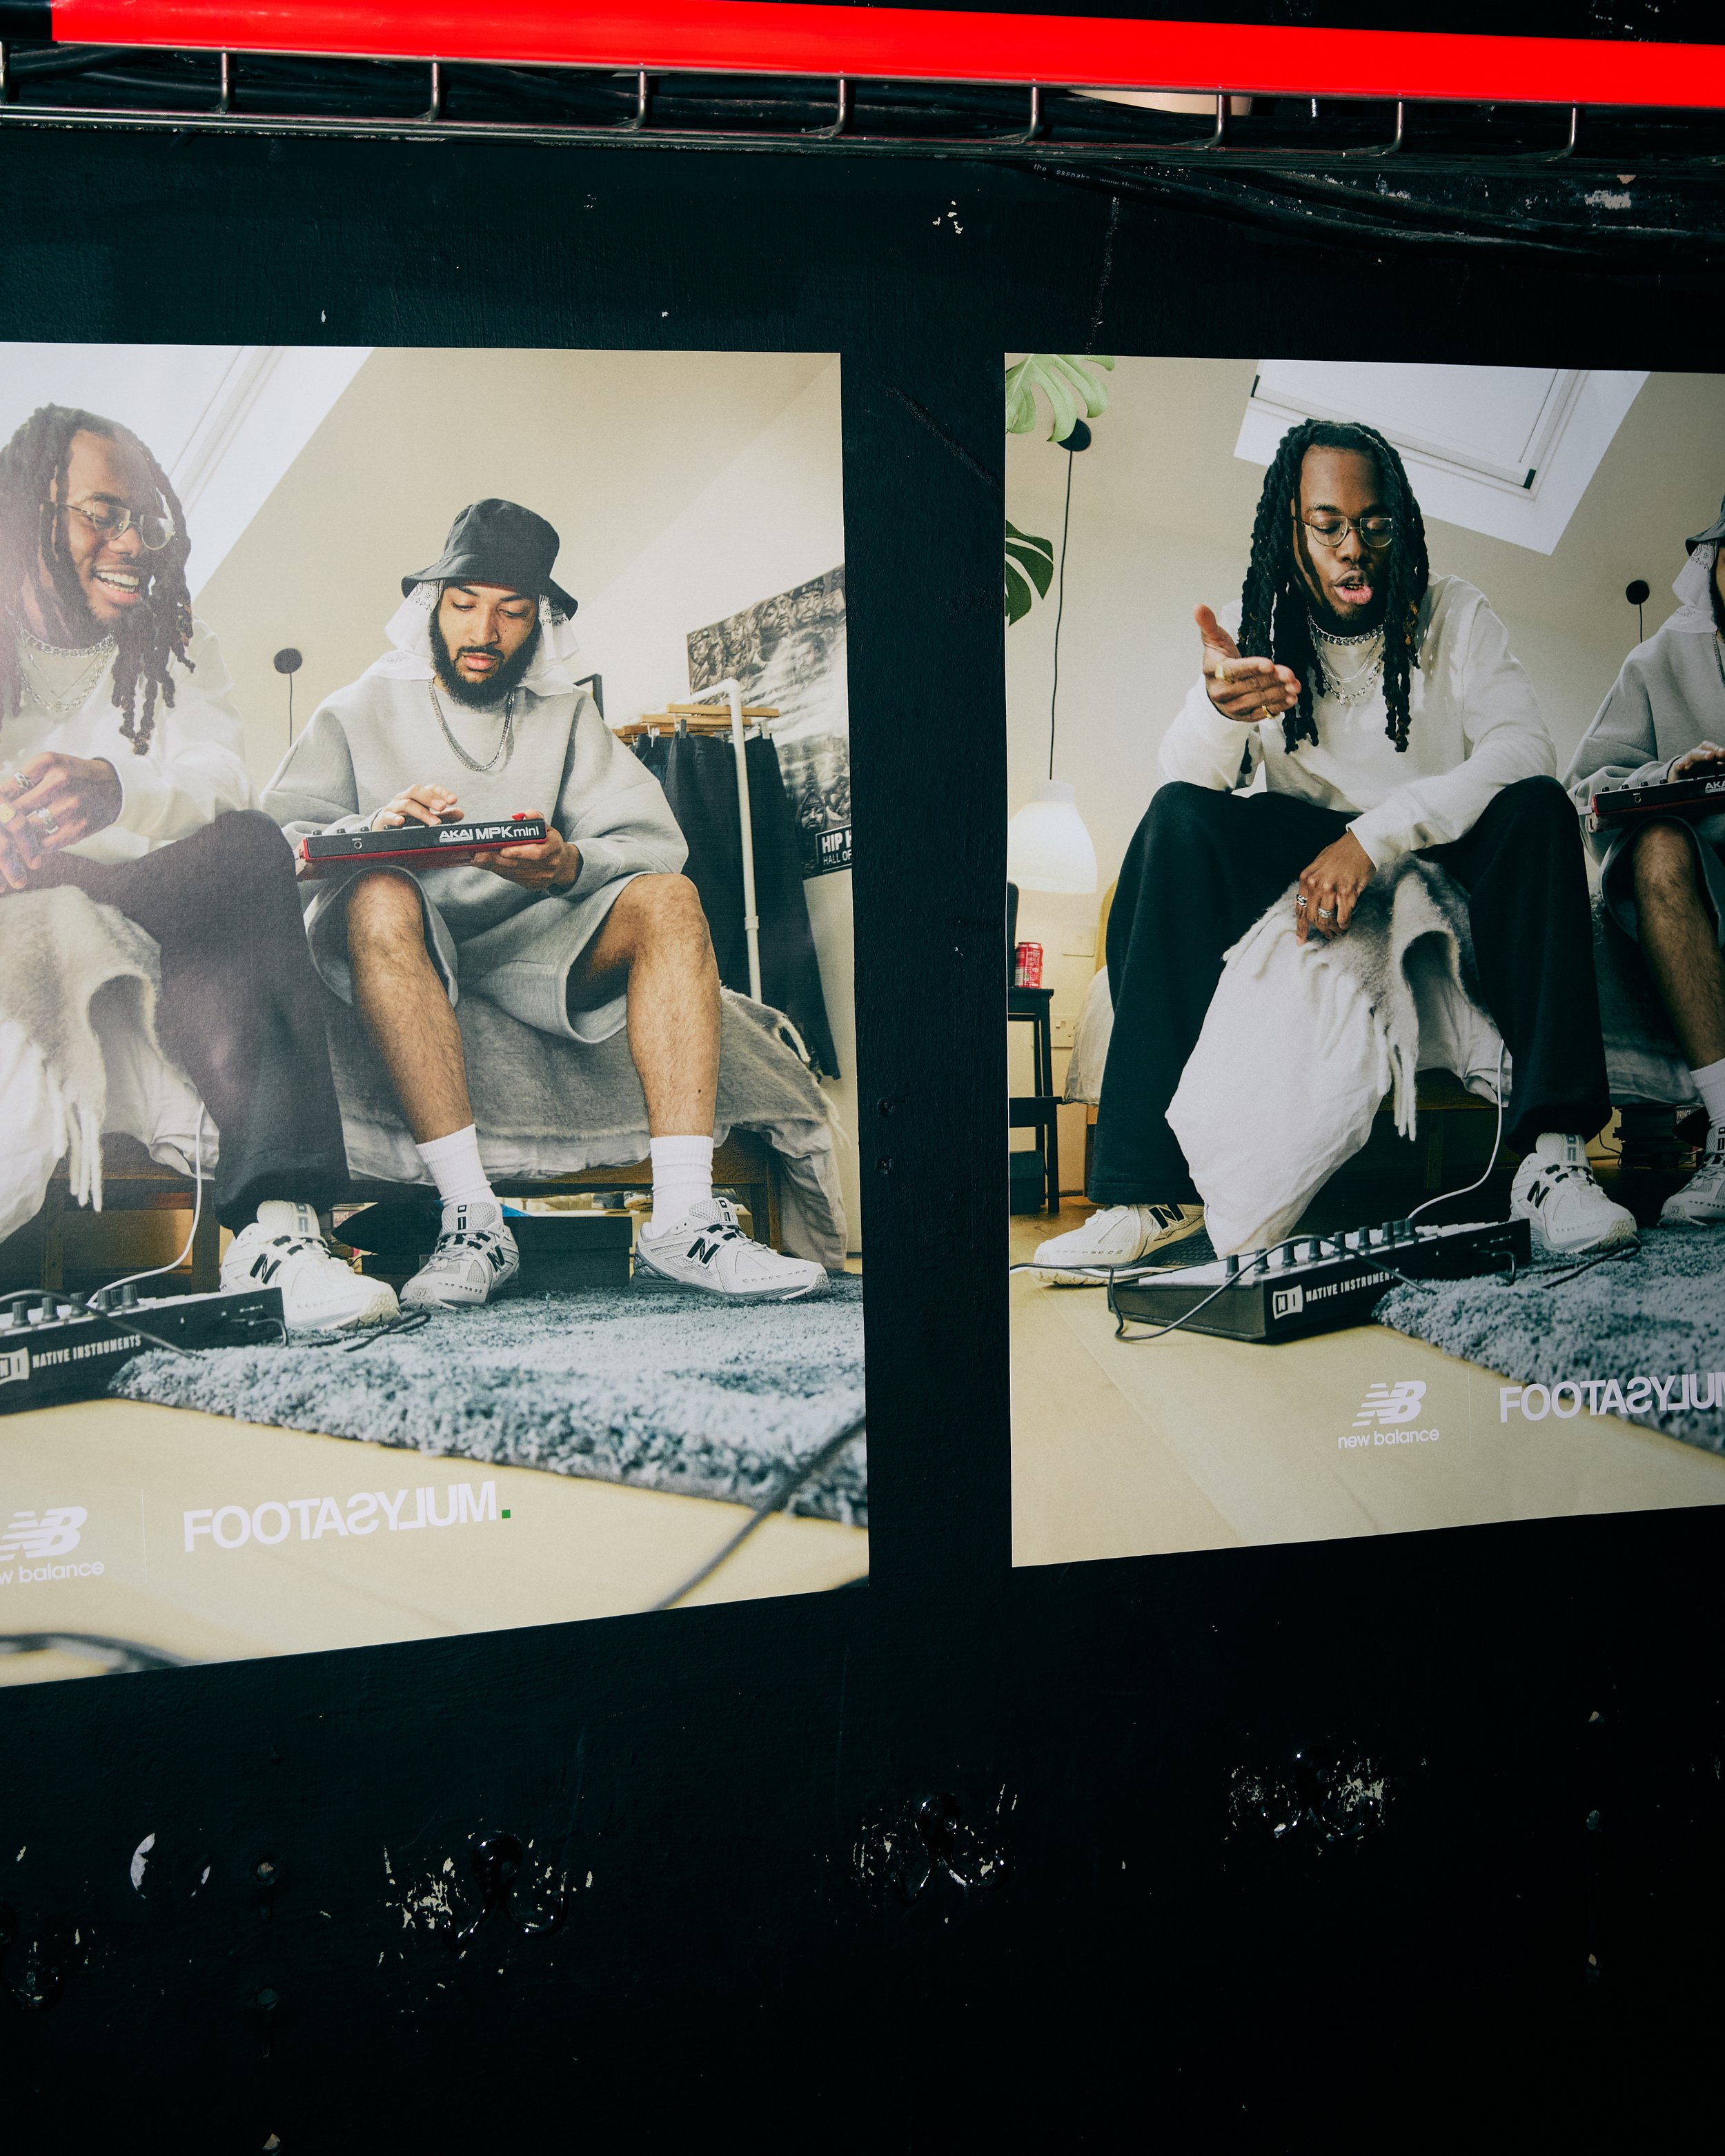
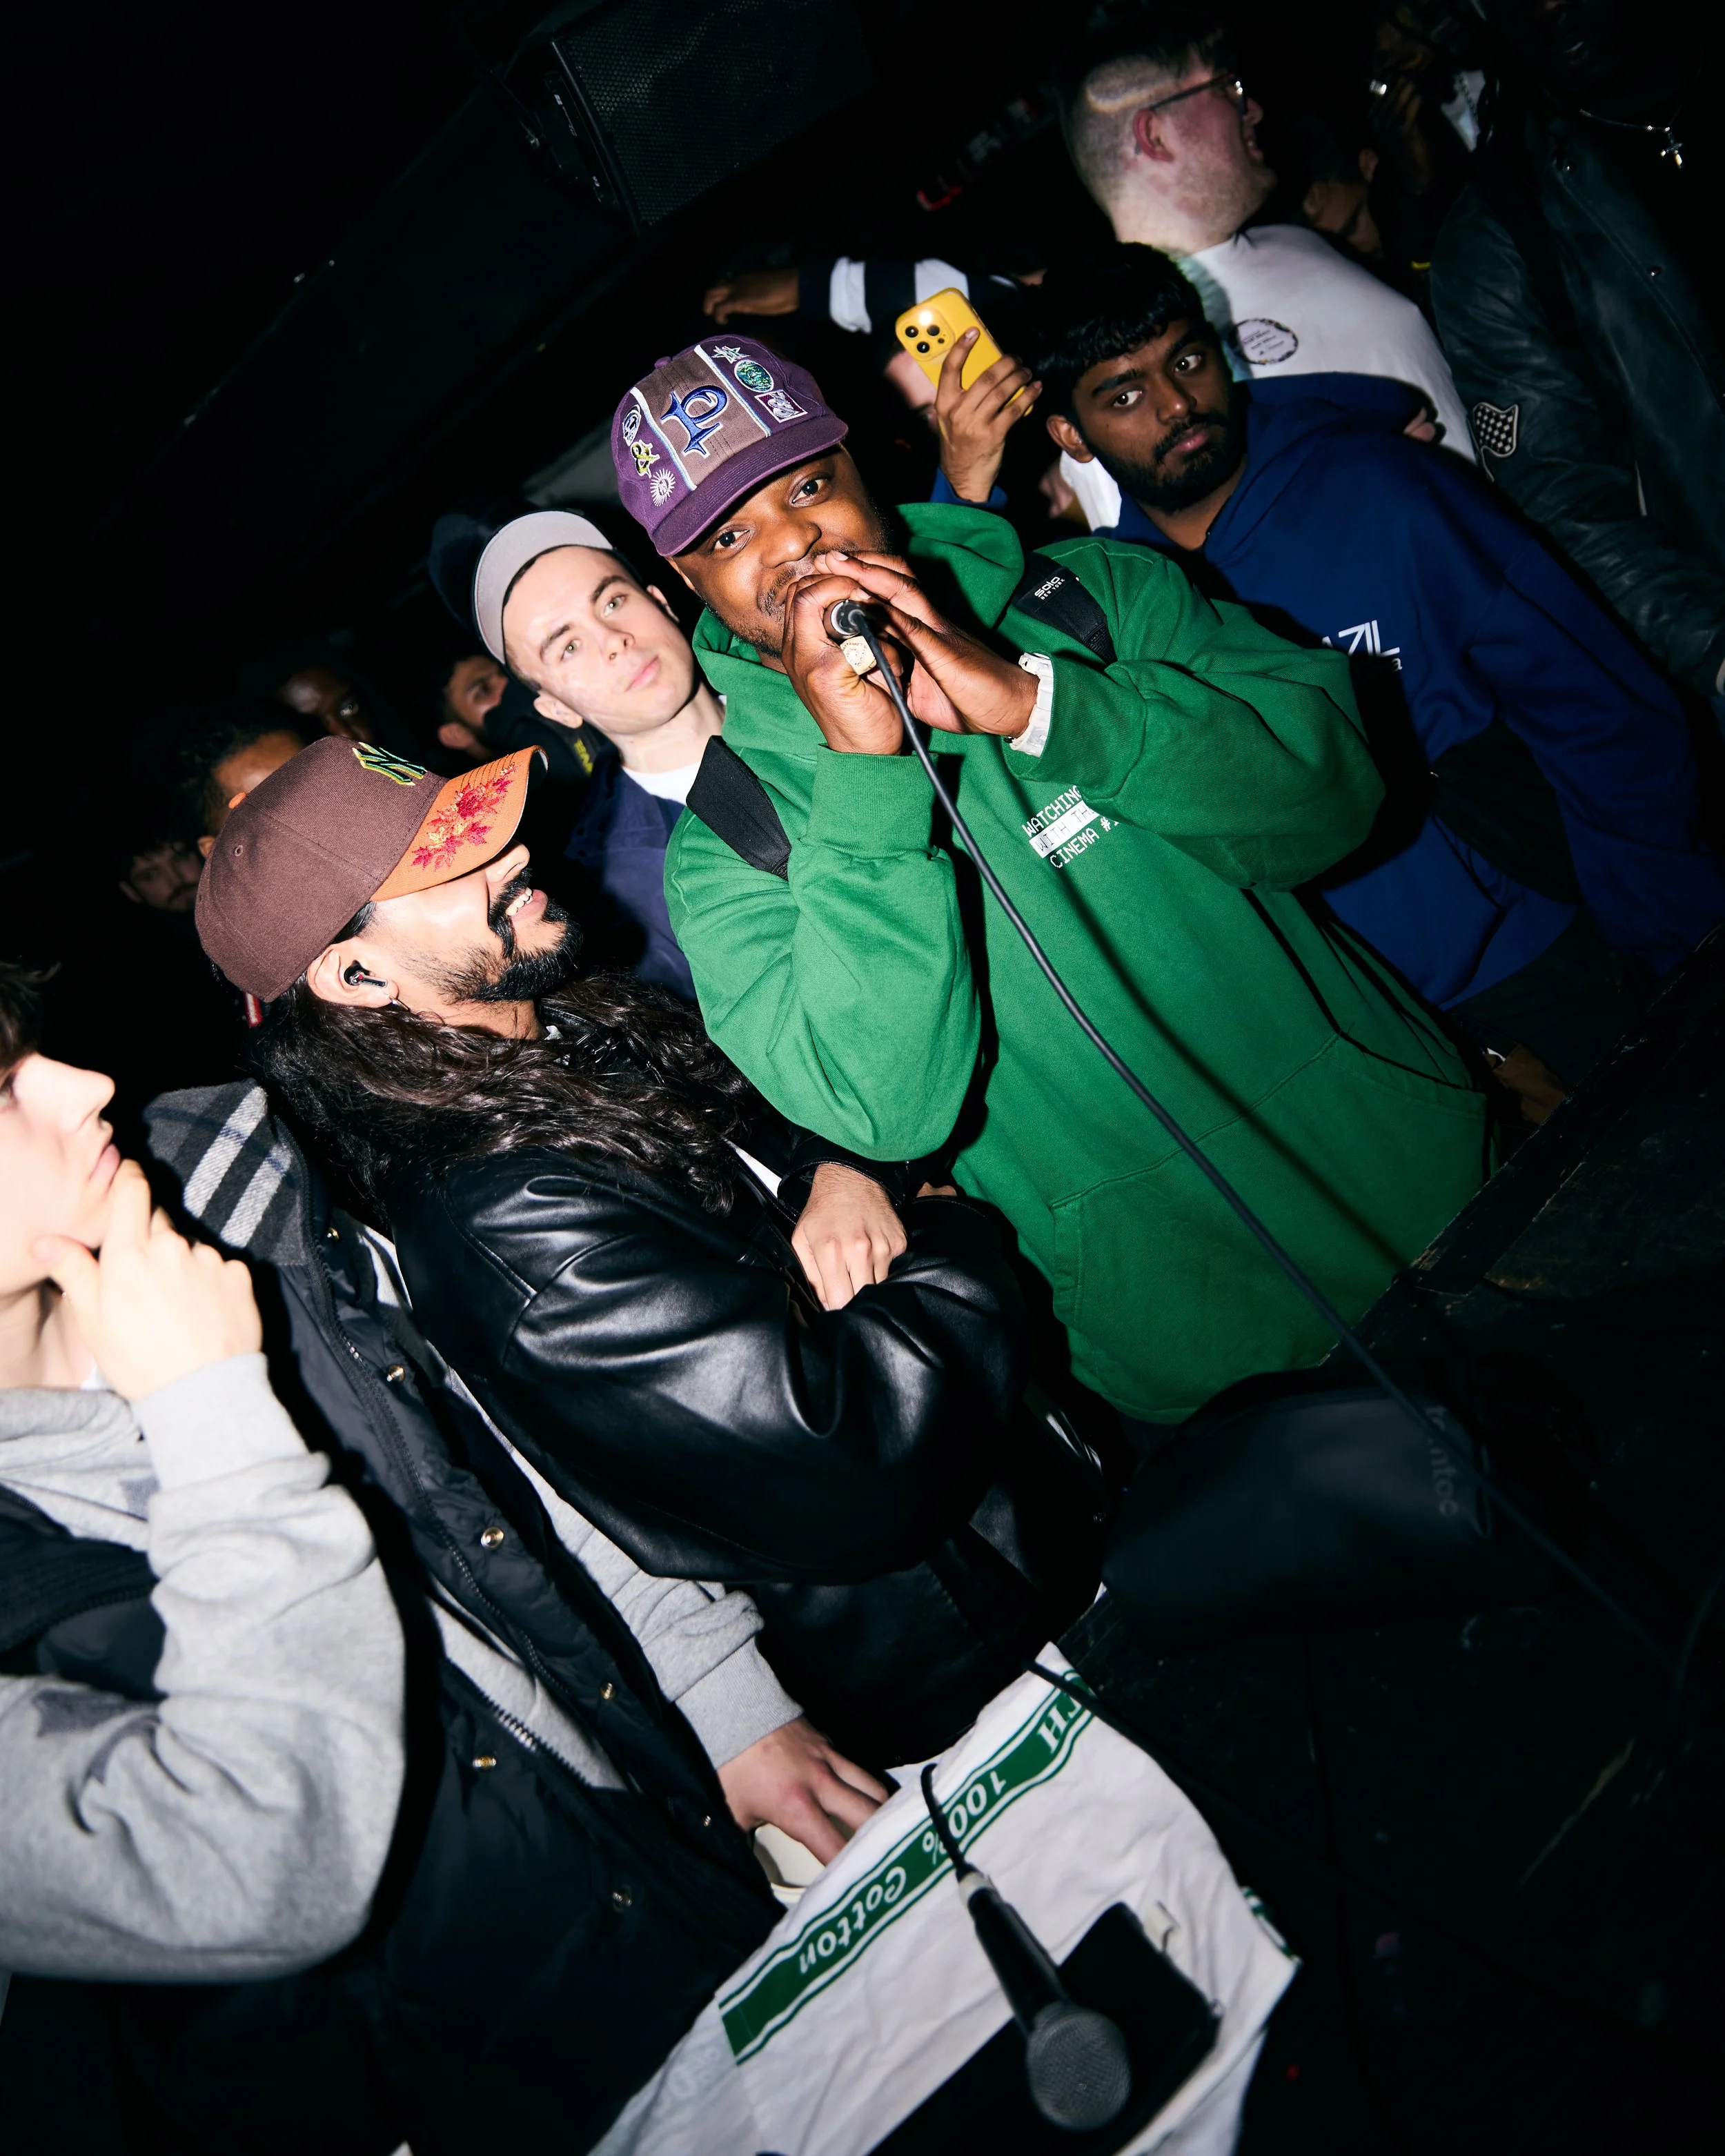
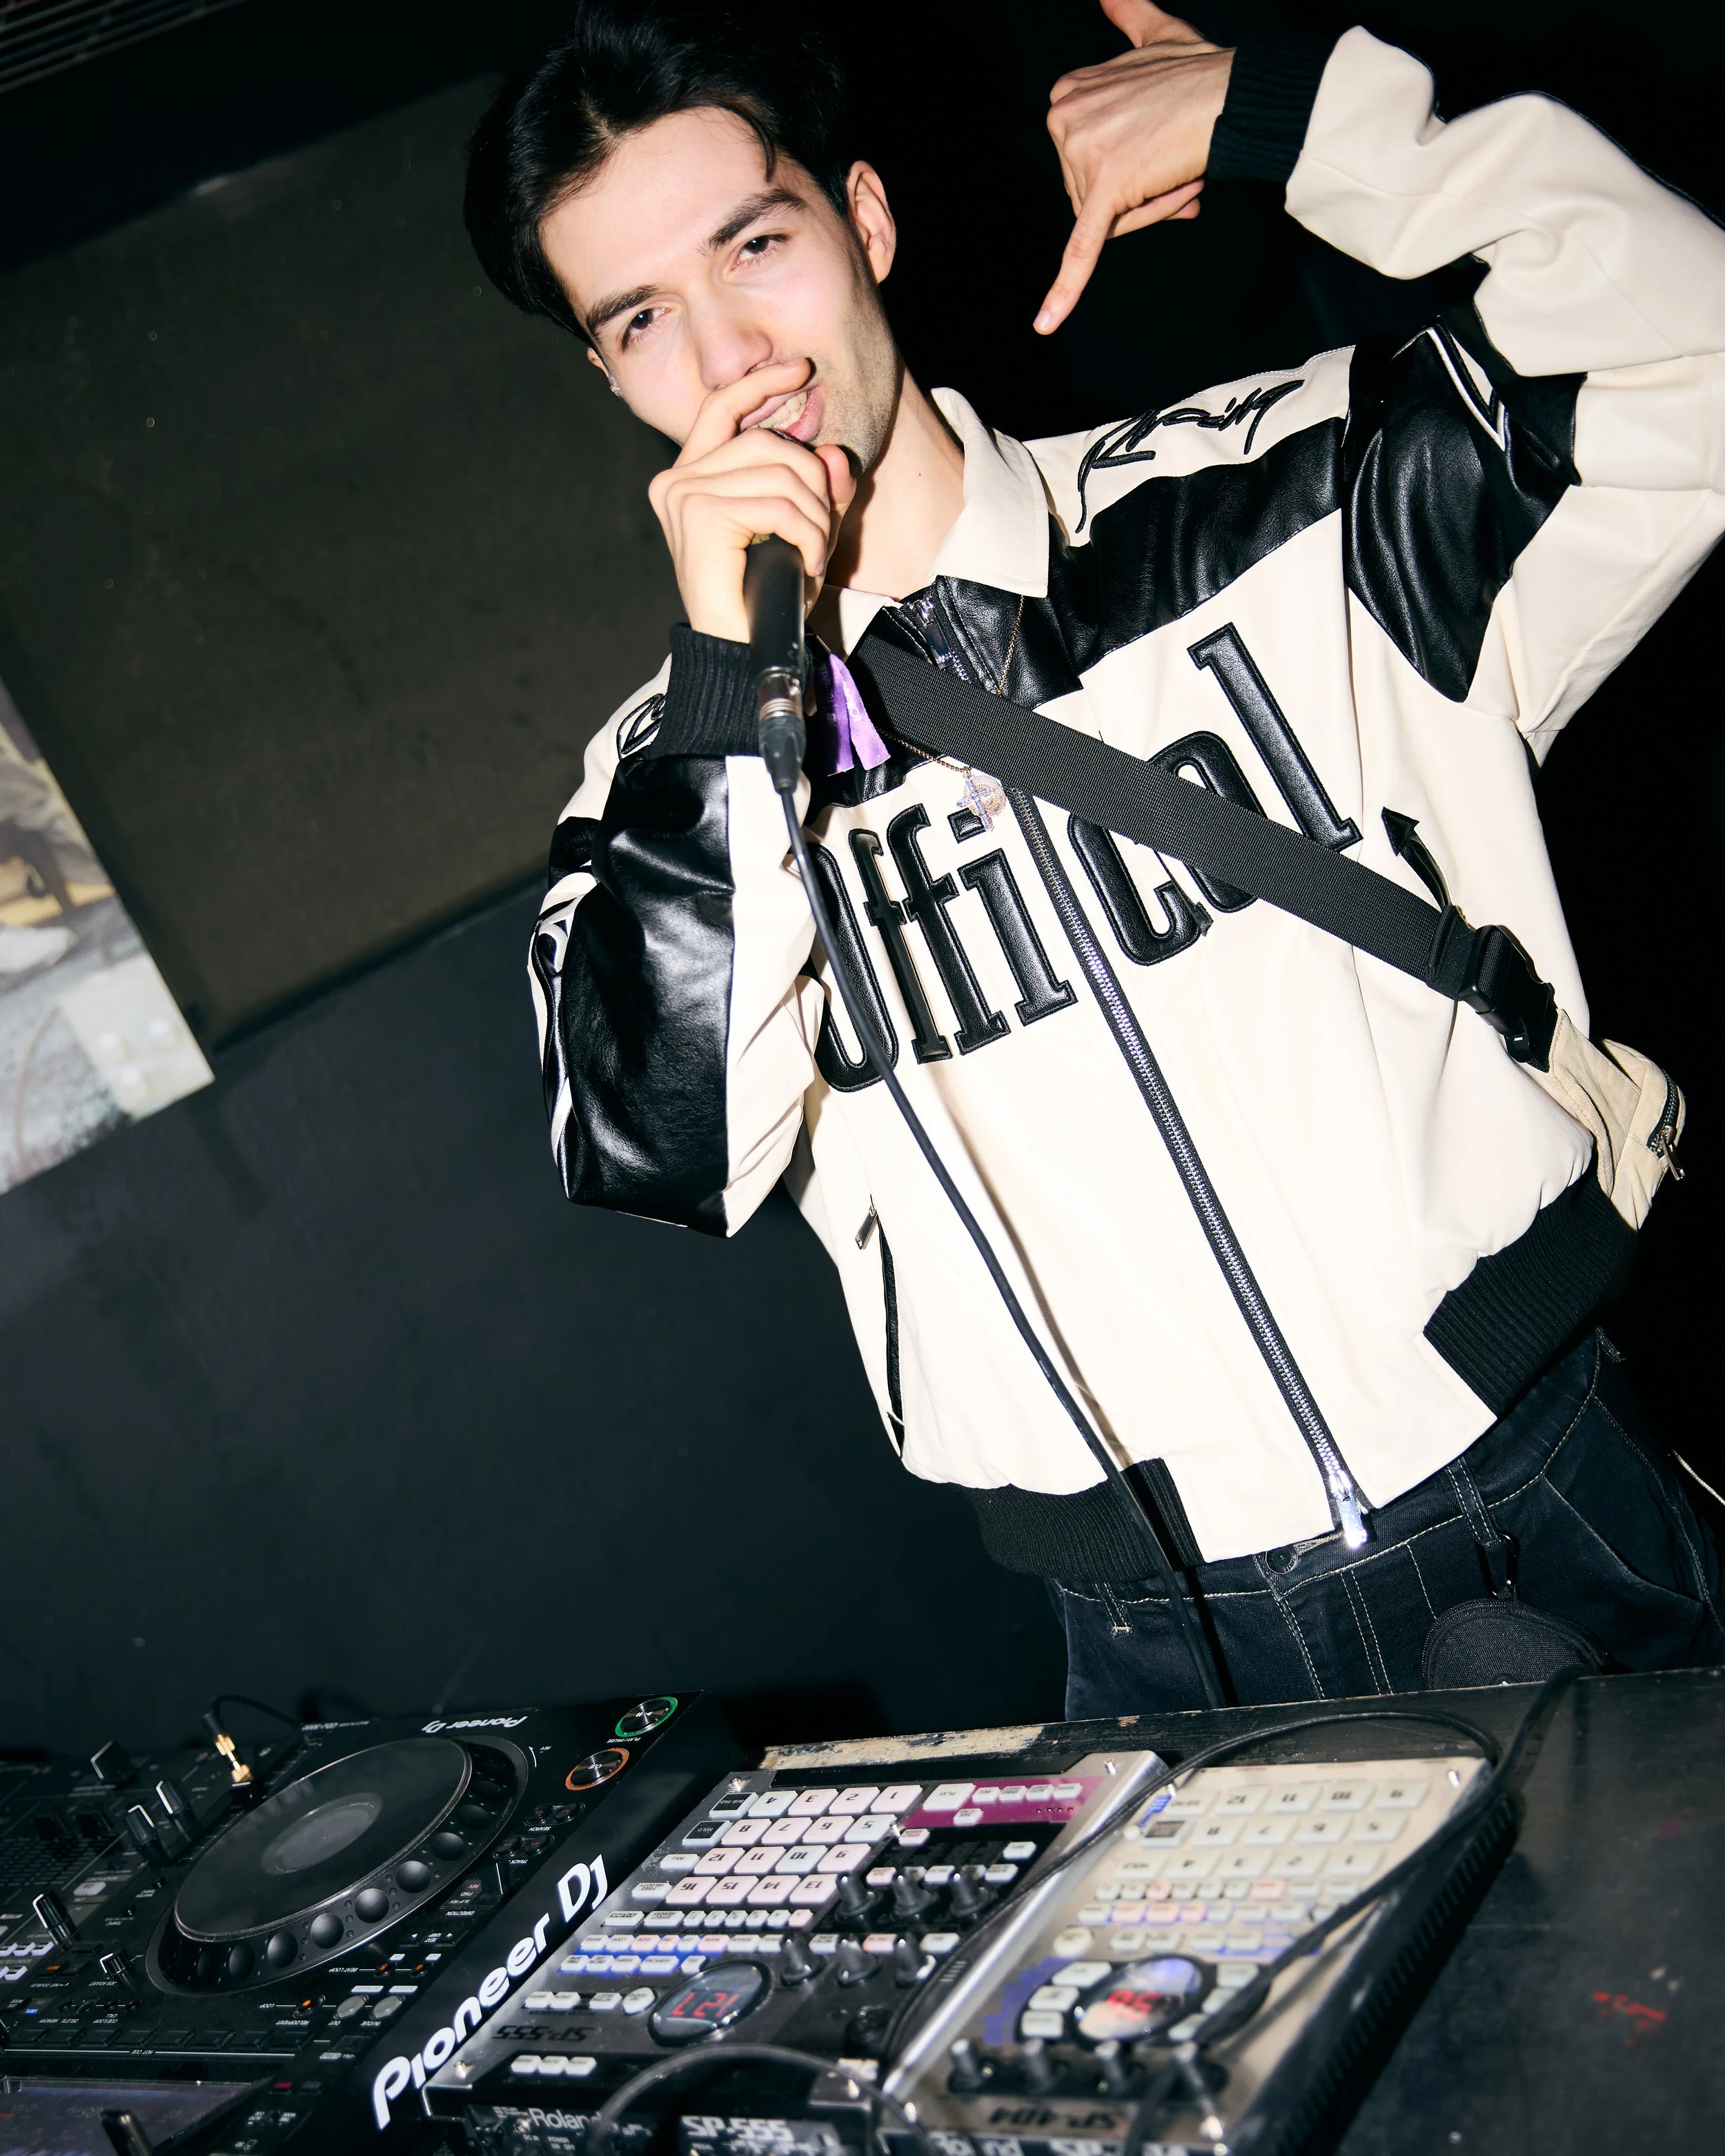
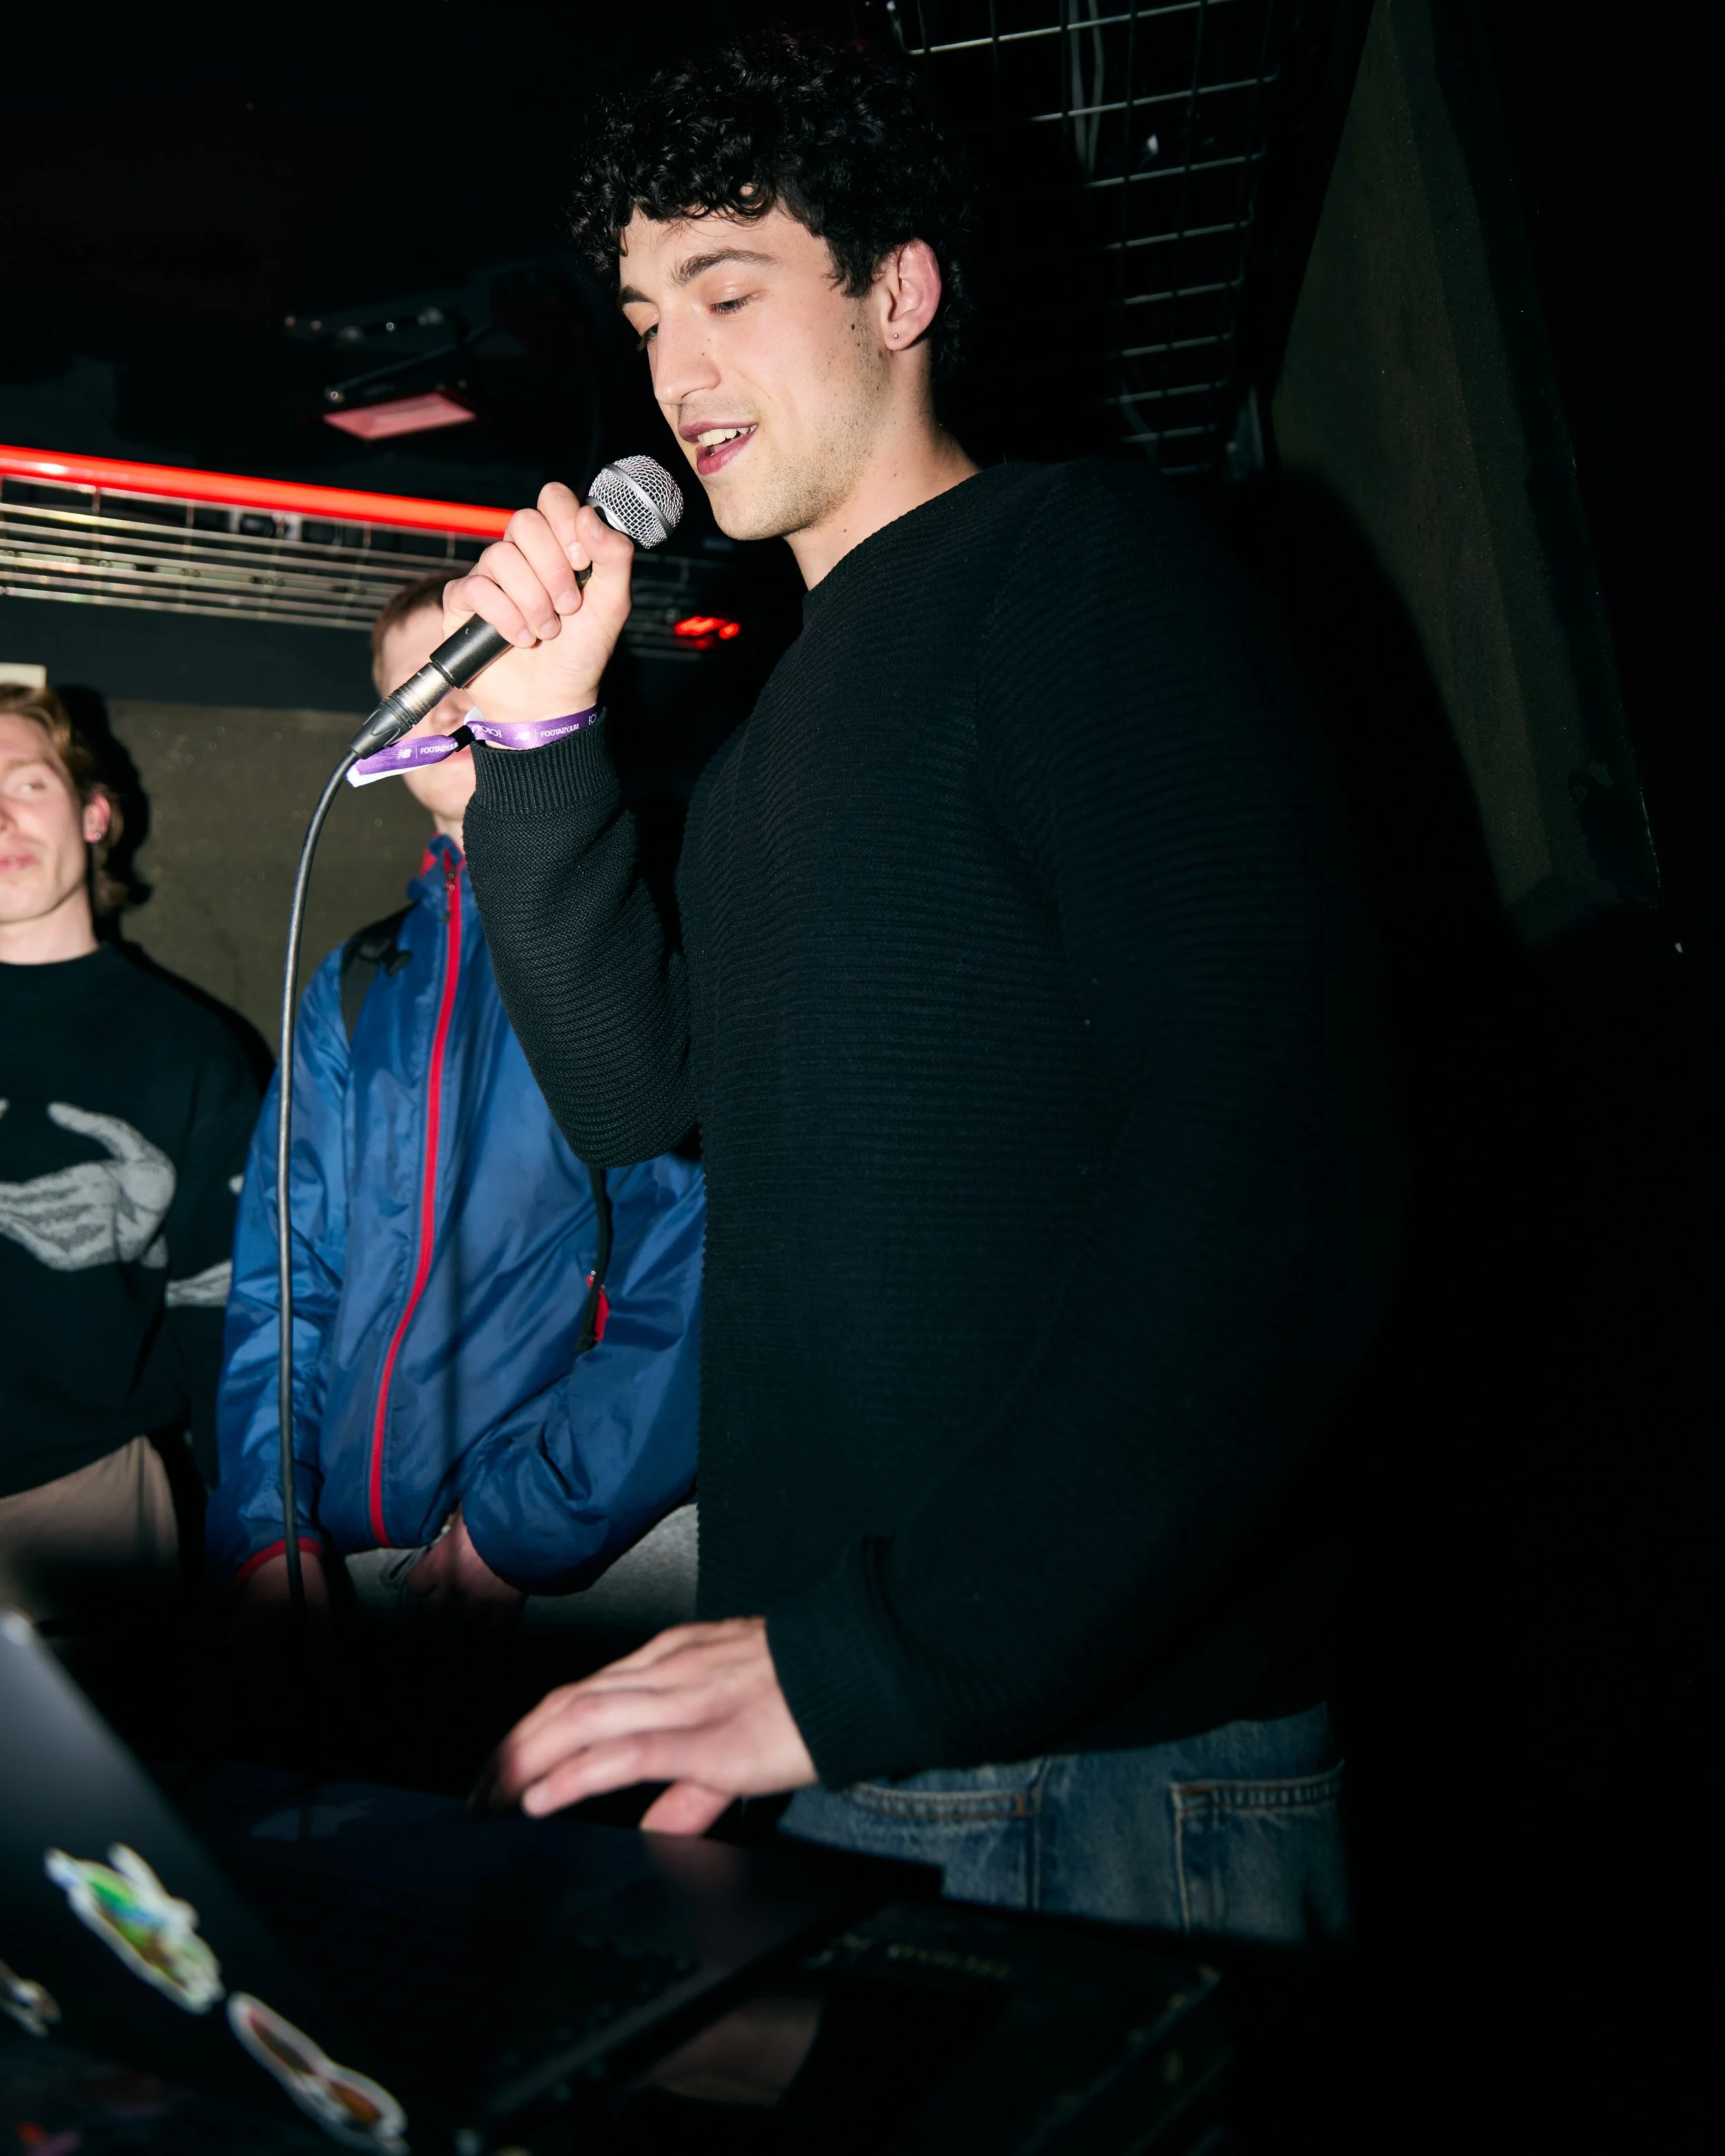
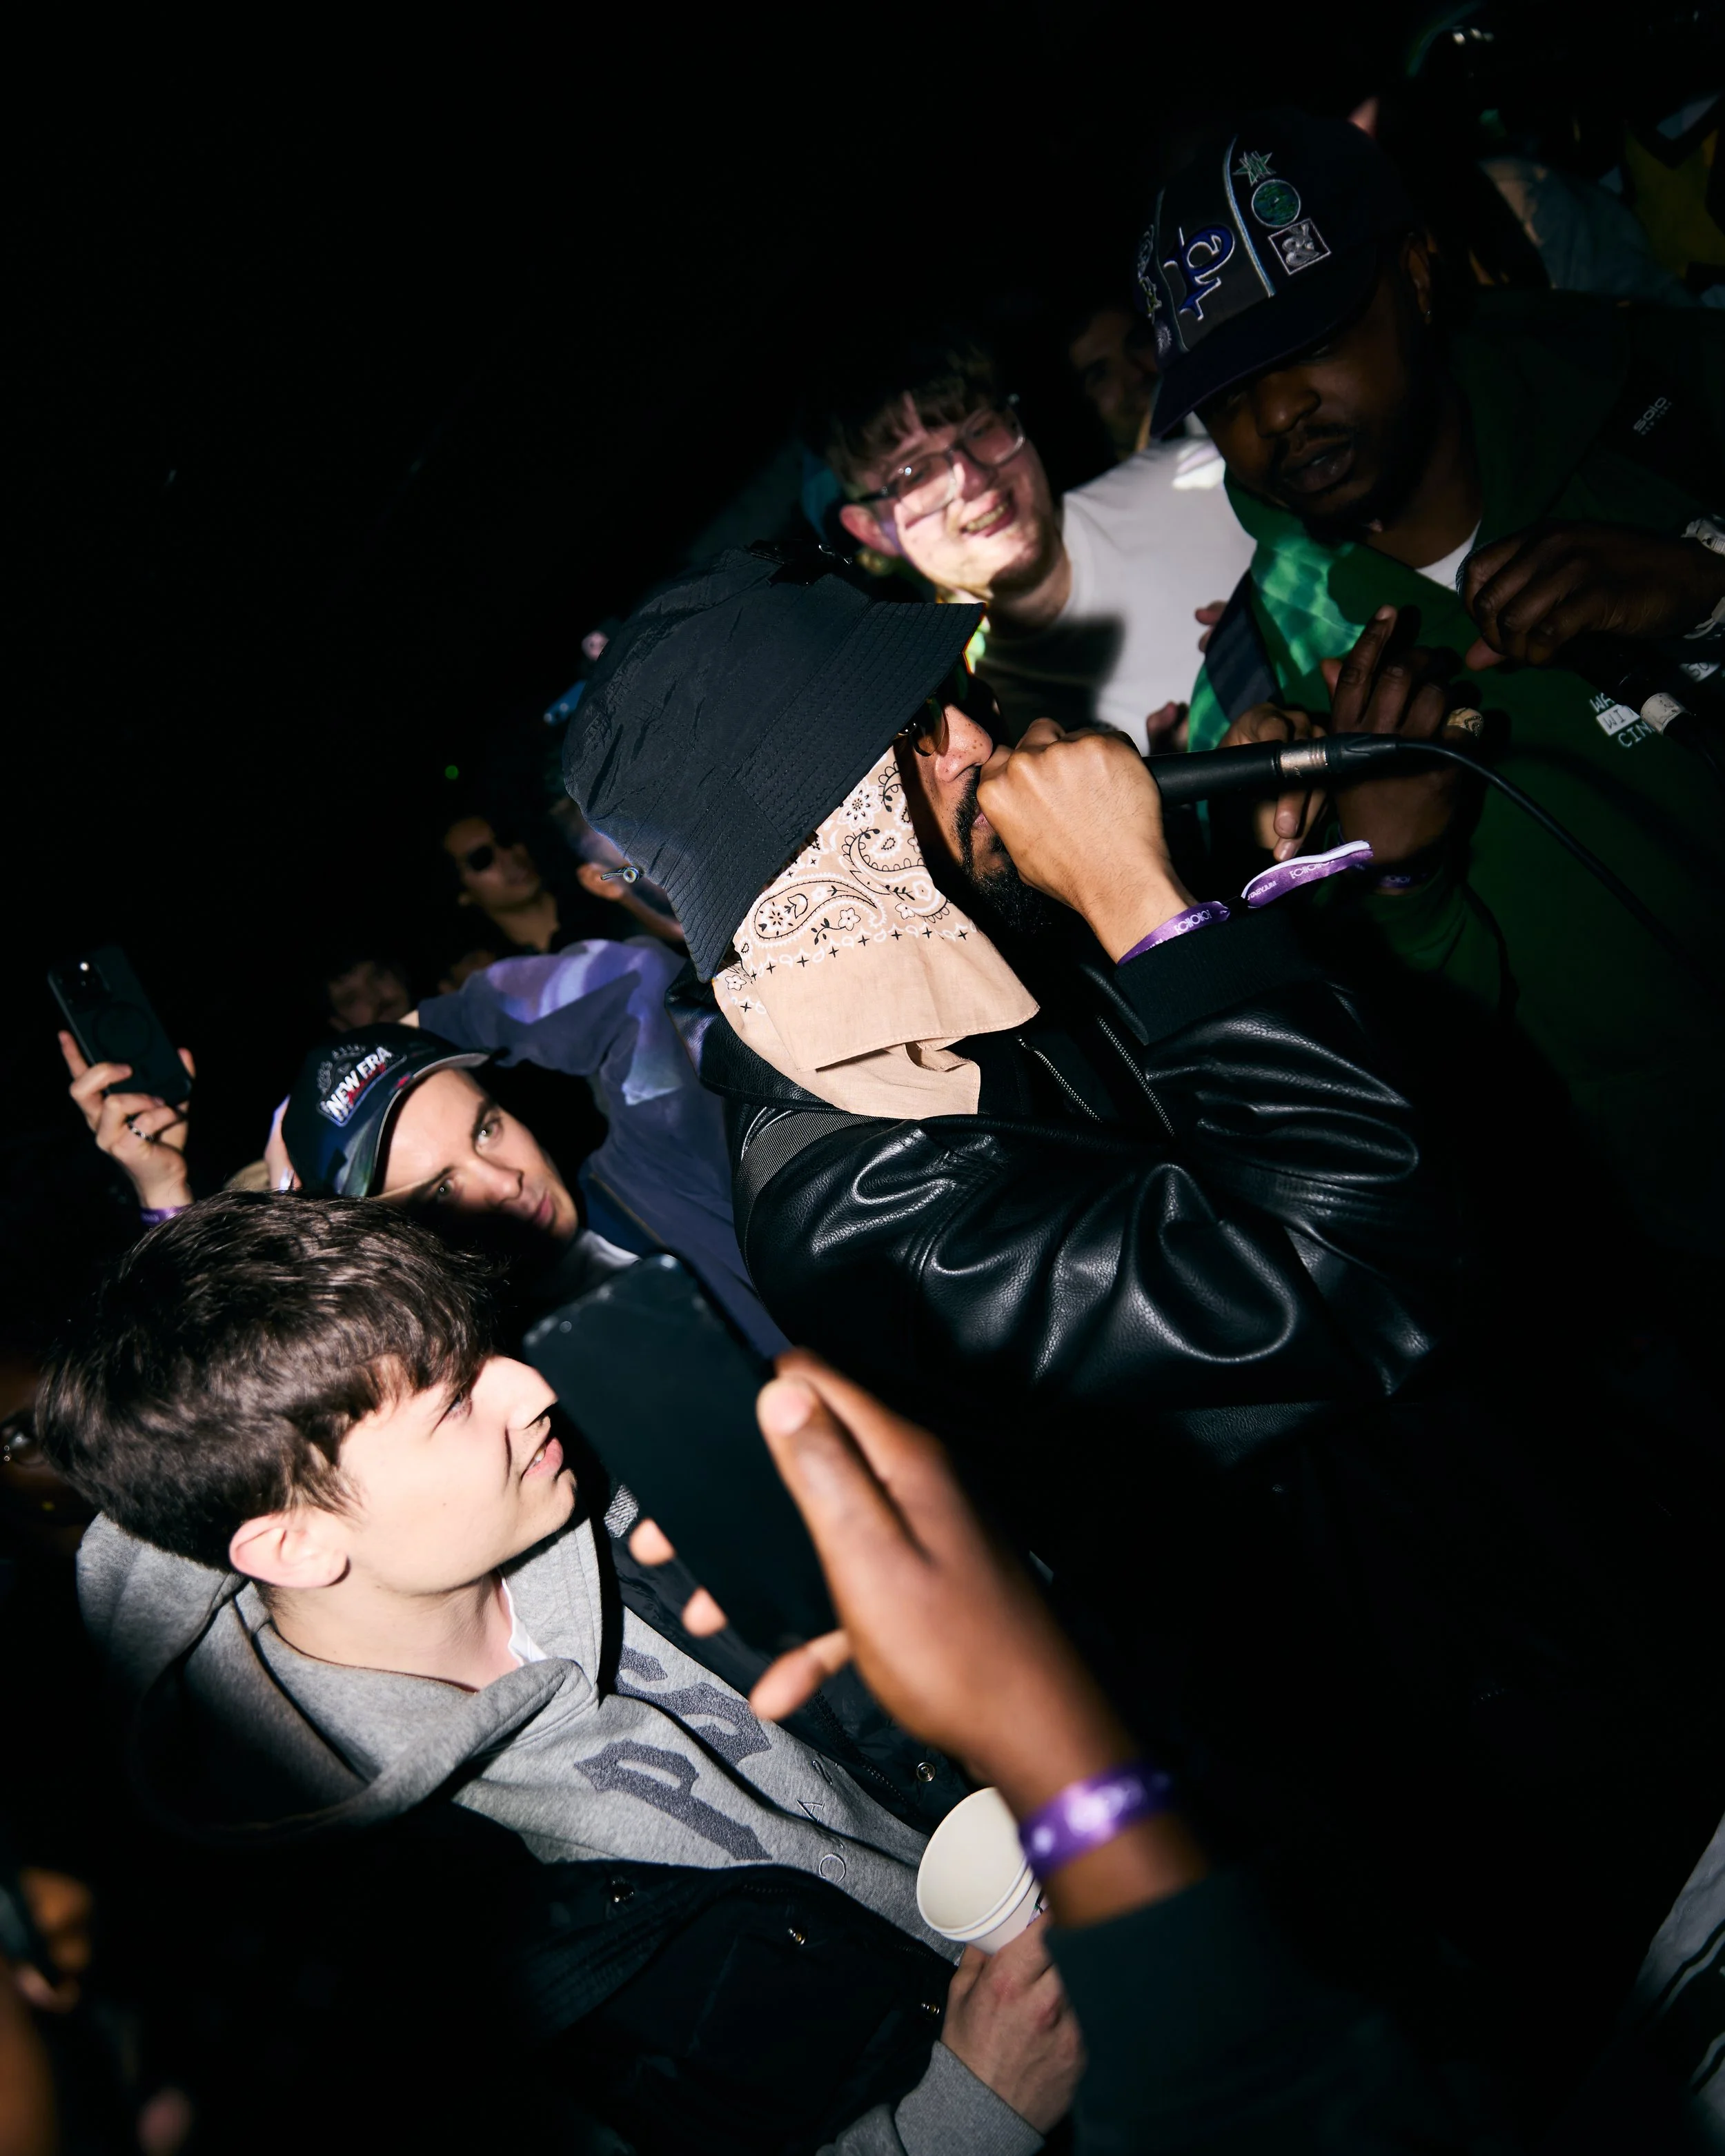
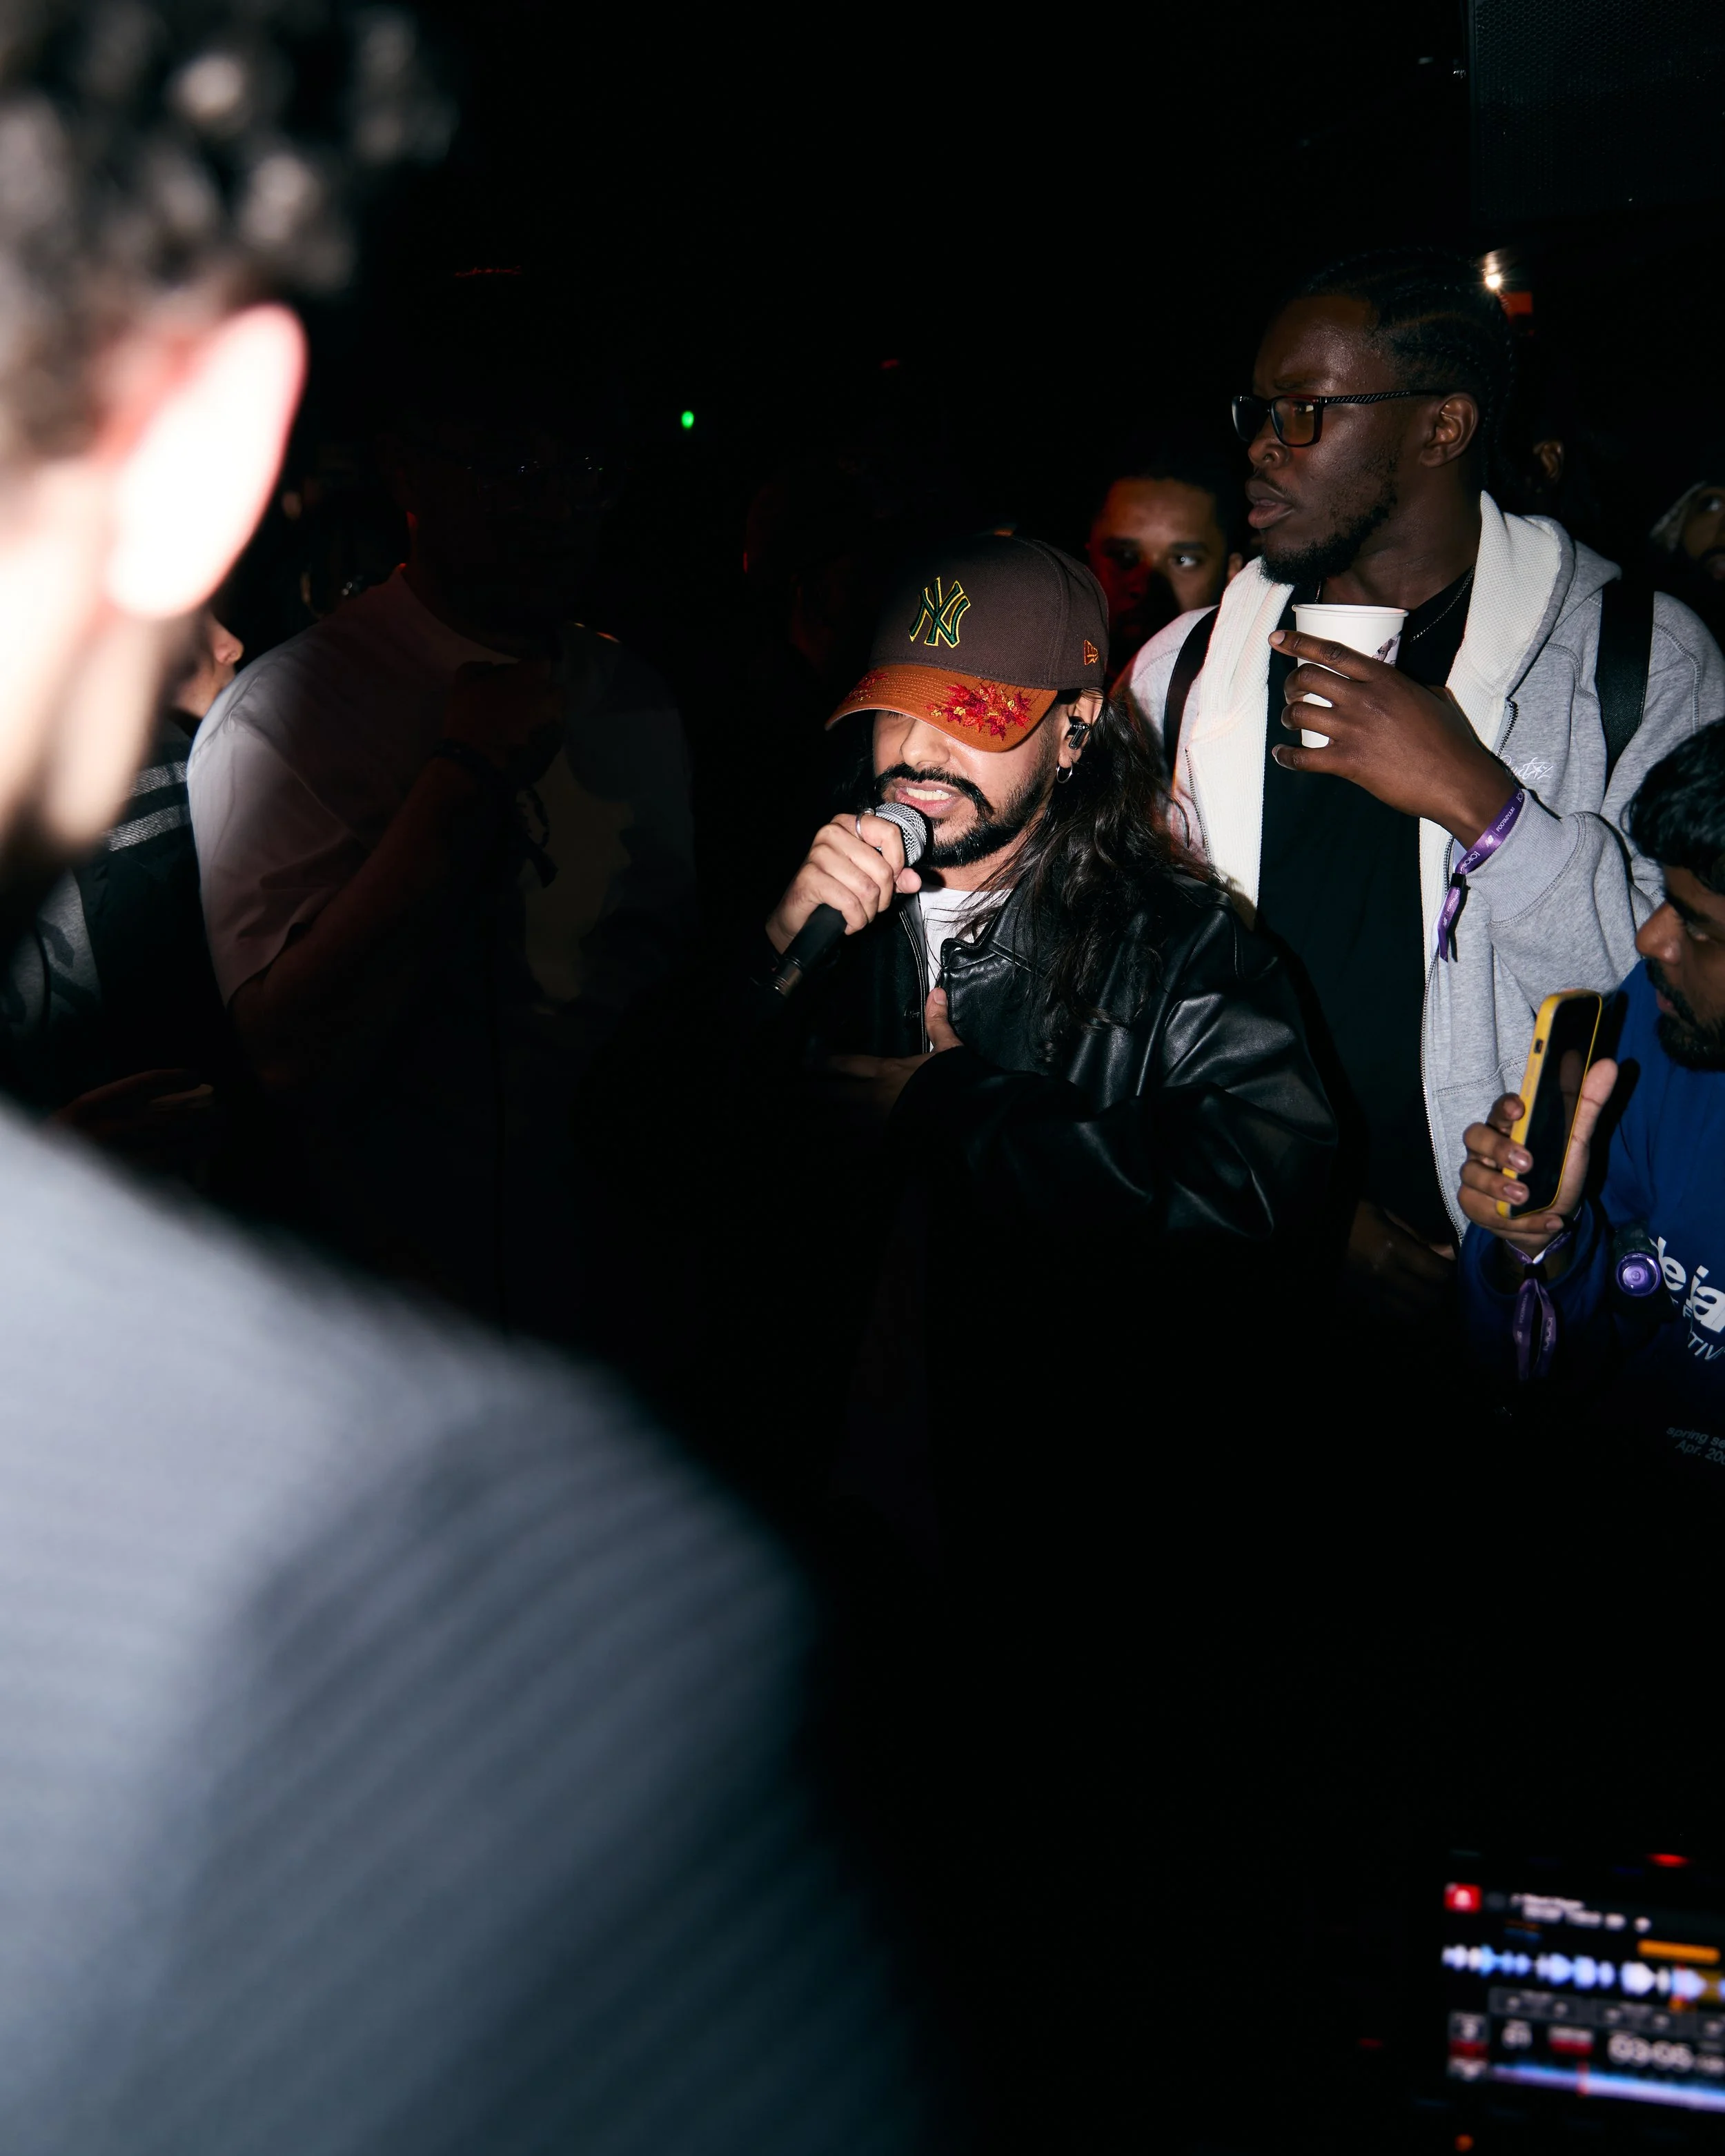
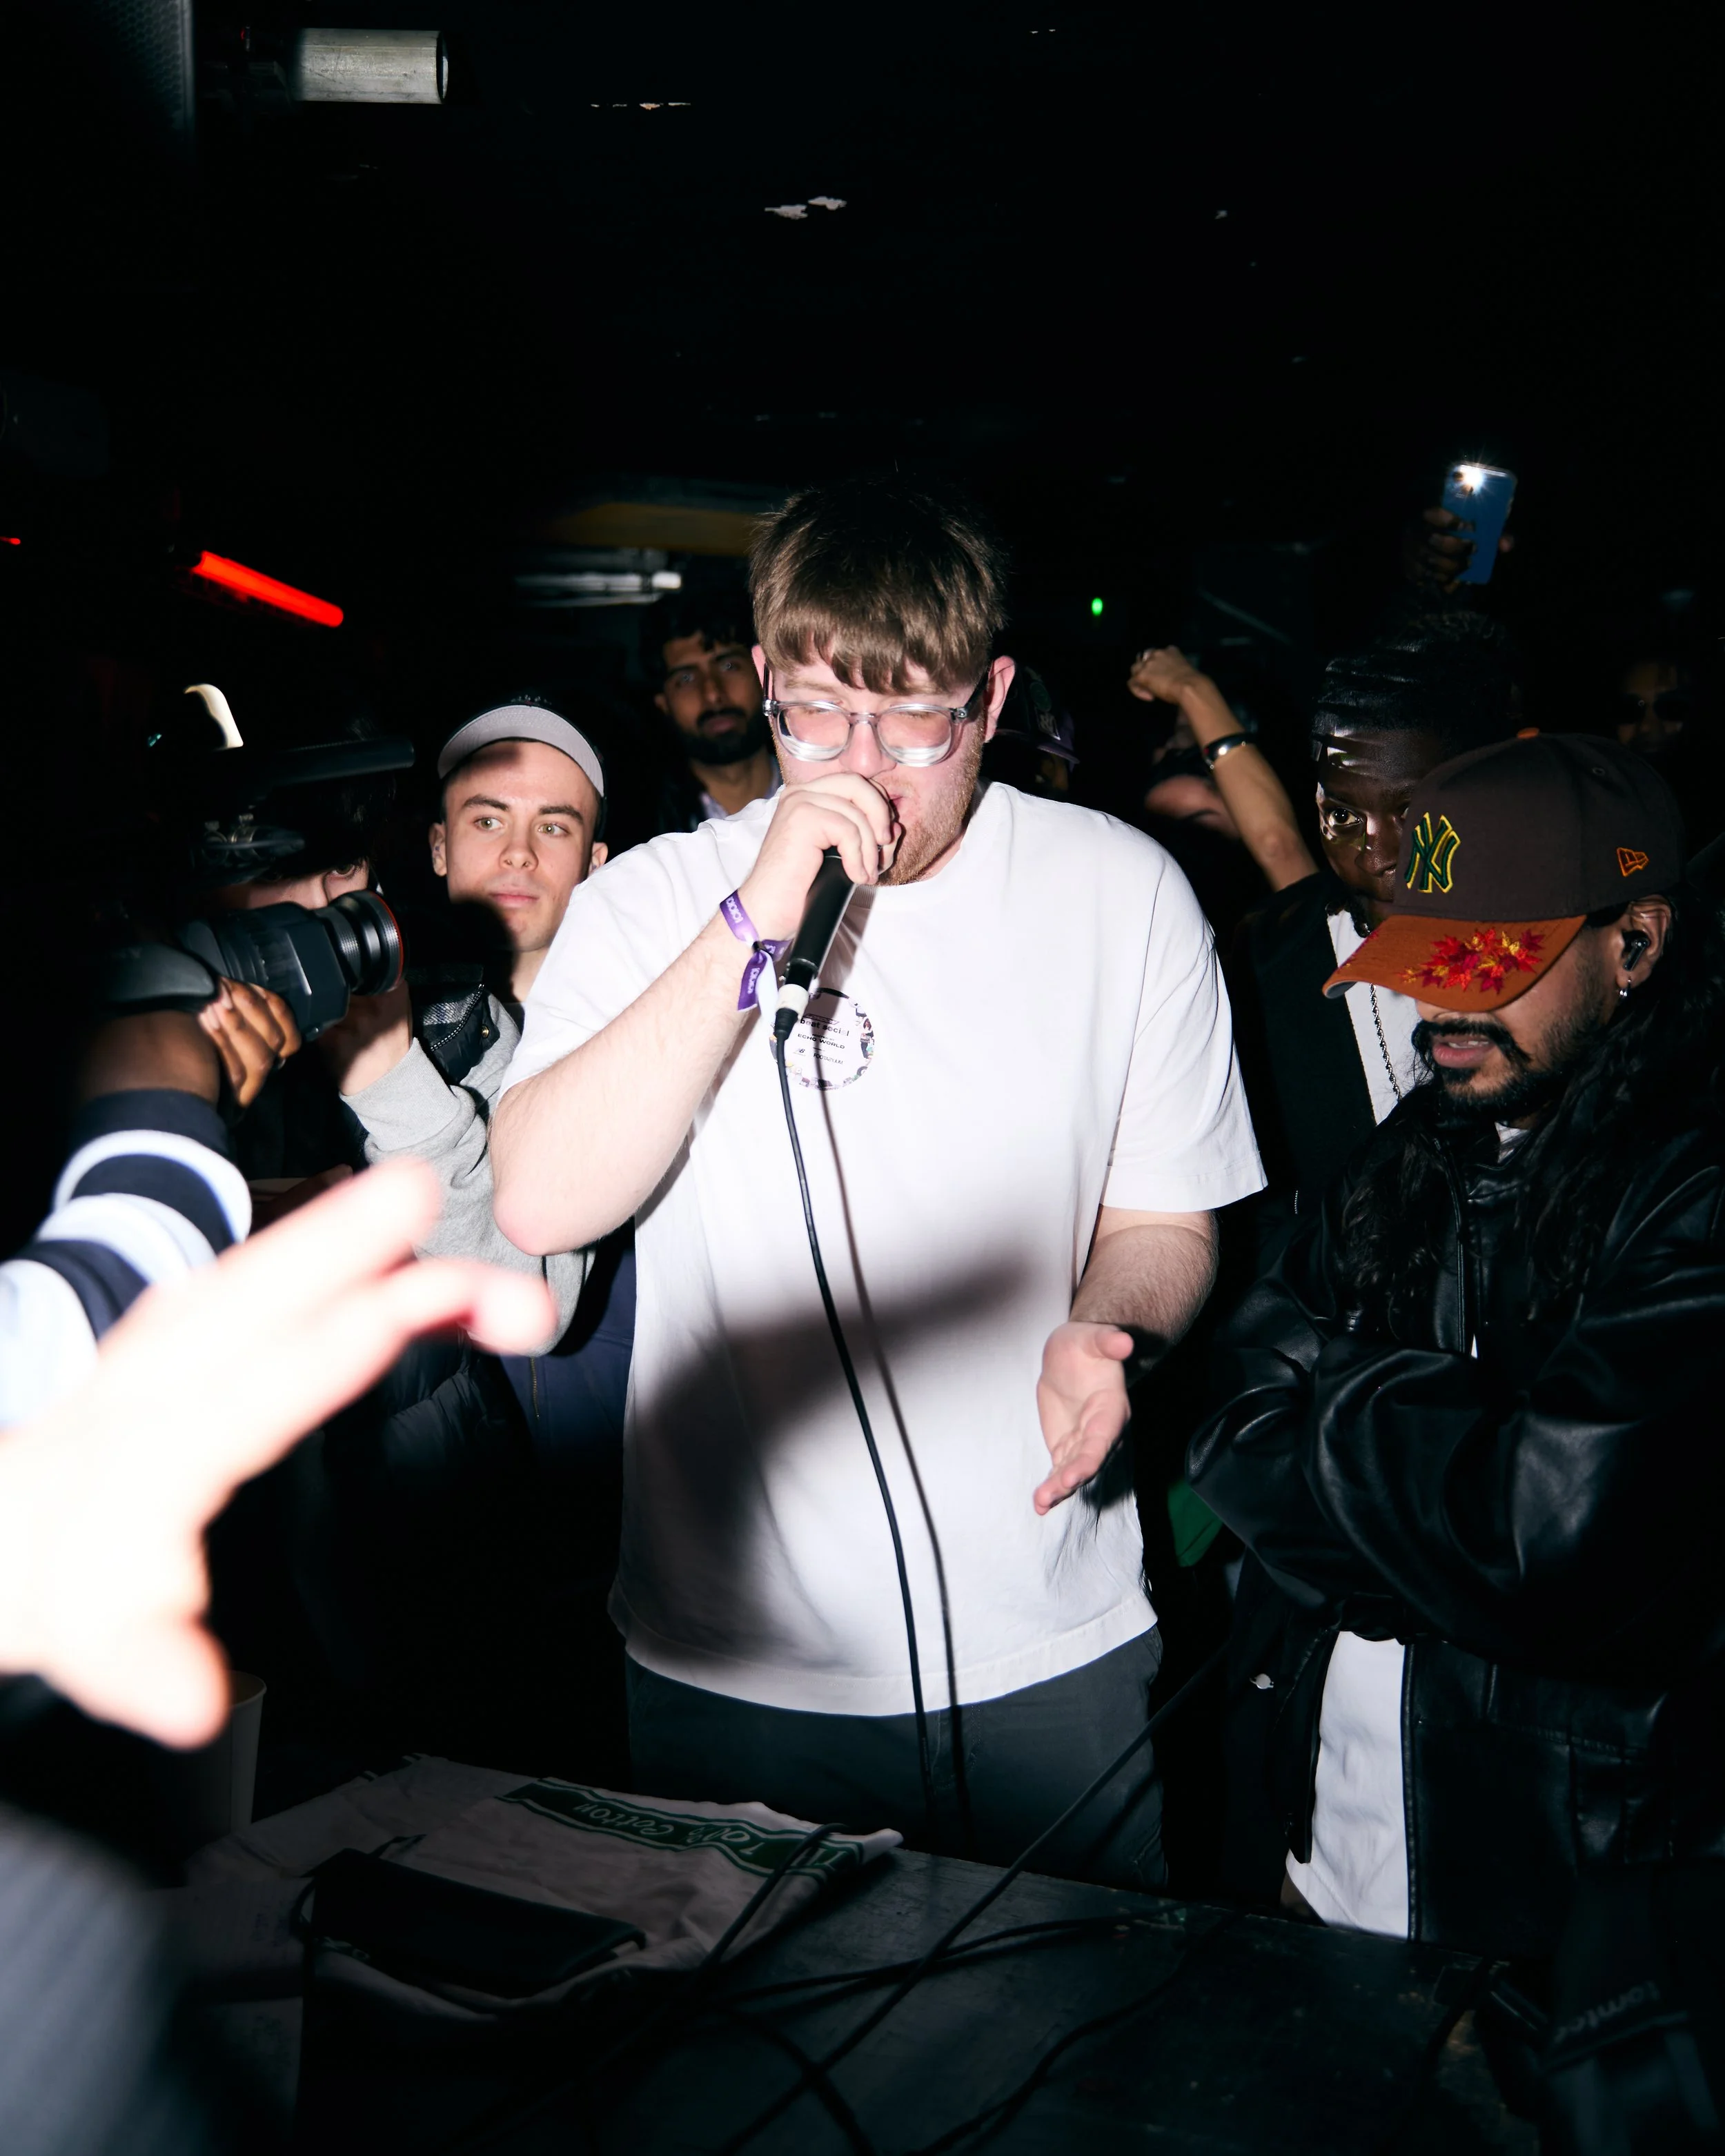
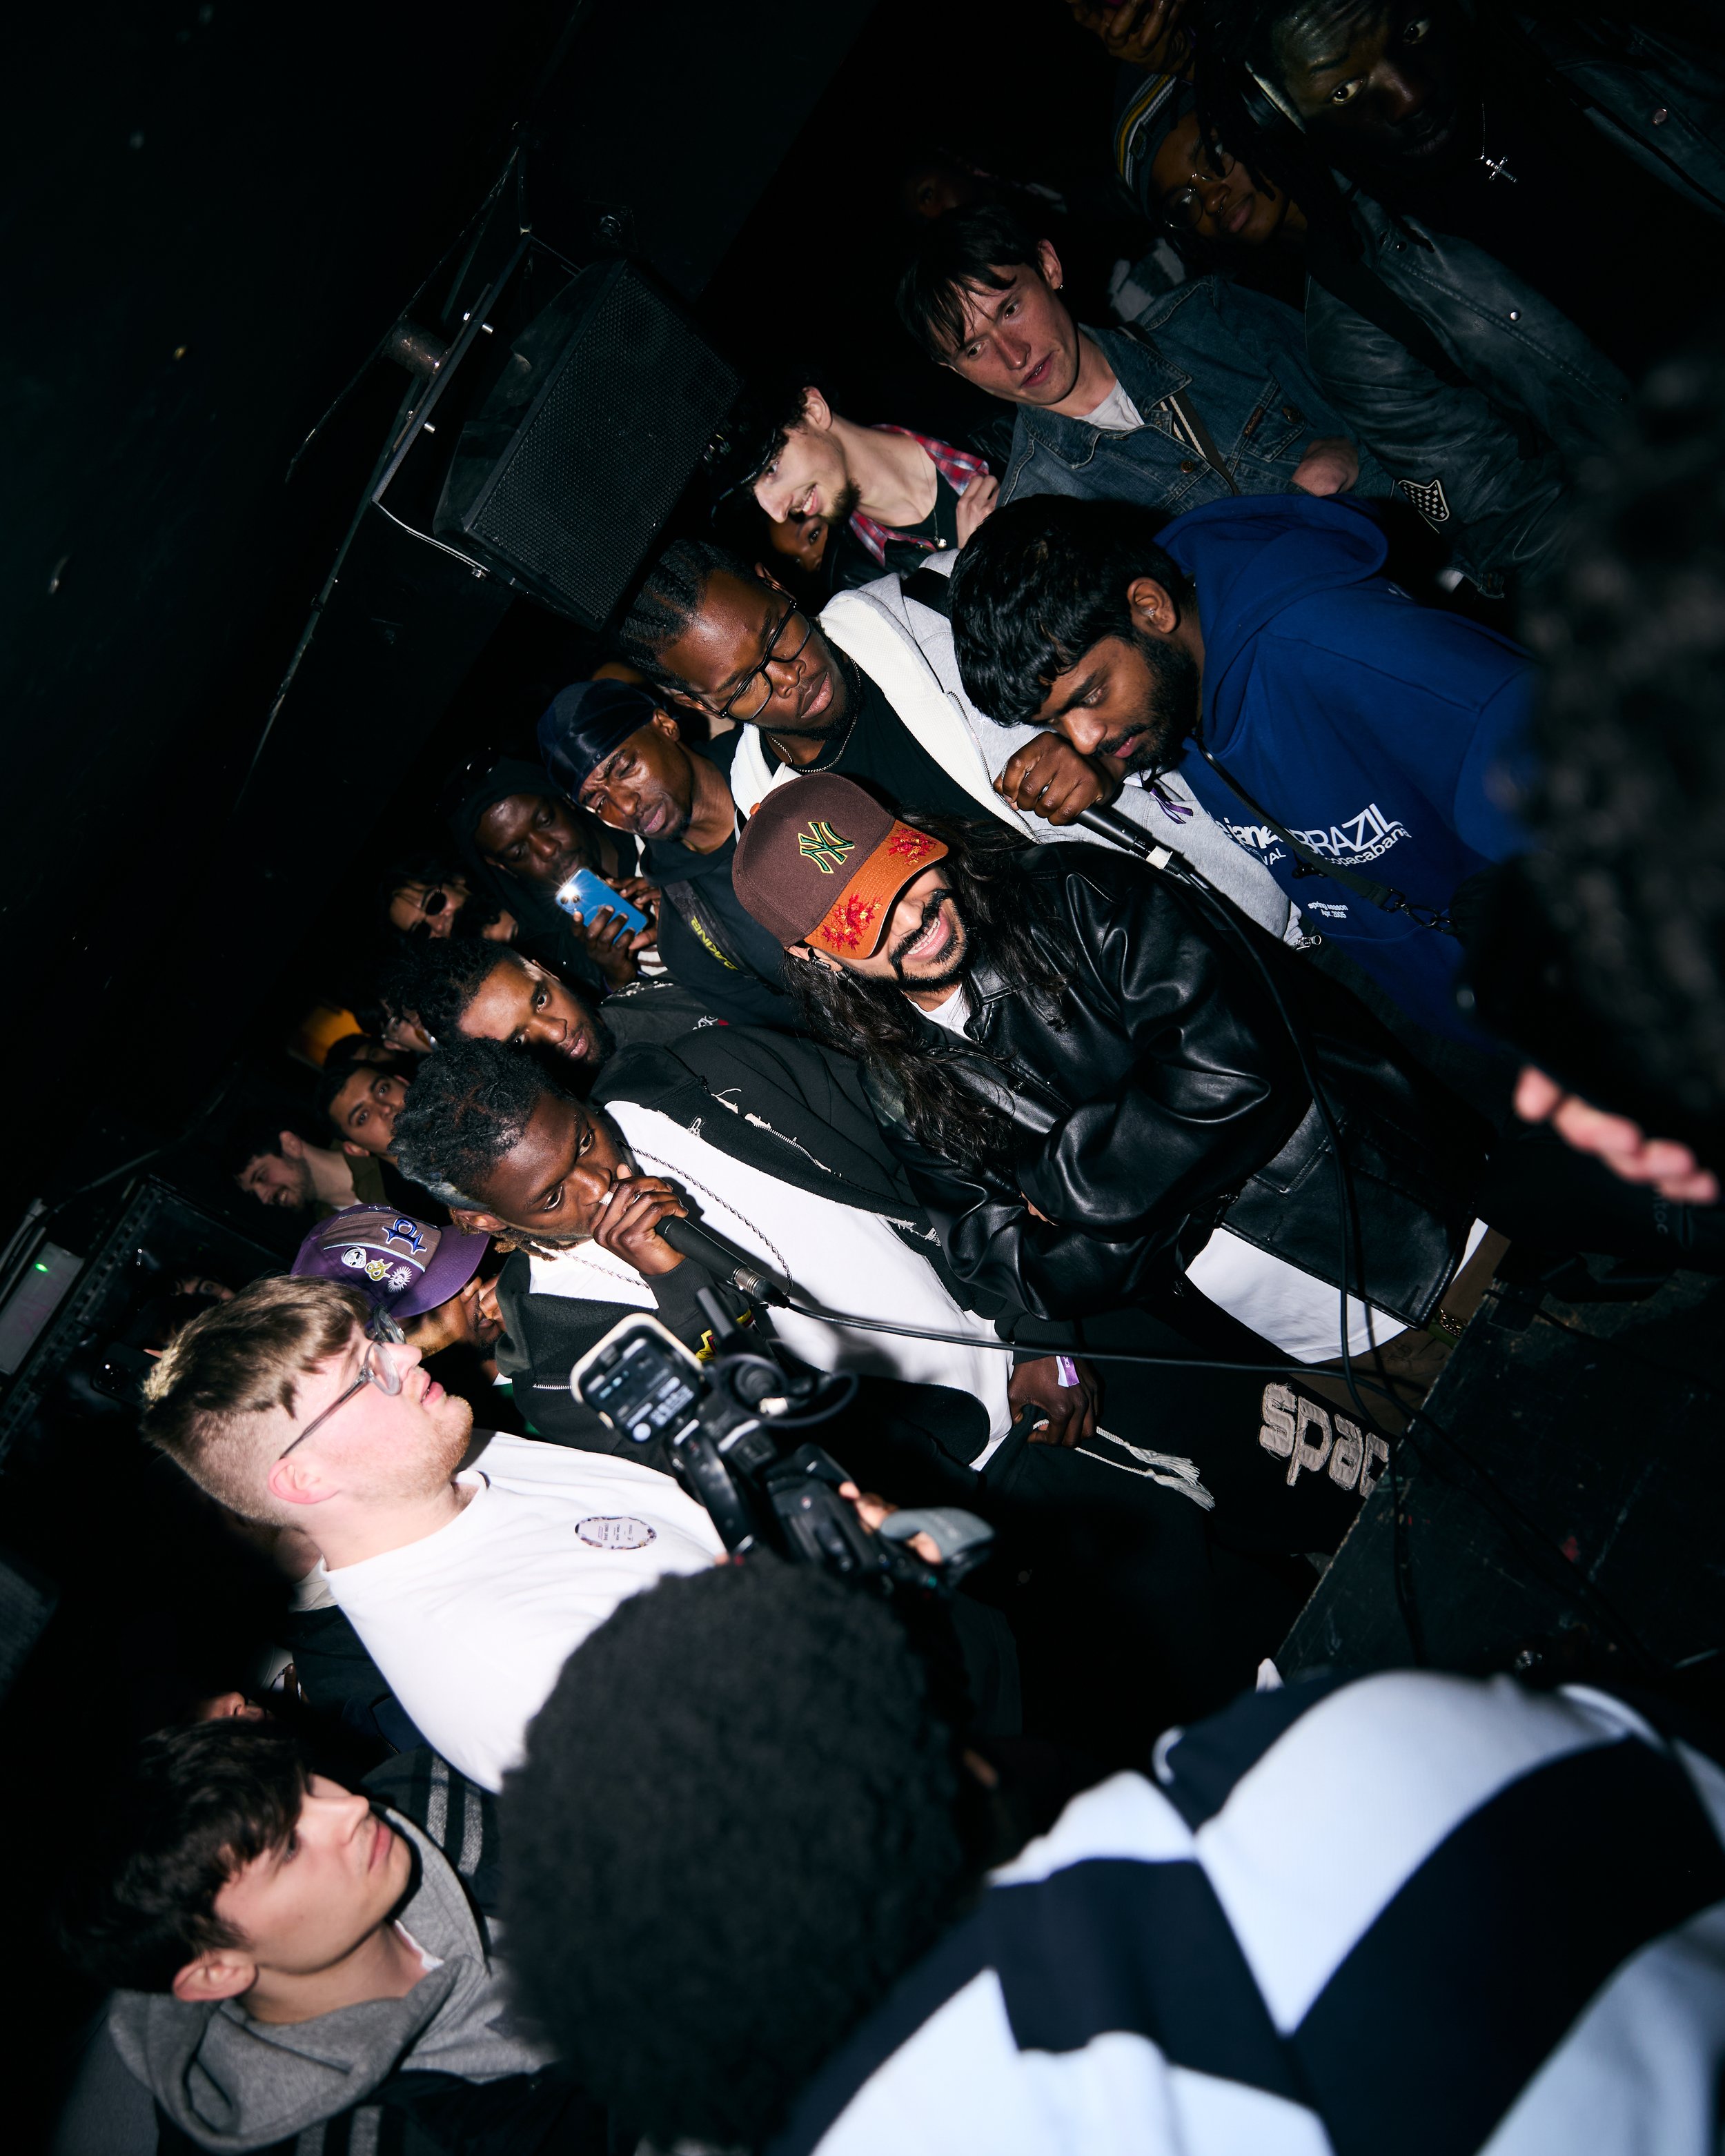
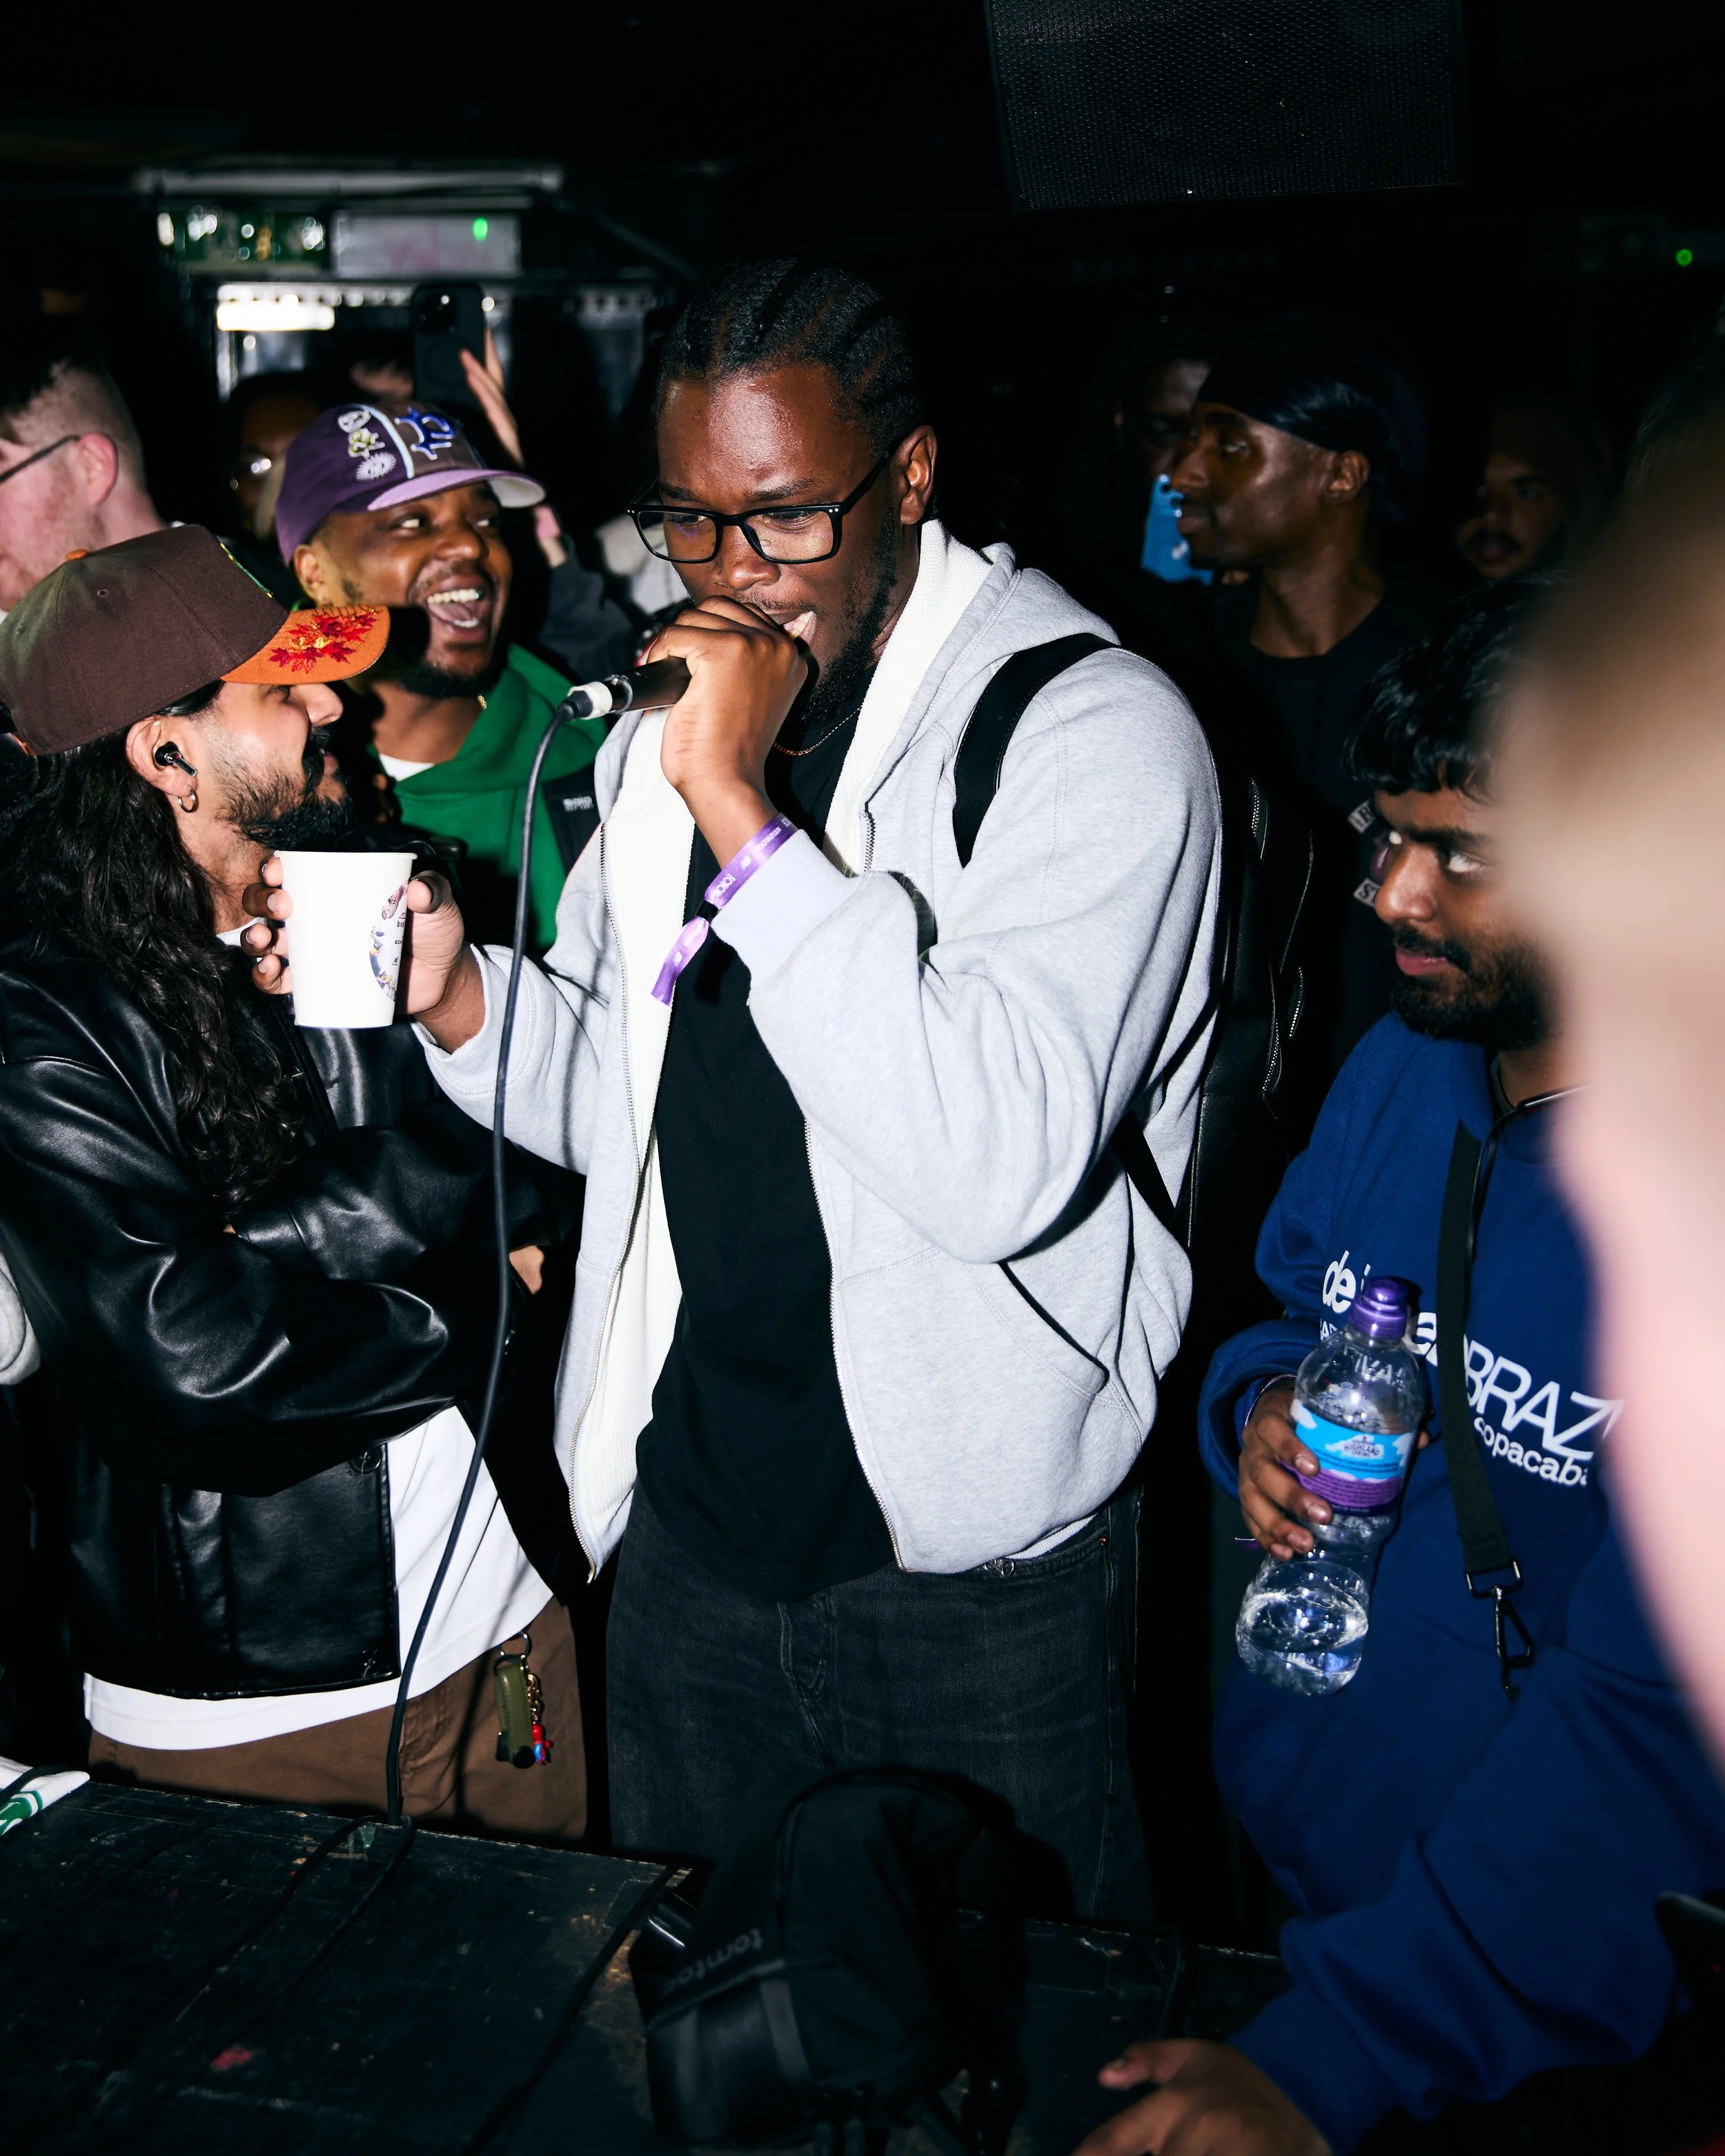
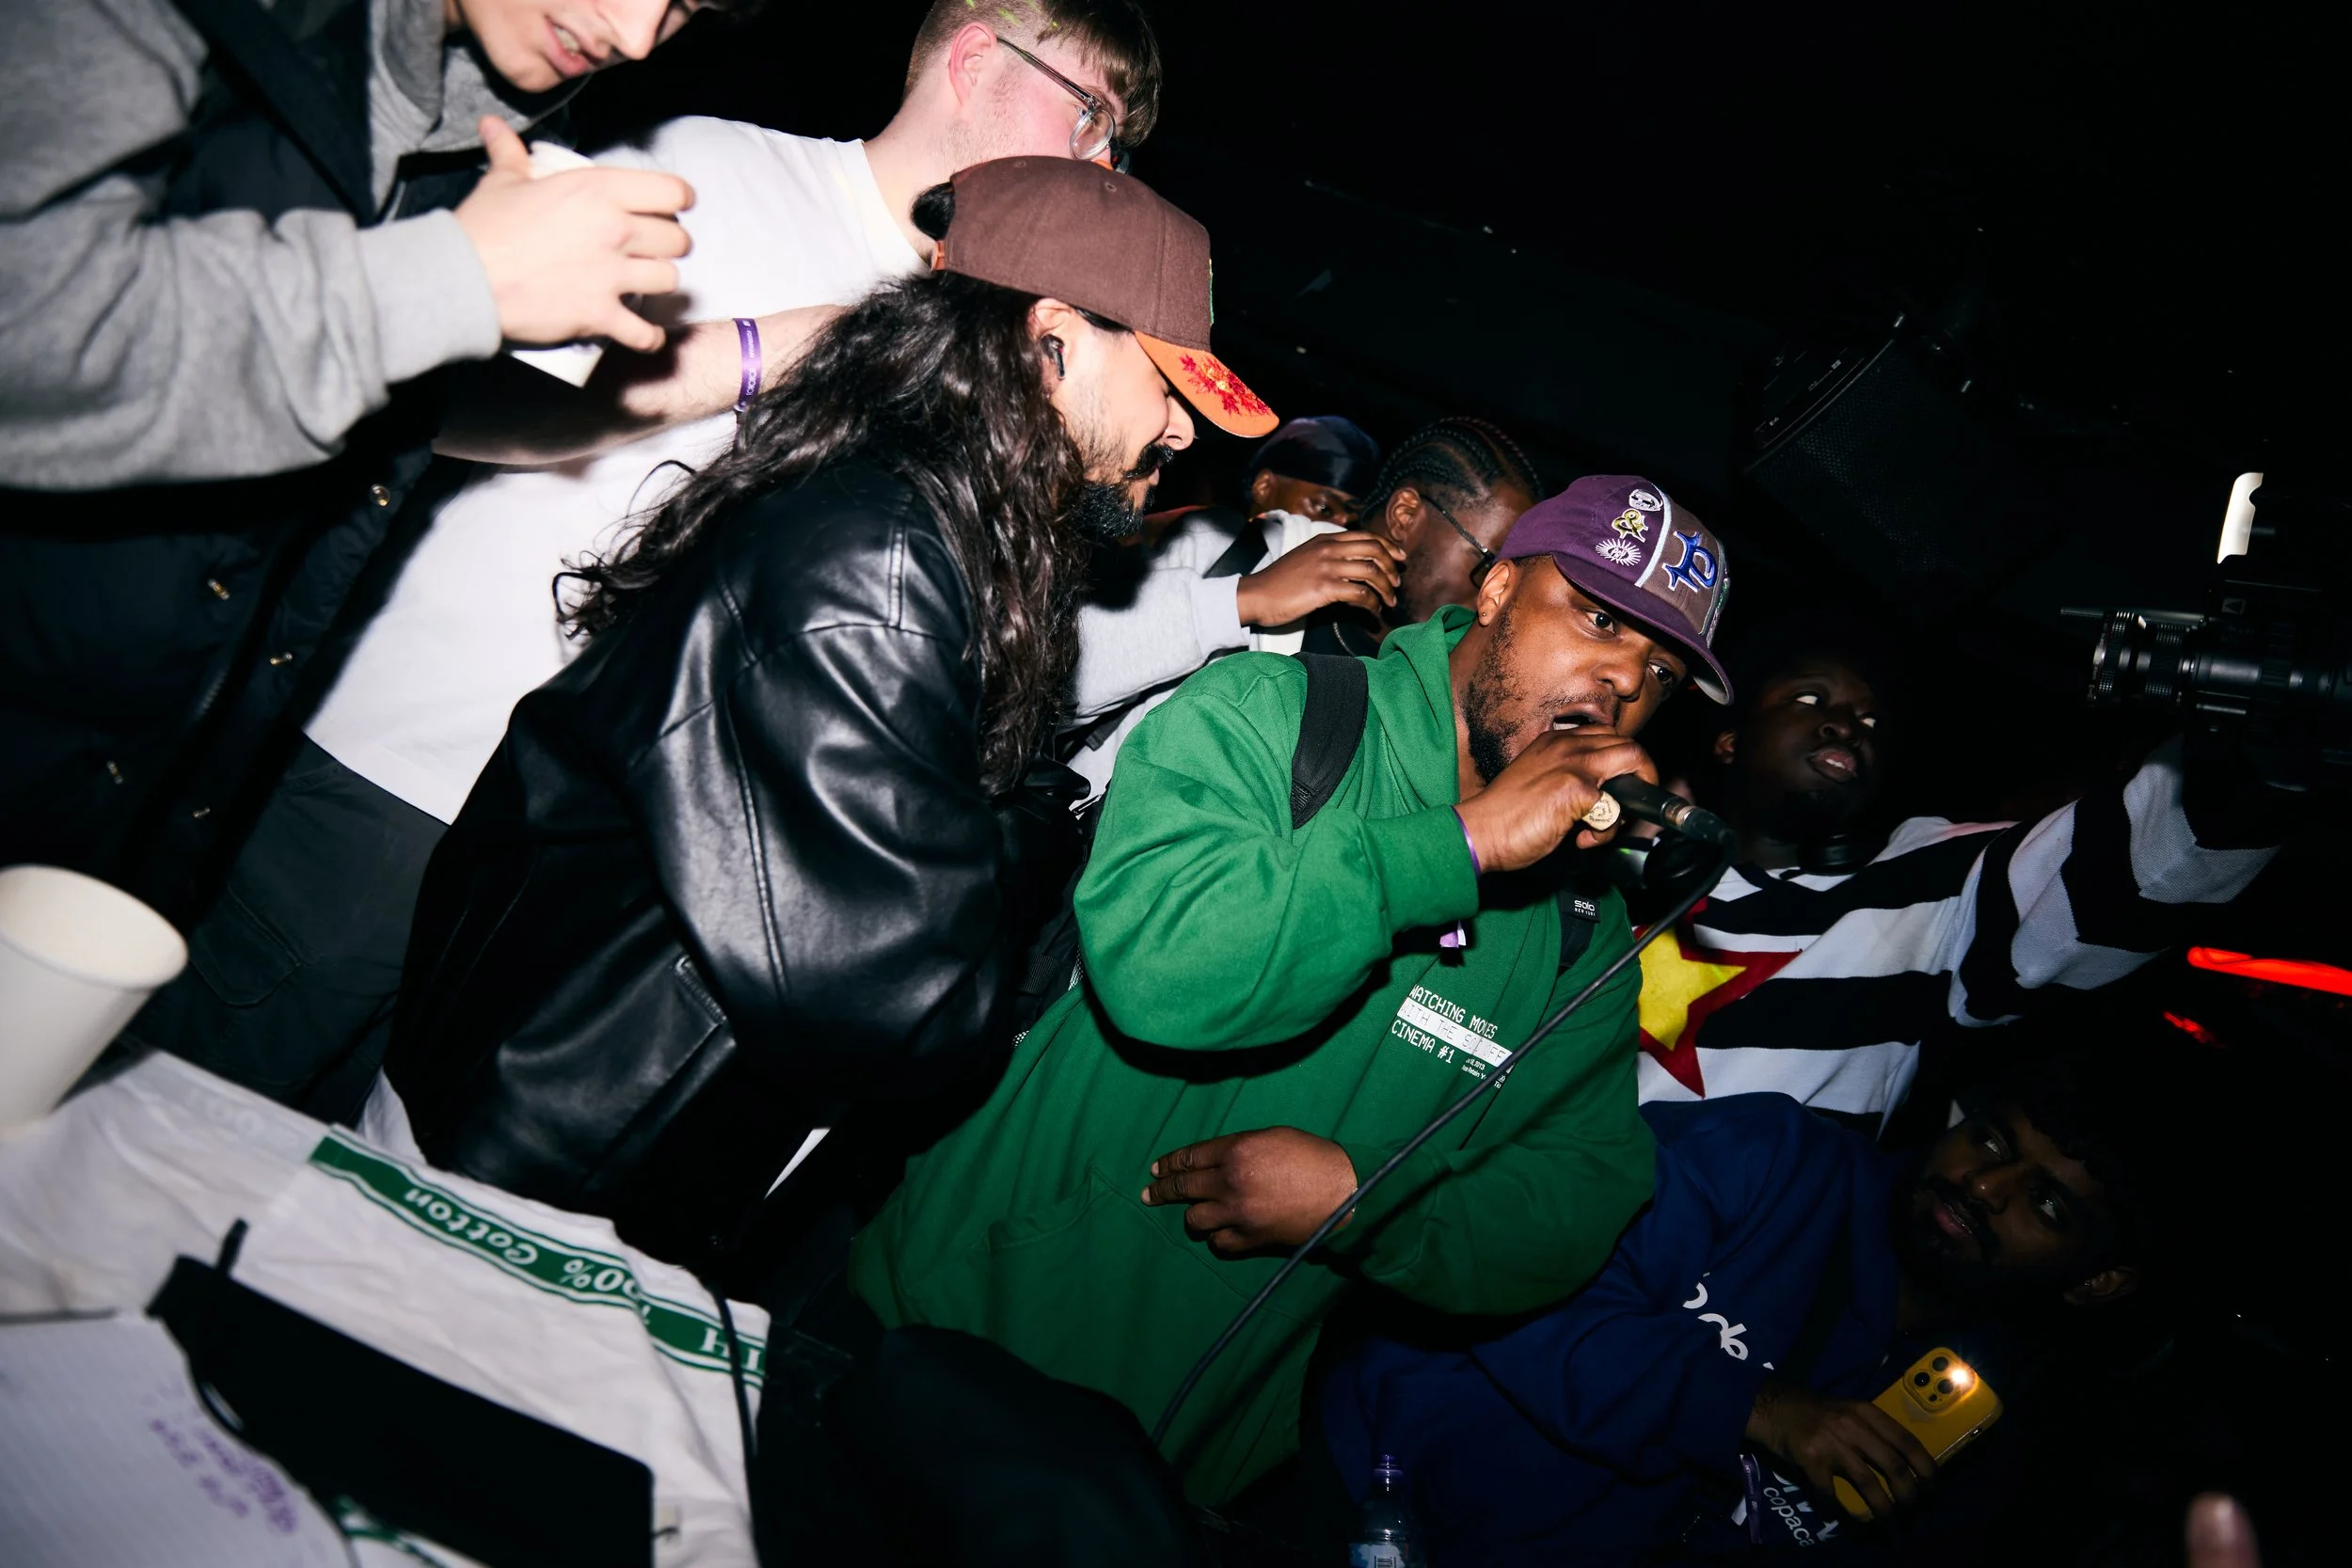
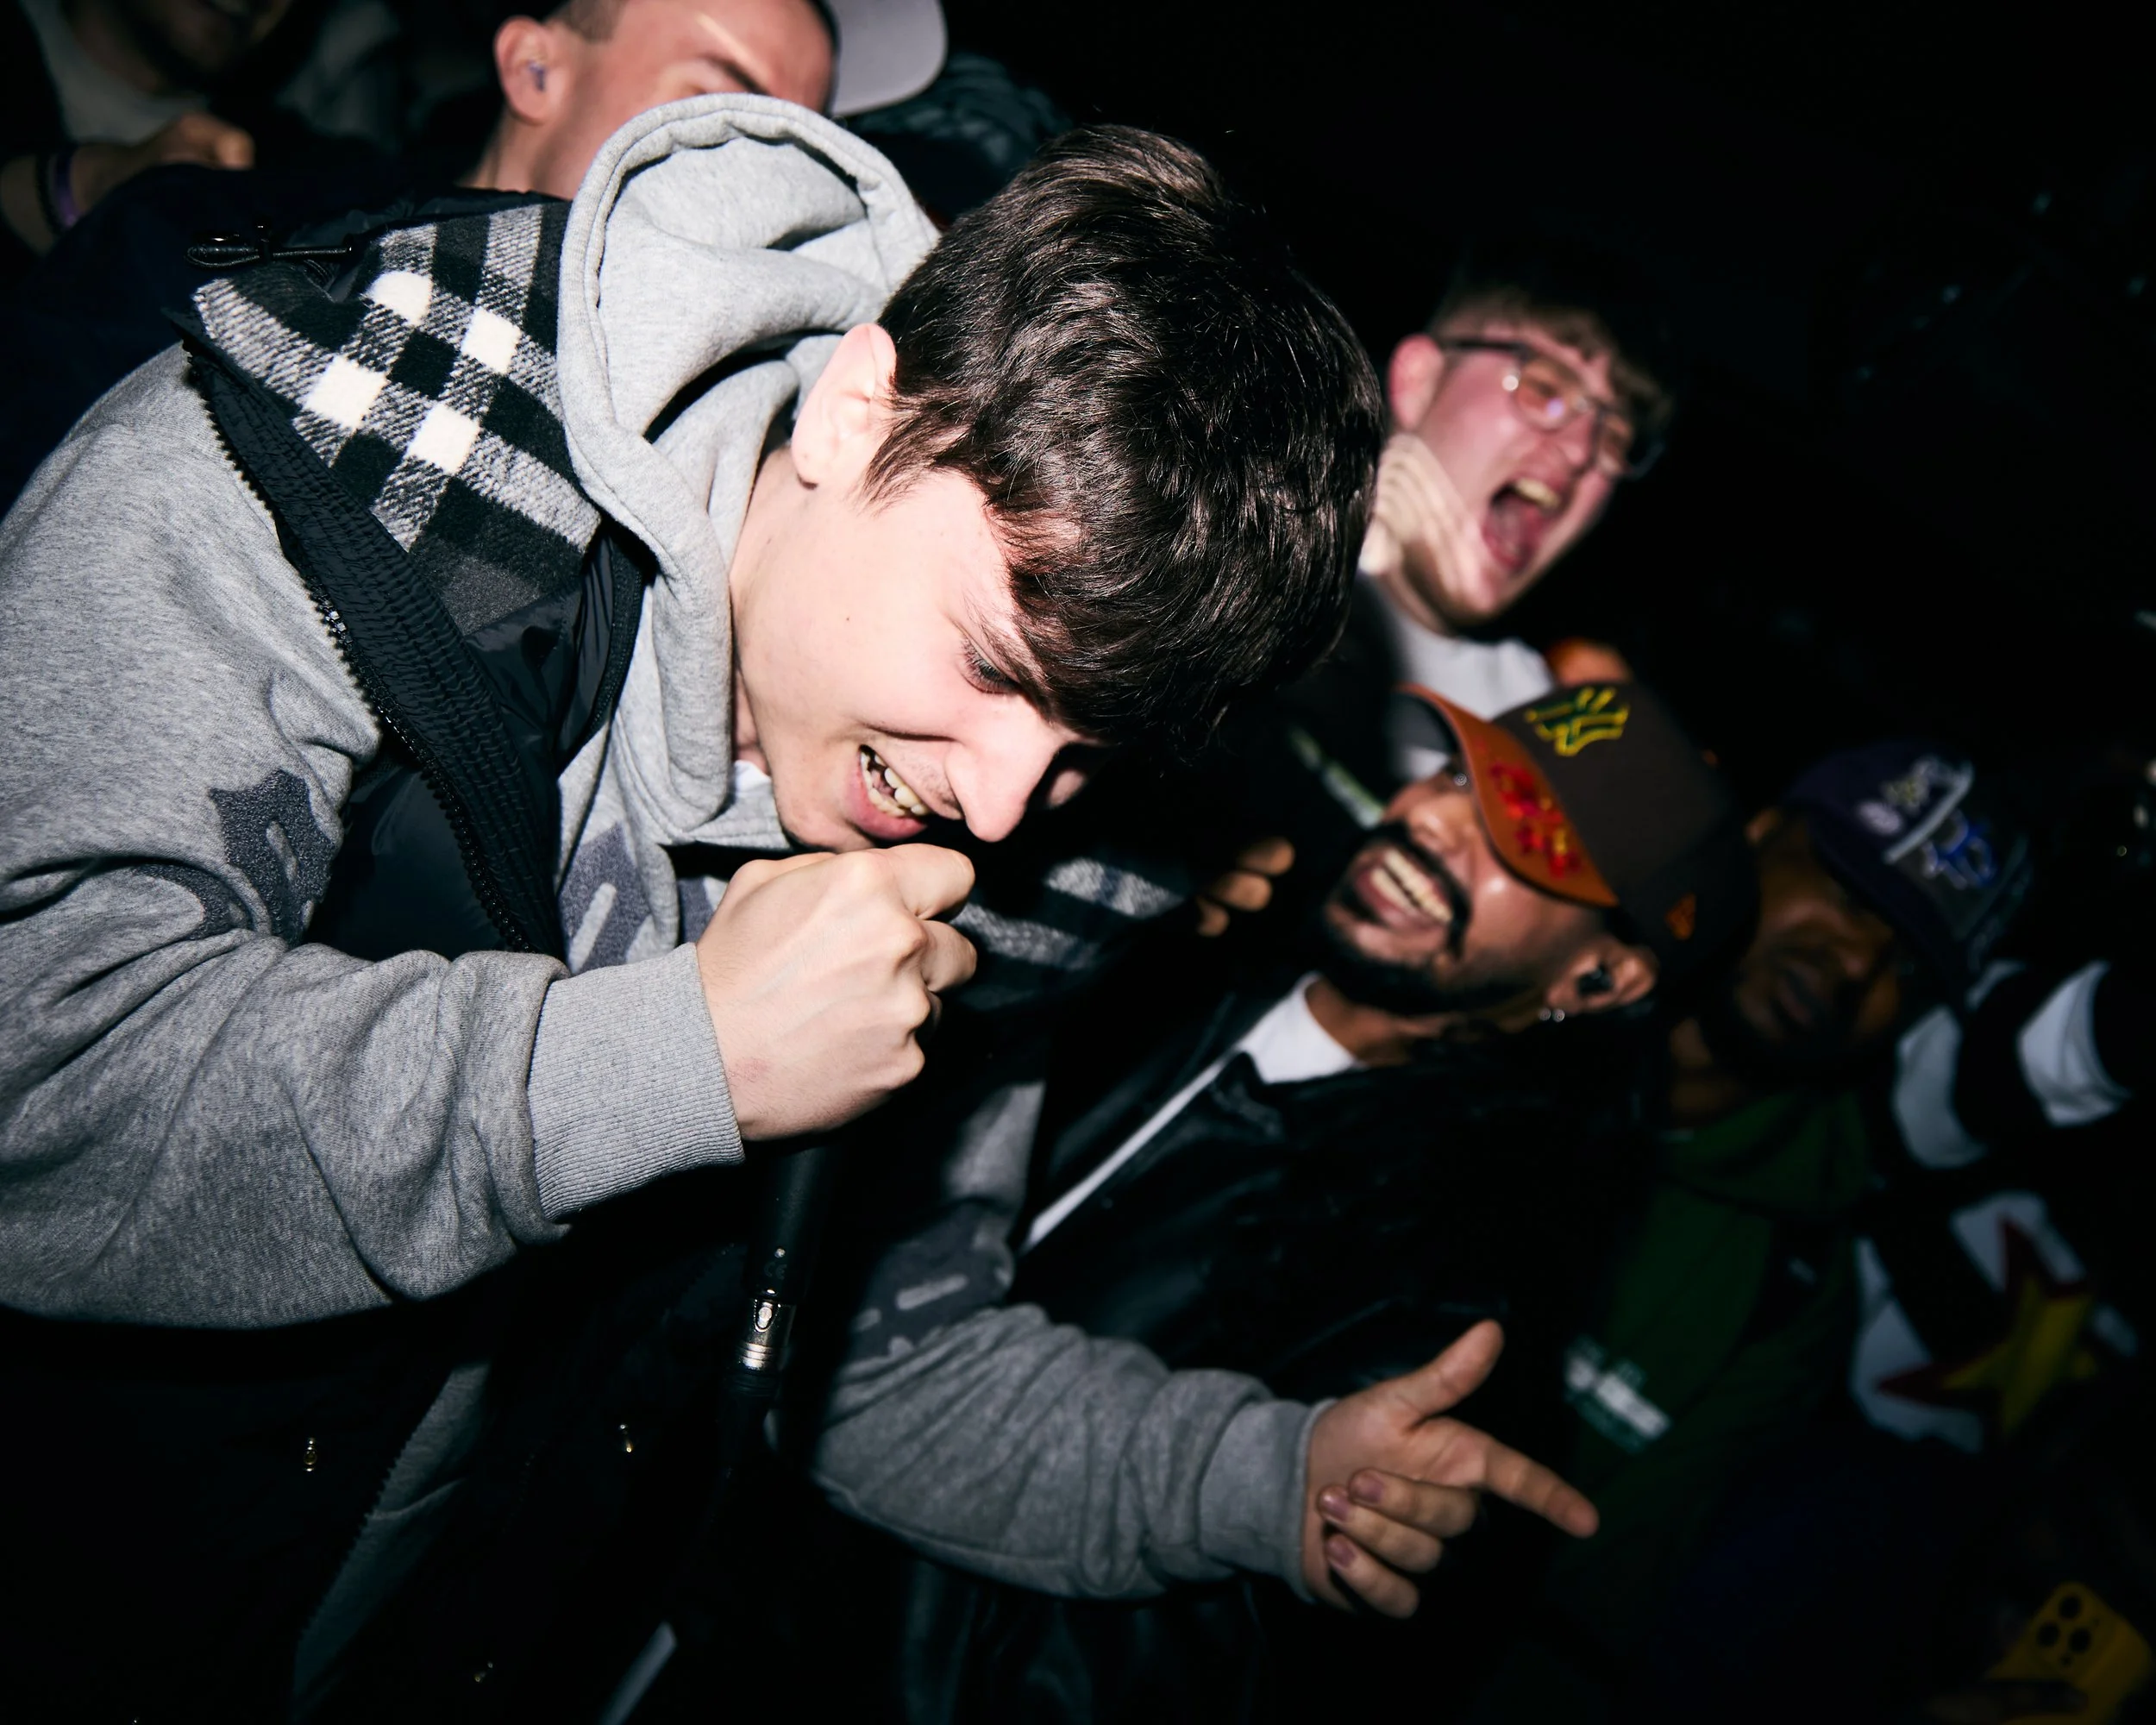
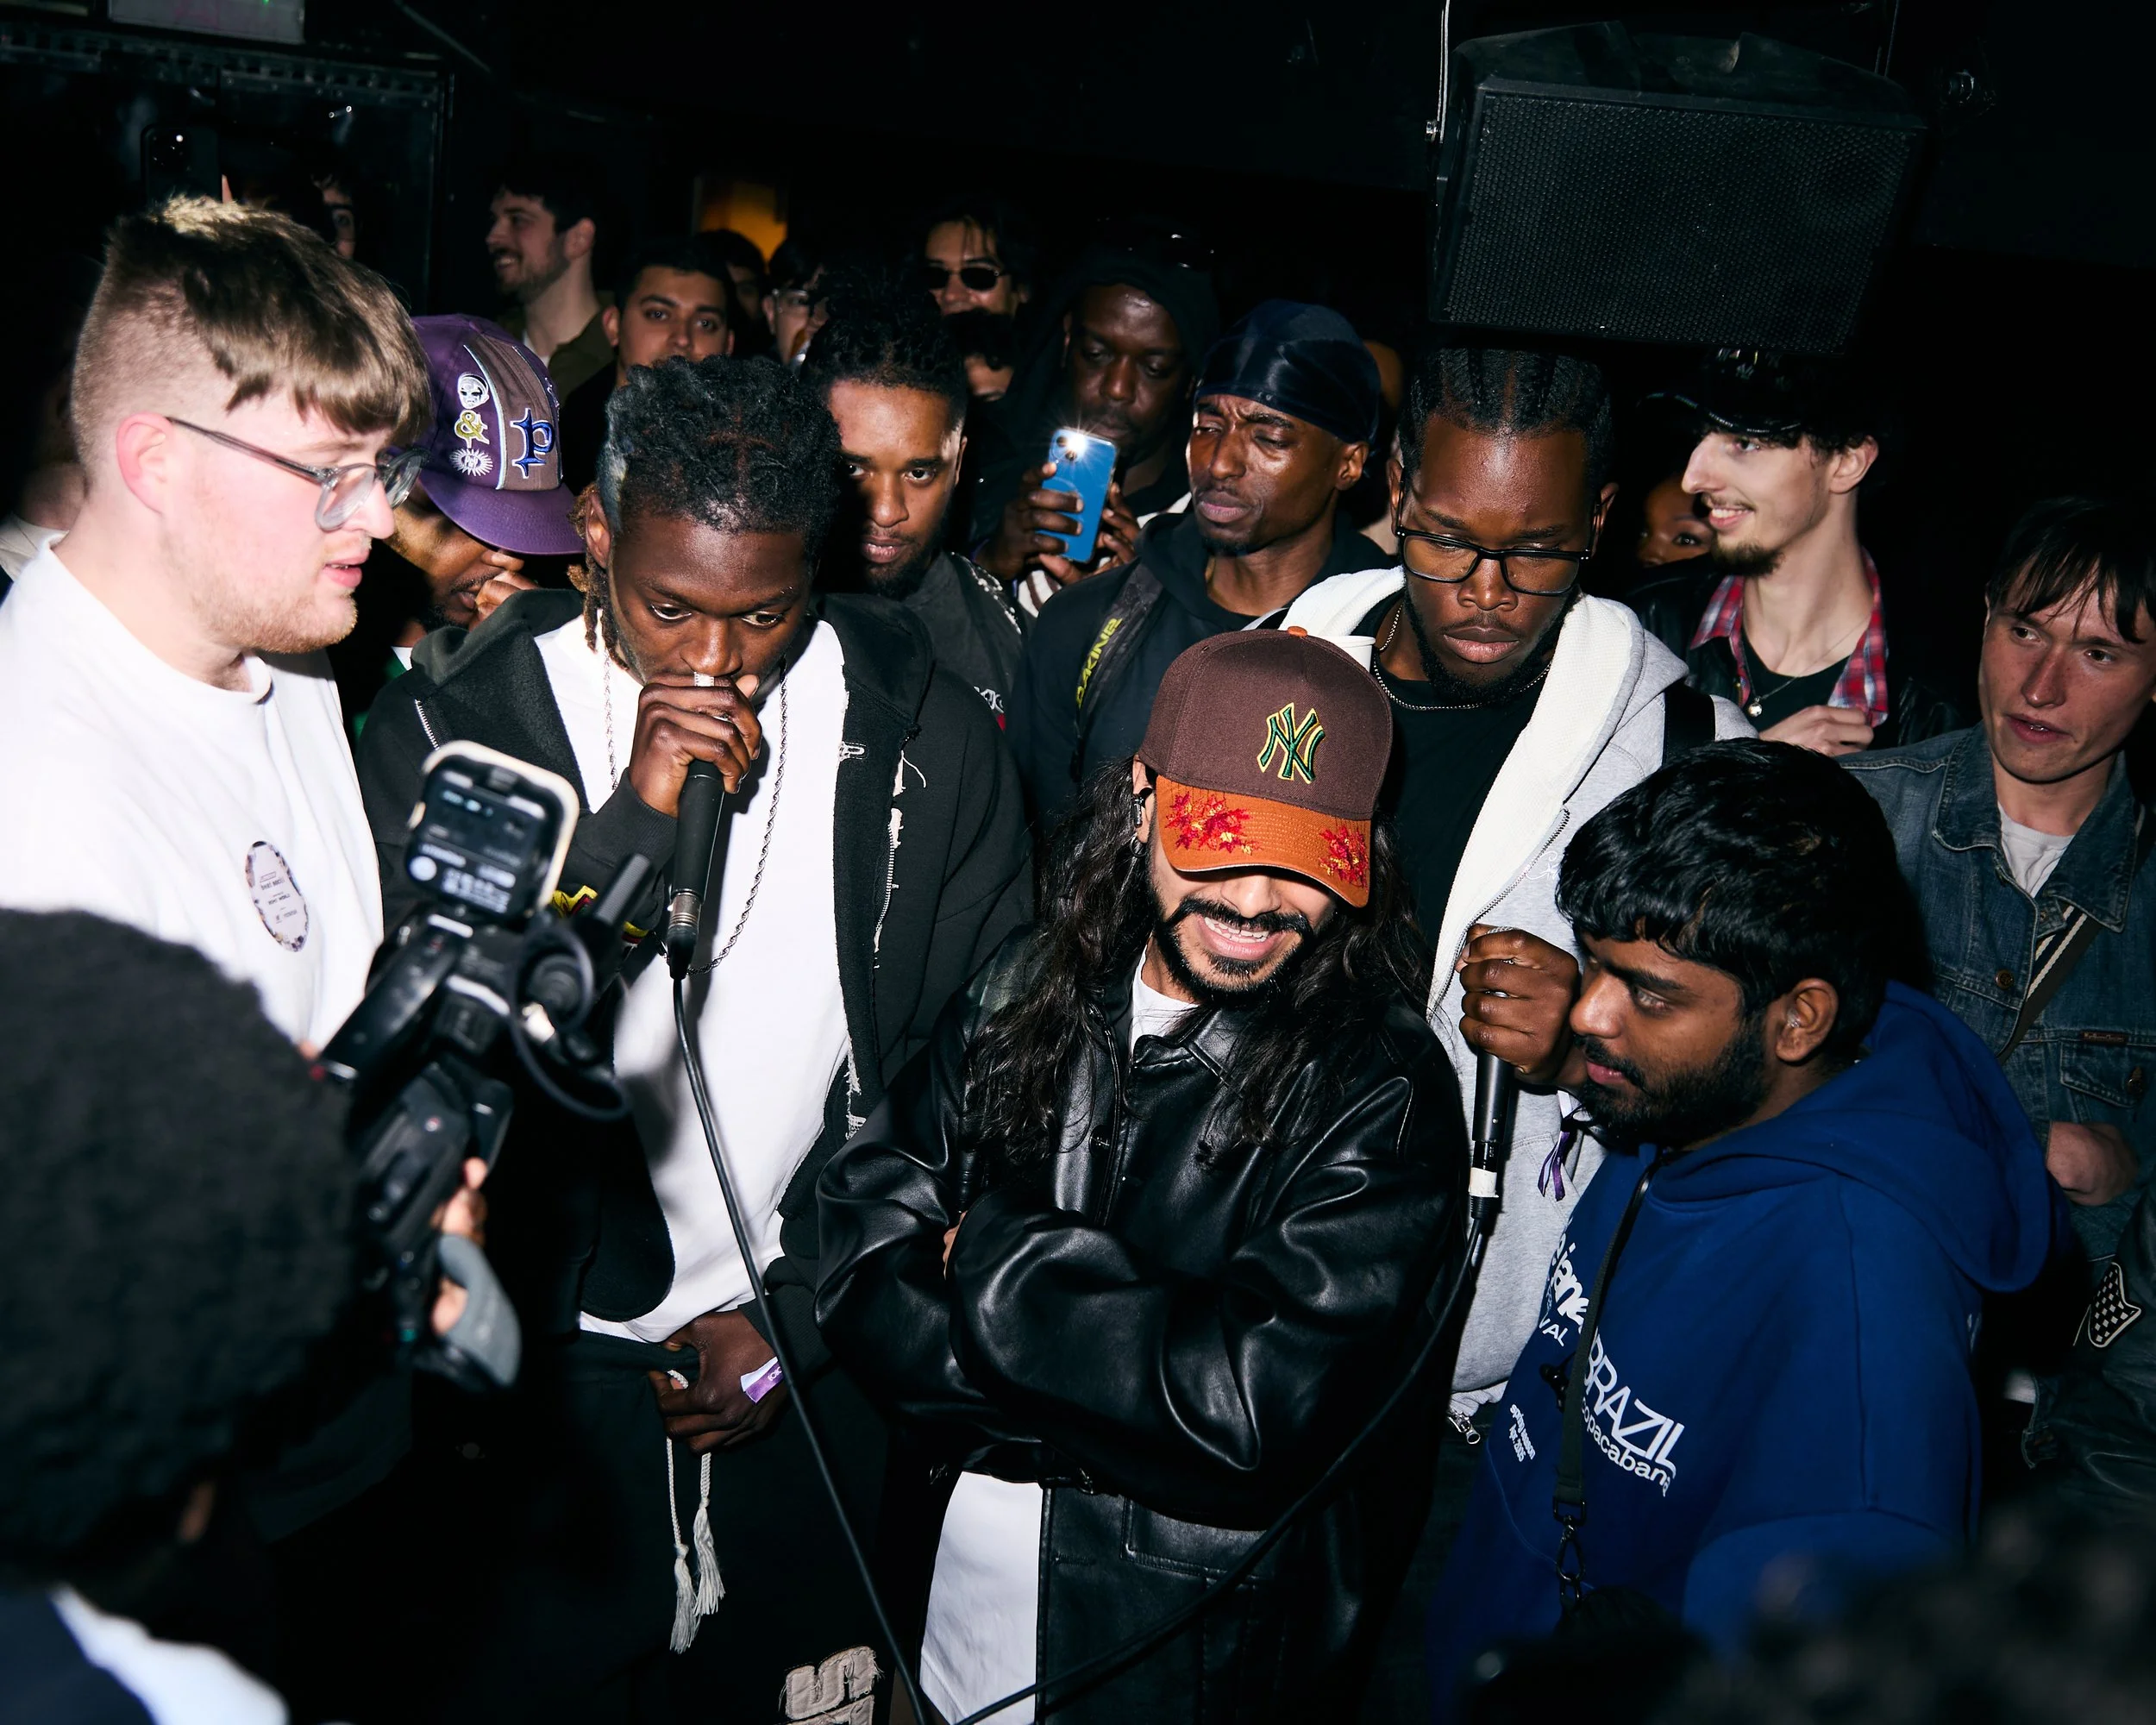
Highlights from the New Balance x Footasylum x Echo World event performances.
A Sold-Out Night with New Balance & Footasylum
In April 2025, Echo World linked up with New Balance and Footasylum for a sold-out community event at The Glove That Fits in London.
Built around music, style and the creative energy of the city night brought together producers, artists, video artists and the wider Echo World community for an intimate event with proper real-life impact.
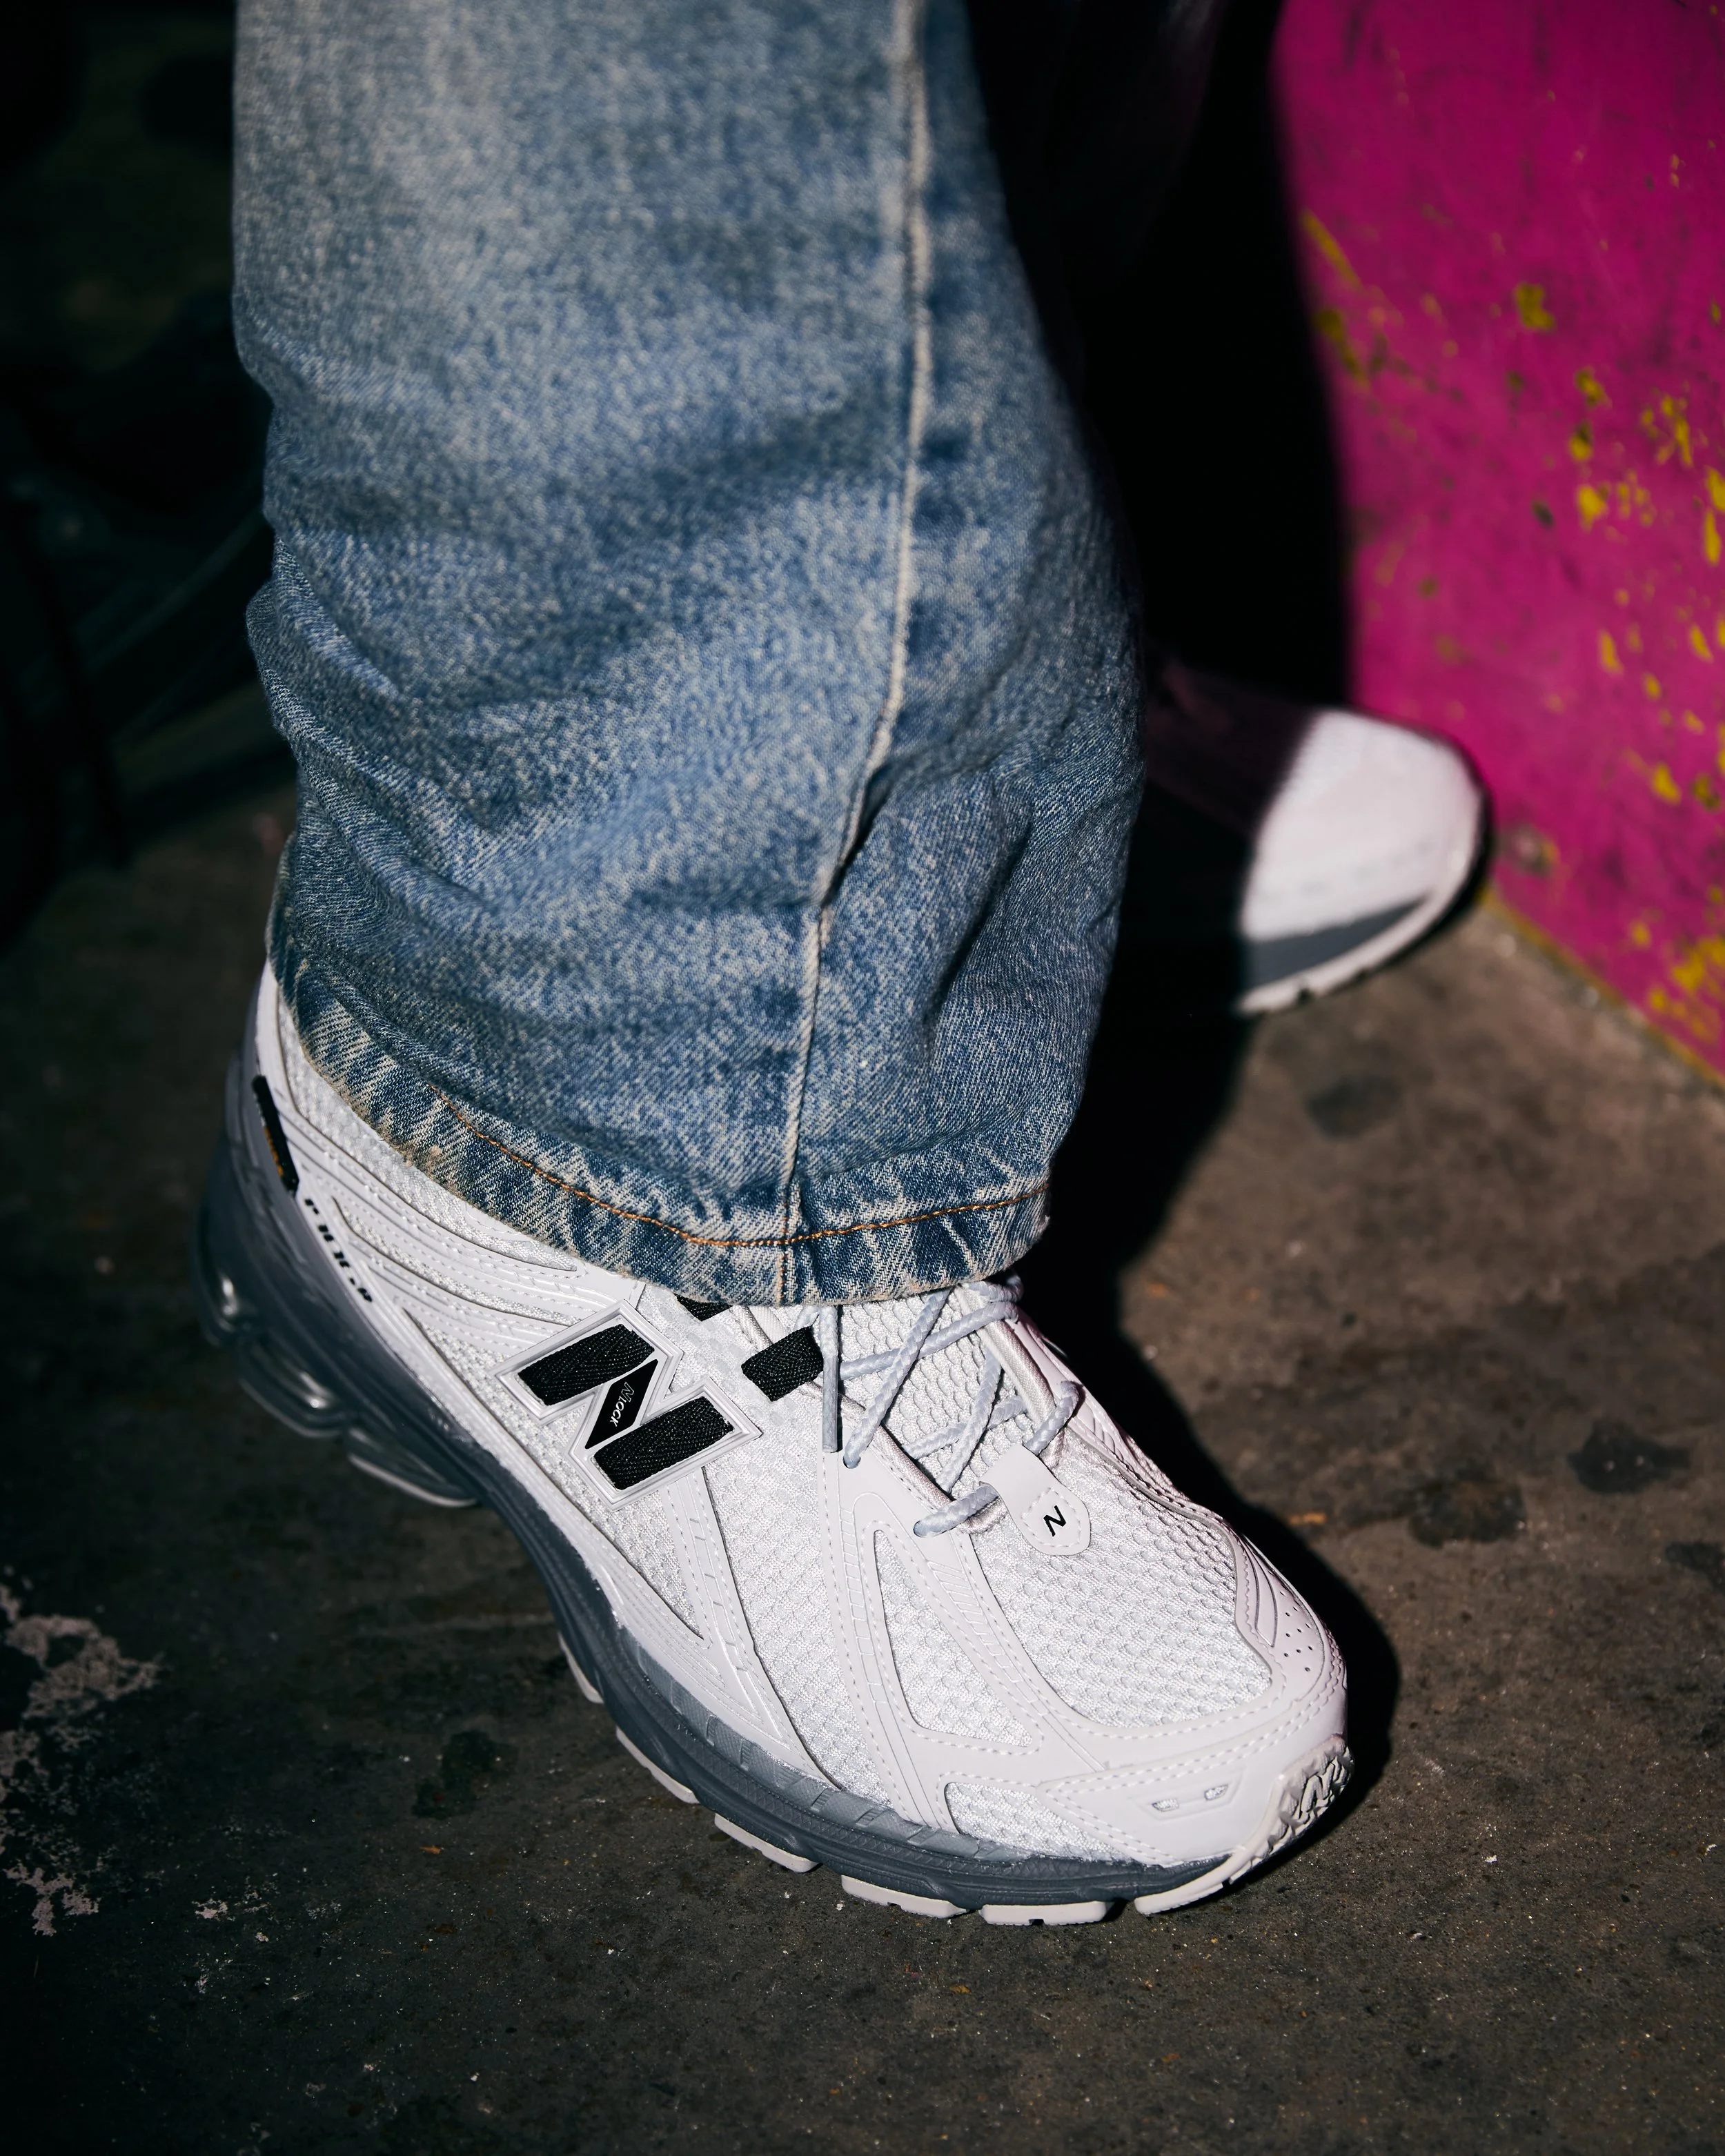
When New Balance and Footasylum approached Echo World to help launch the New Balance 1906 Cordura Pack, it felt like a real moment — a chance to translate the release into something physical, cultural and genuinely connected to the people shaping UK creative scenes right now.
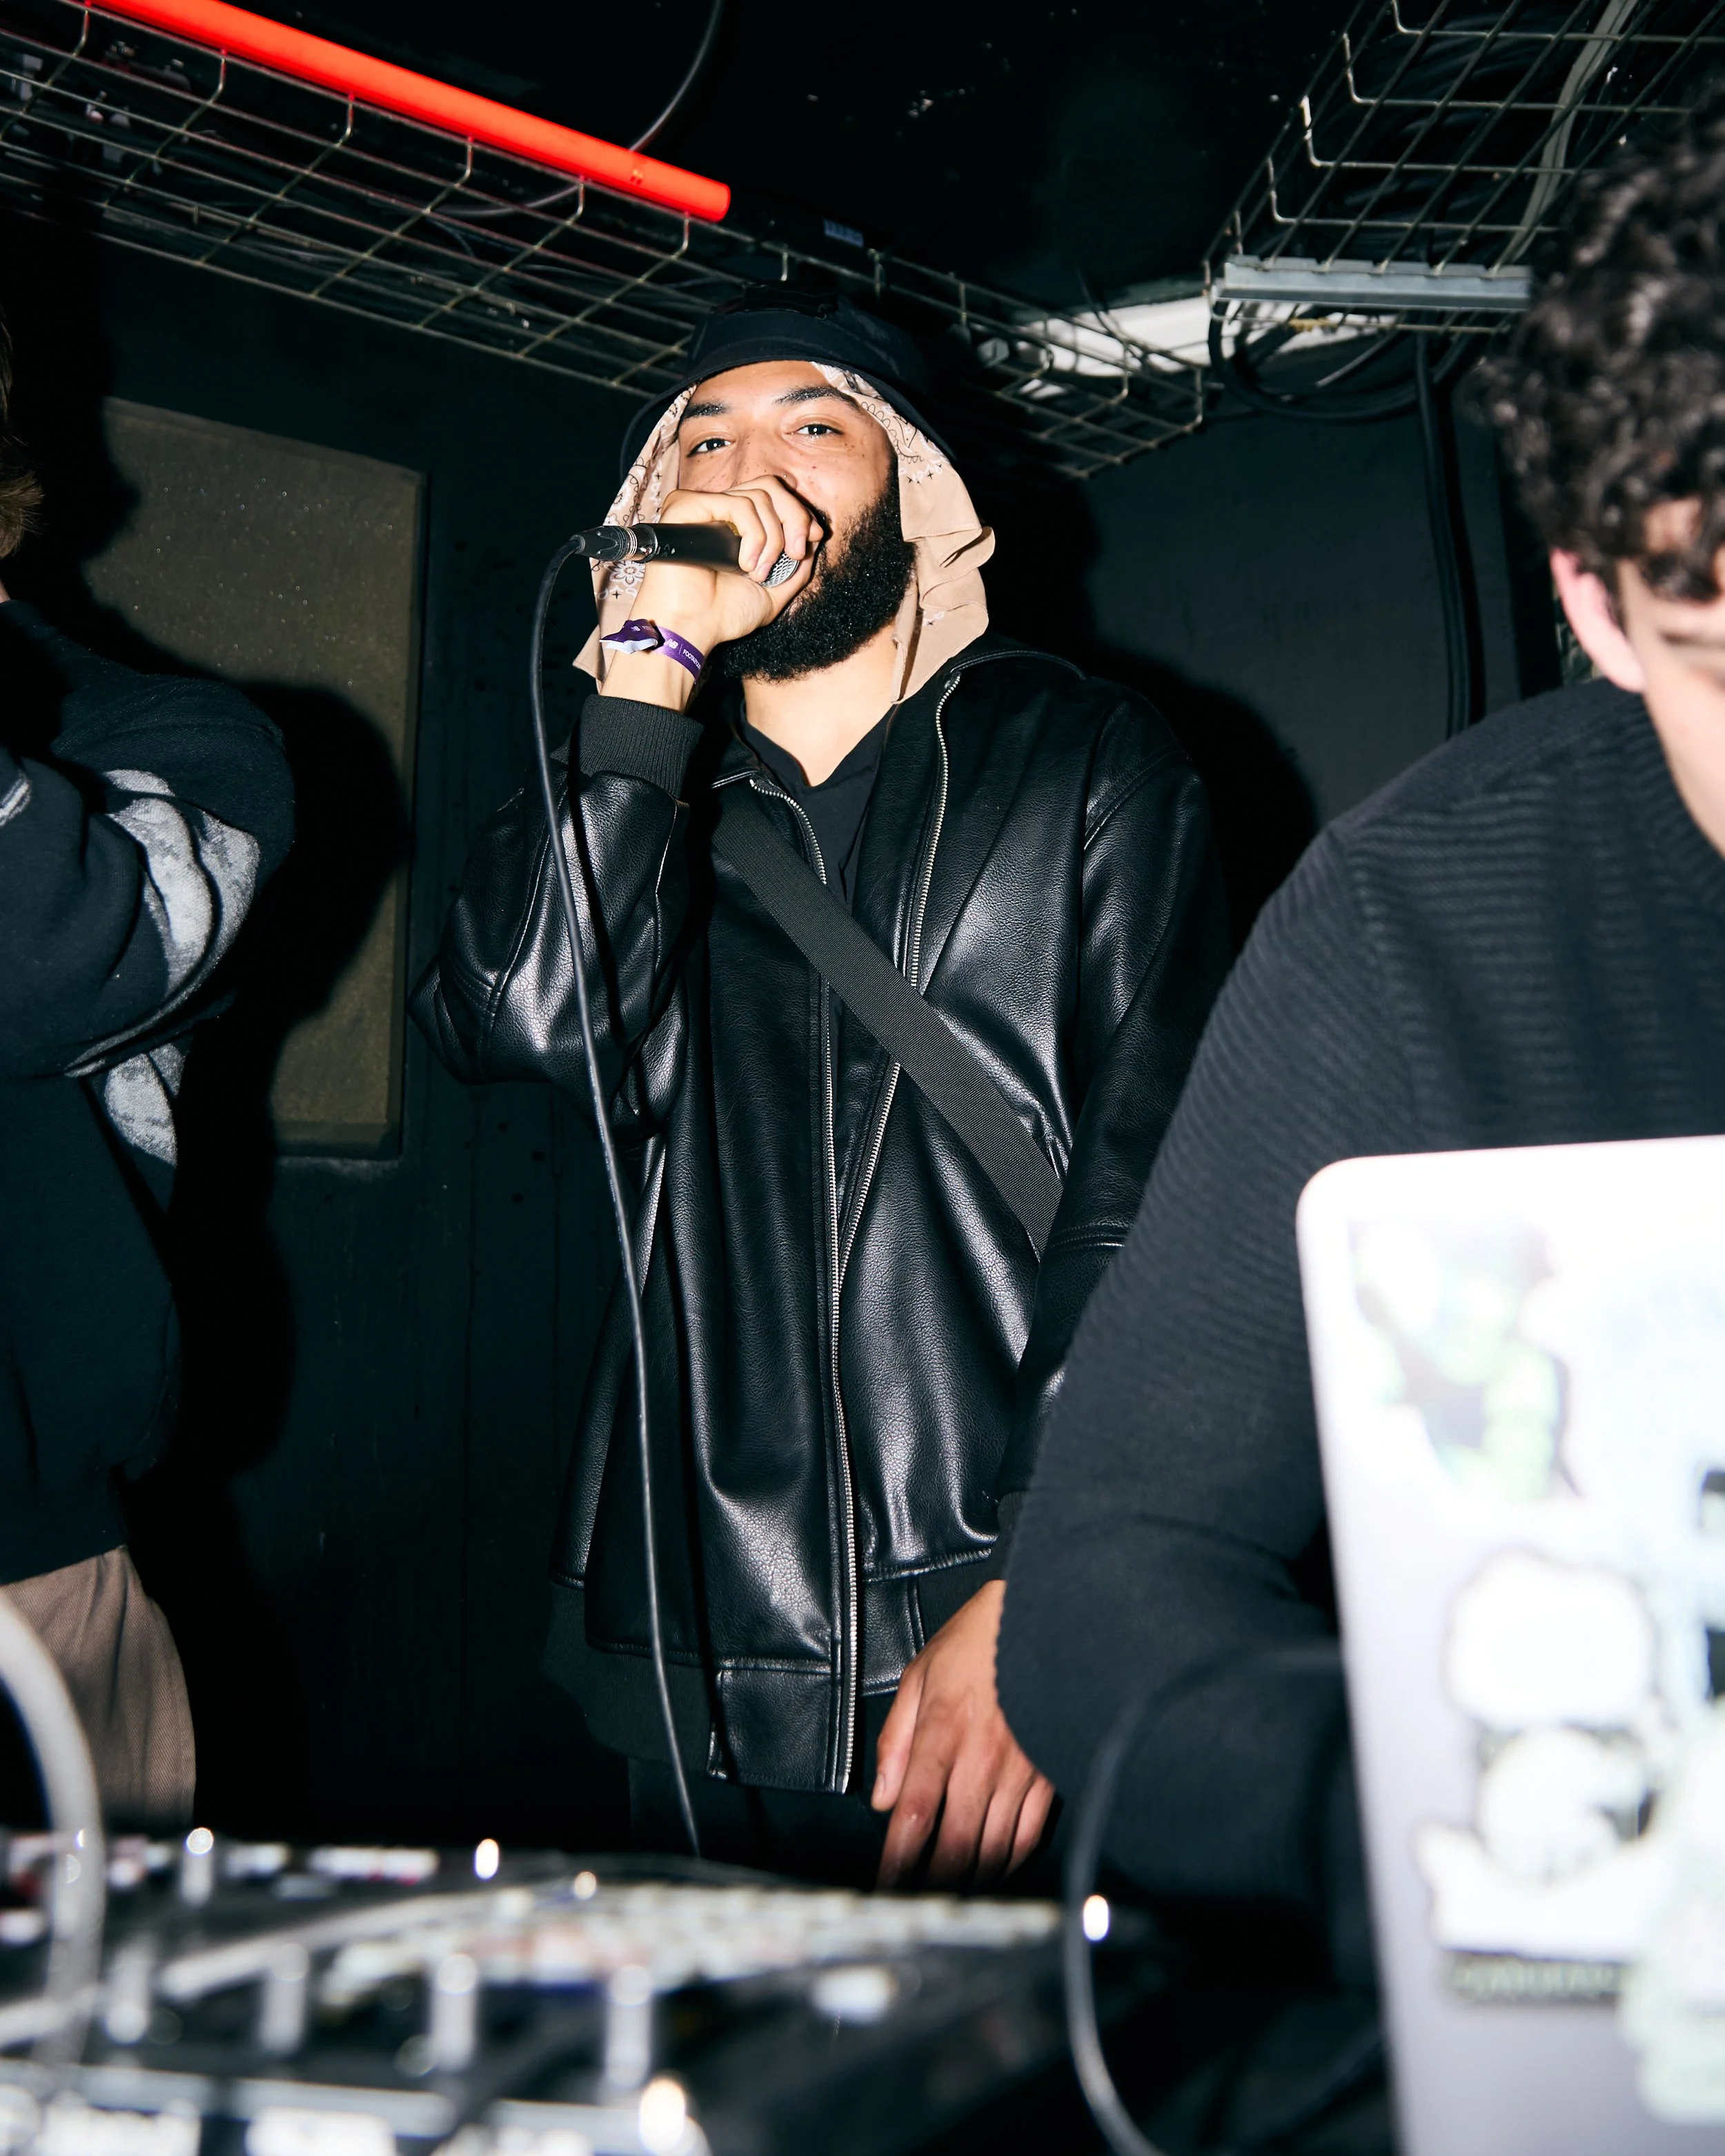
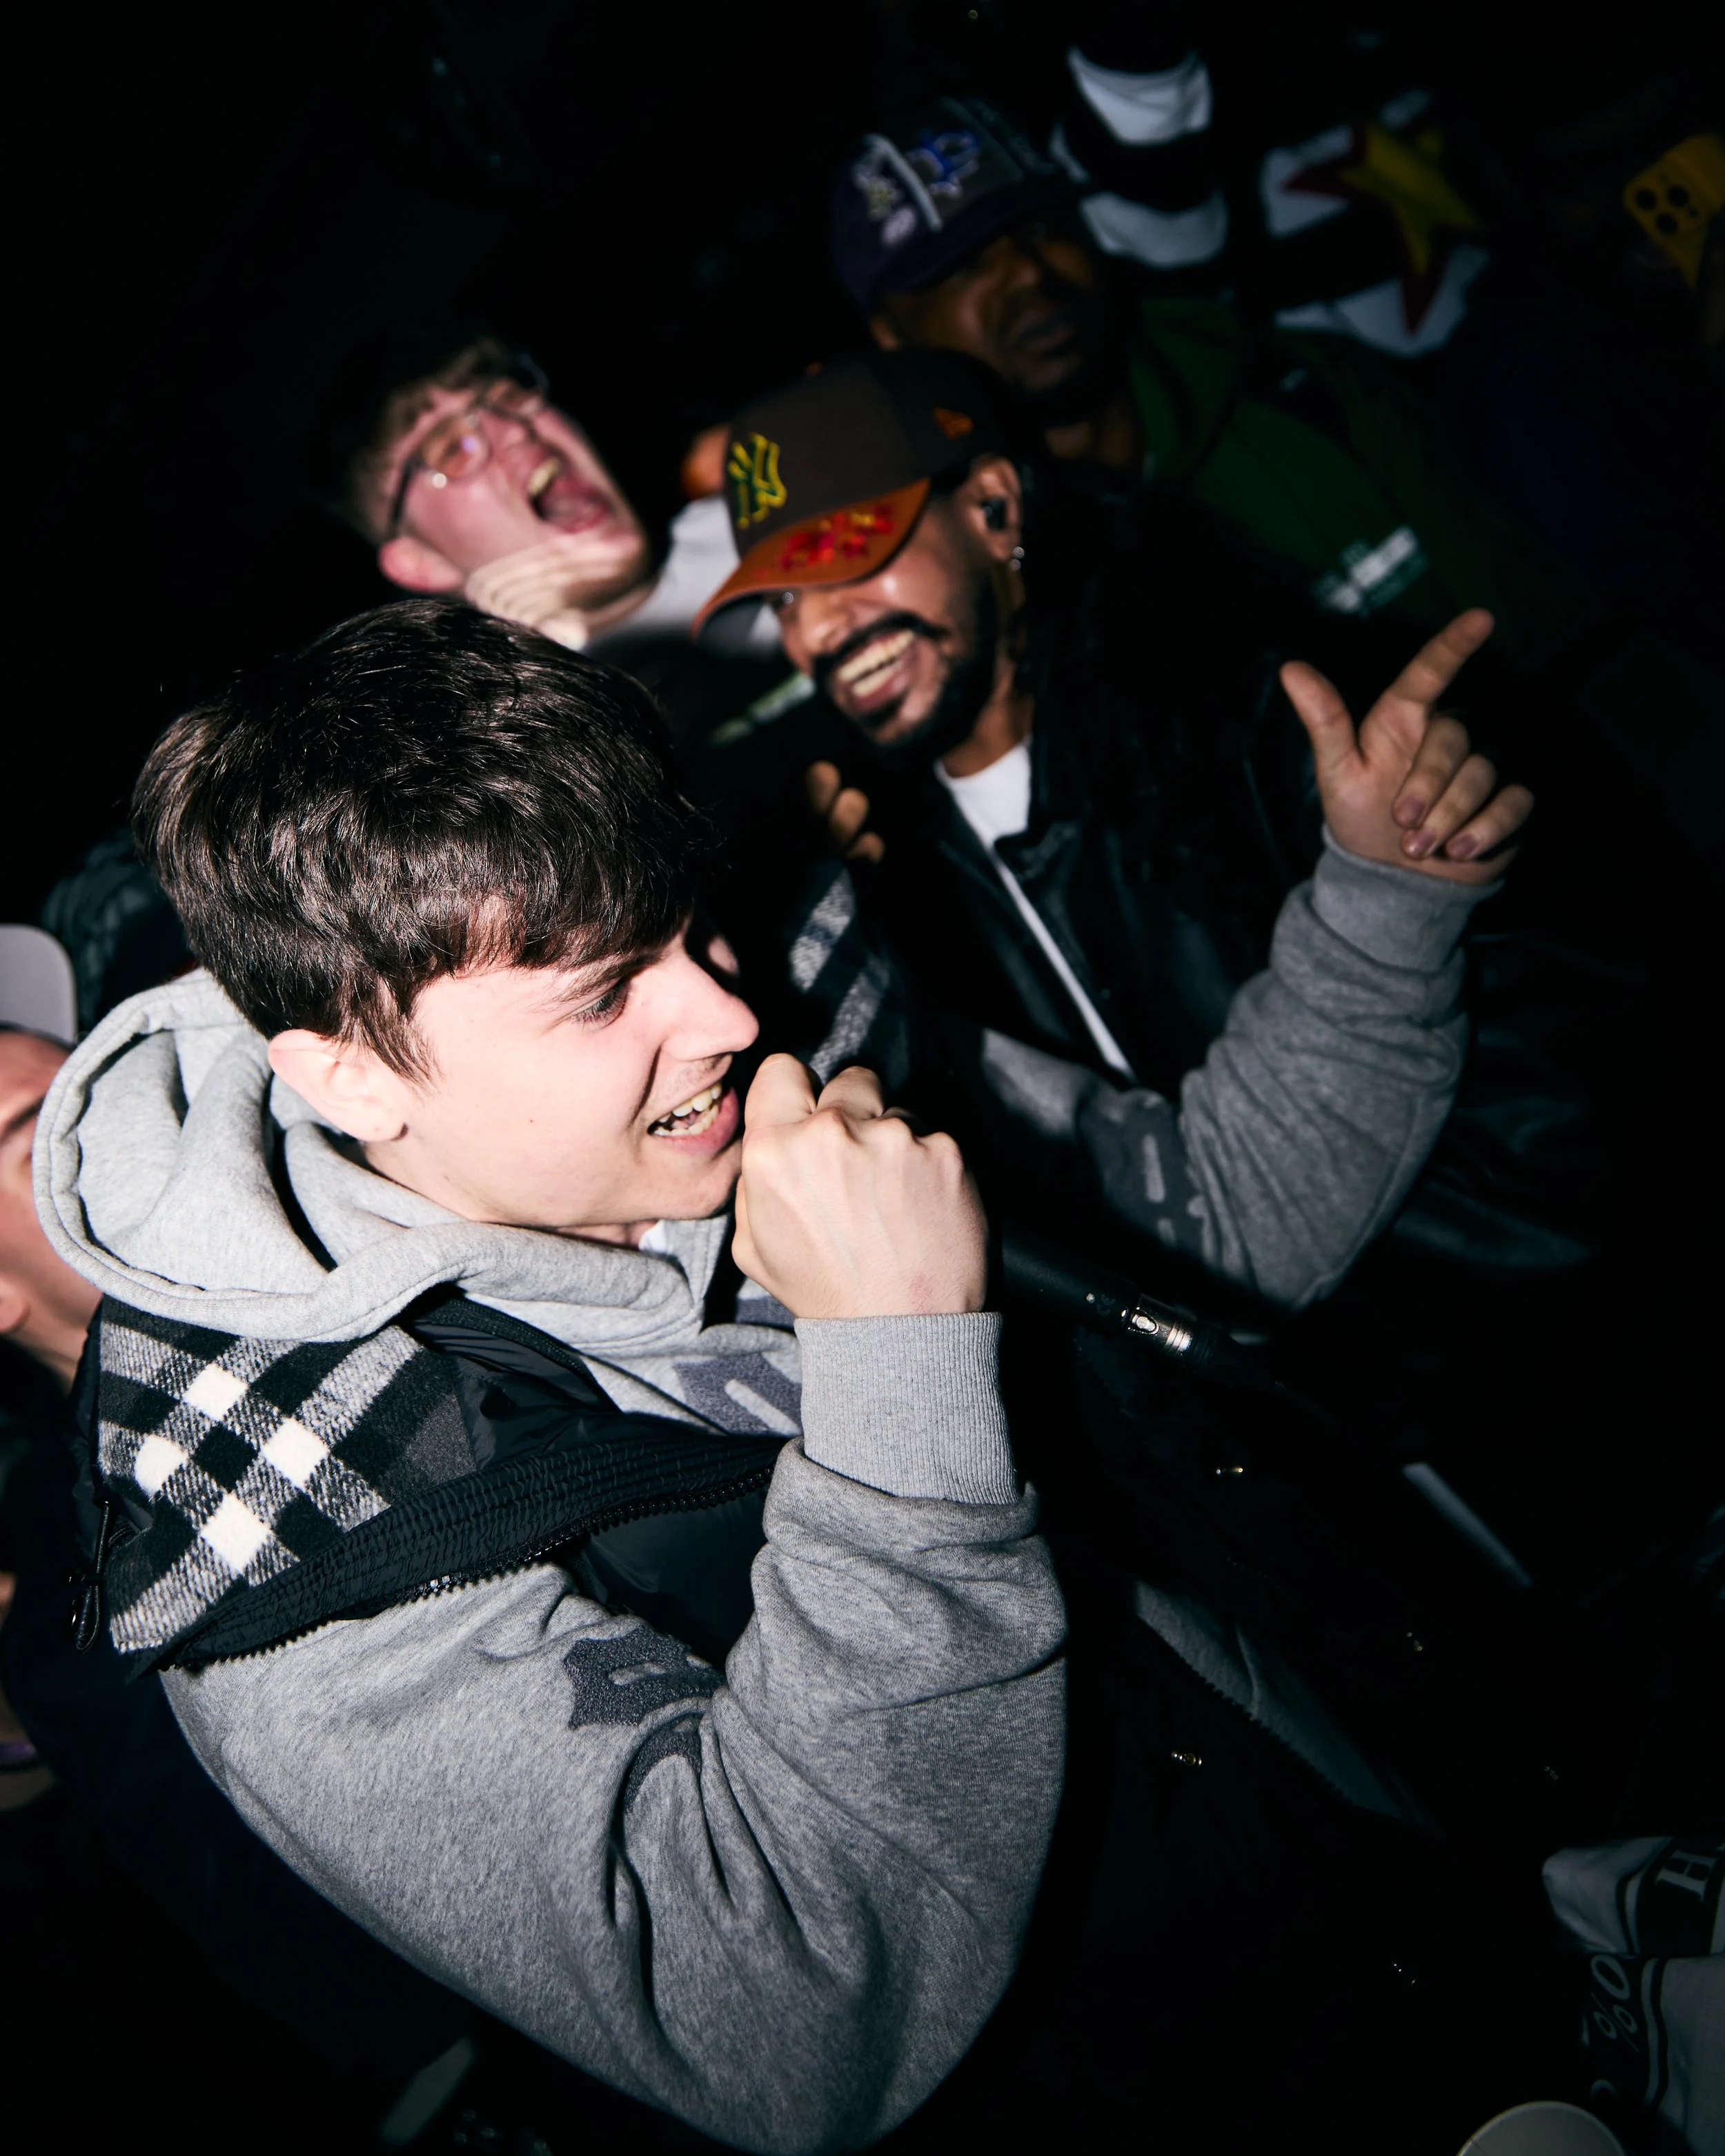
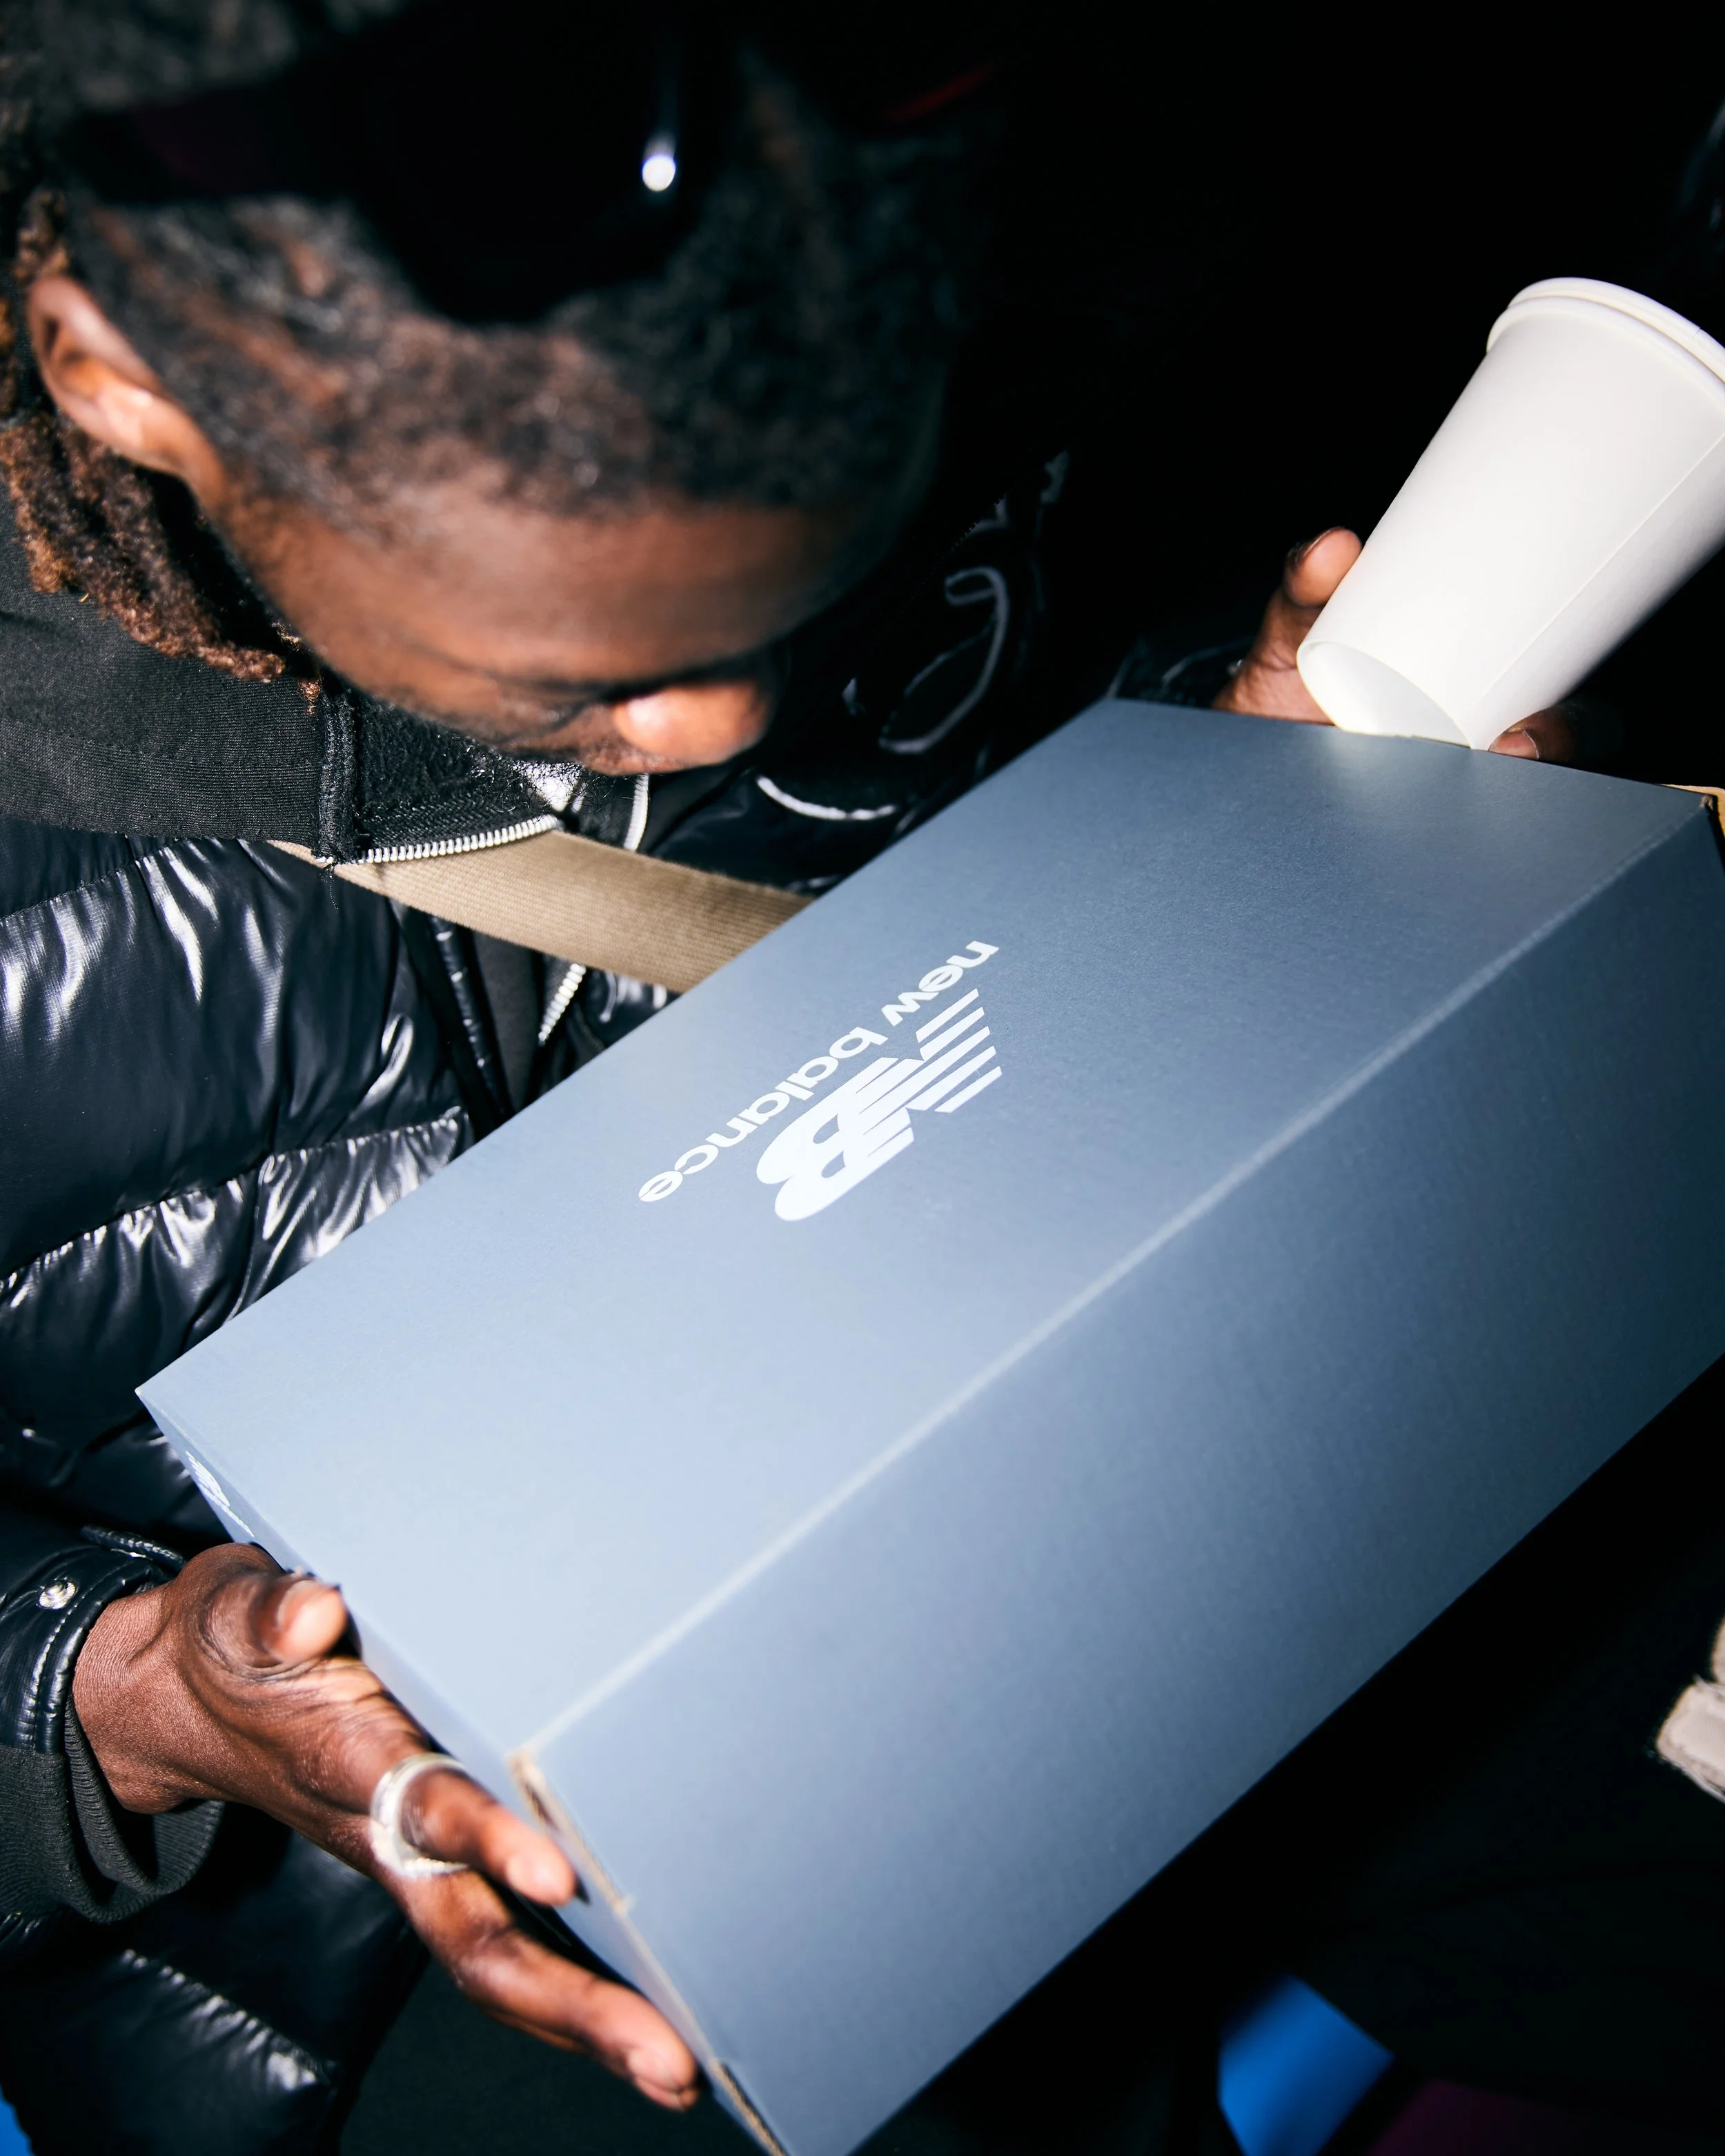


Throughout the night, performers received 30+ pairs of New Balance trainers, as well as a fully stocked bar for all ticket holders too. People came through for the music, and left with new connections, new memories and a new idea of the atmosphere we want to create in 2026.
That’s what made this one special.
For us, this event showed exactly why the UK’s underground community is buzzing right now. When brands show up in the right spaces, with the right energy, they can connect and become part of culture in a truly authentic way.
We are proud to have hosted this with New Balance and Footasylum and even prouder of the community that showed up and made the night what it was.
Big love to everyone who came down, everyone who performed and everyone who helped bring it together.
Community first. Culture always.
See you soon.
Team Echo ©
🌍


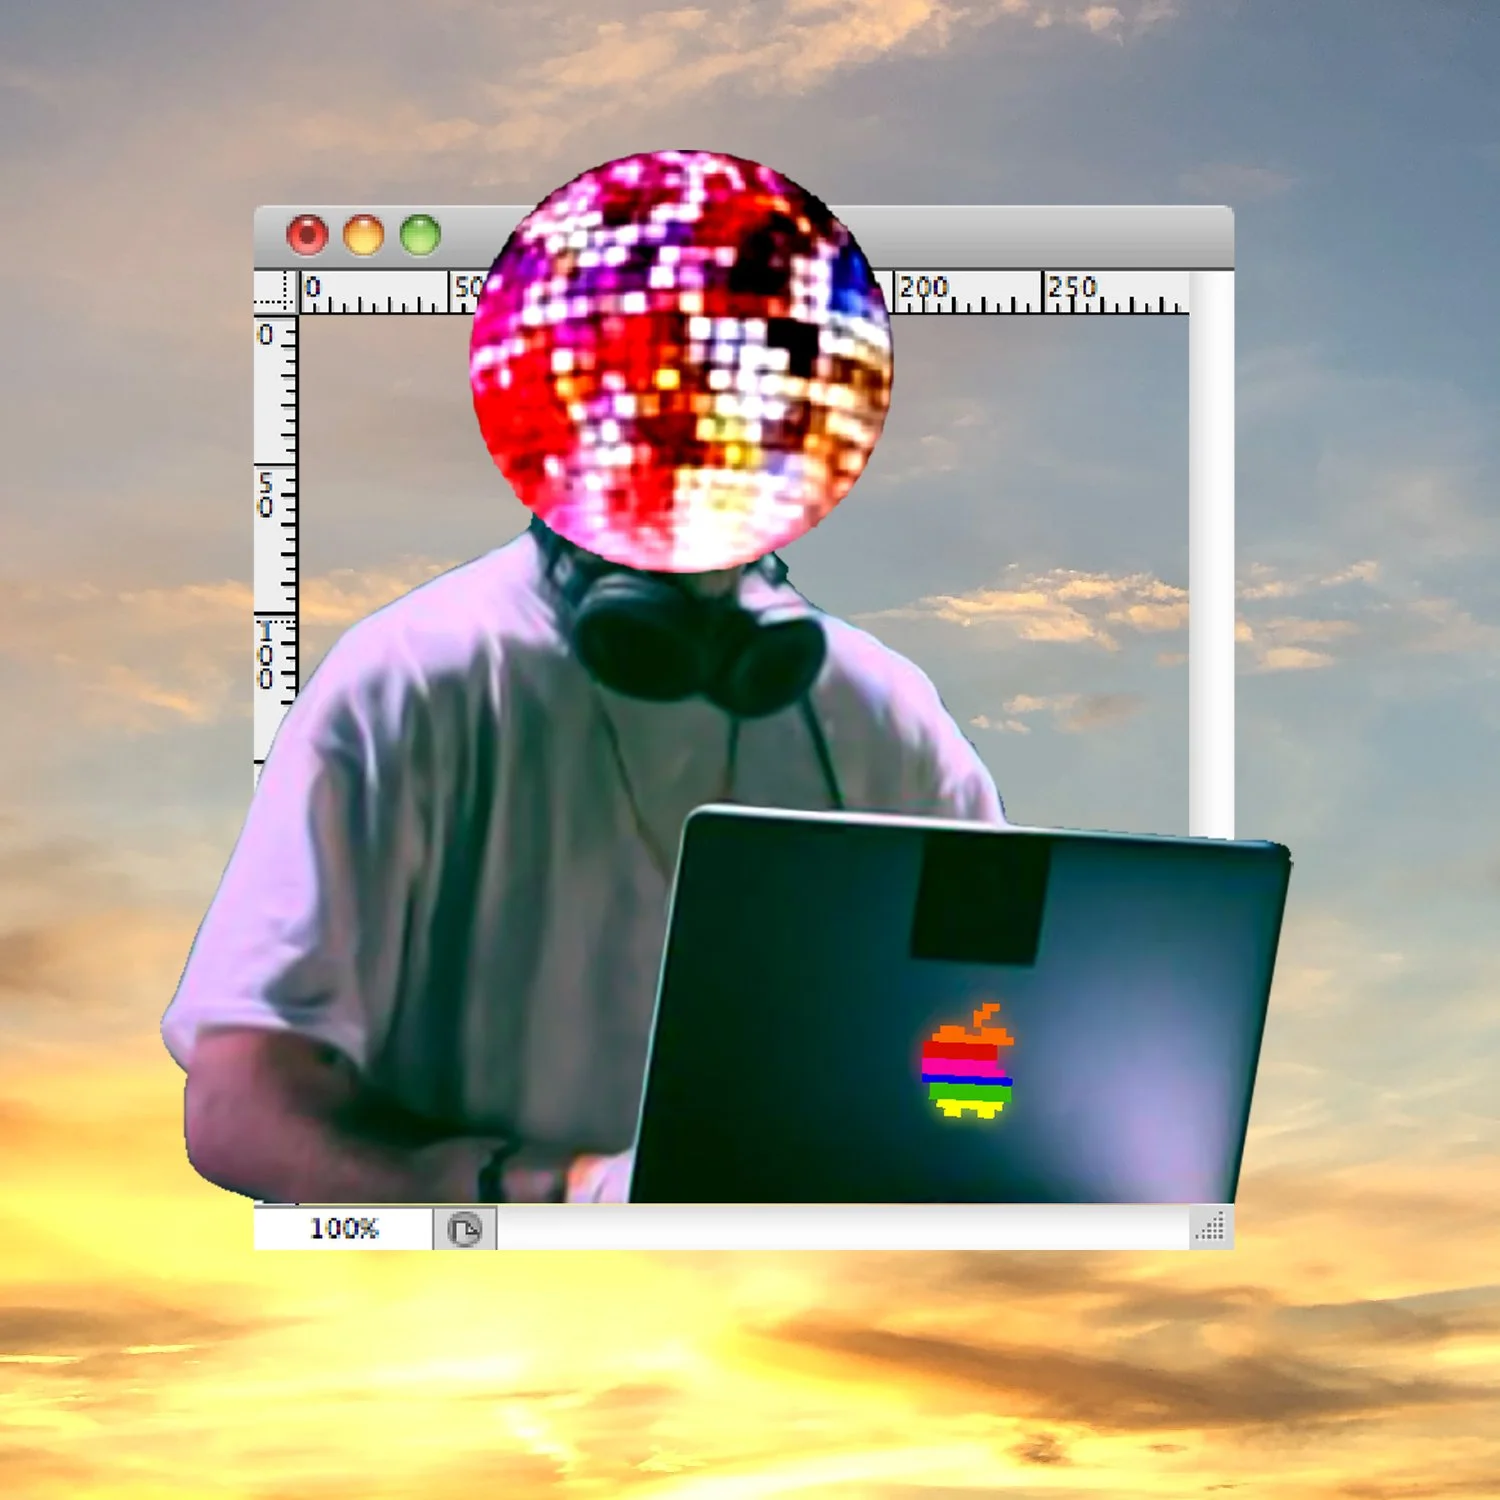
Why No-one Is Finding Your Music: Essential Advice for Young Music Producers
You’ve just uploaded your latest track to Spotify via DistroKid. You hit publish, you wait… and nothing happens. Why? We've put together this short guide to help answer how to fix this music marketing failure: improving your relationship with social media, enhancing your creative process and growing your music profile all in a simple 5 minute read.
You’ve just uploaded your latest track to Spotify via DistroKid. You hit publish, you wait… and nothing happens.
You might think you just need to “be patient.”
You see people on social media saying you can’t ‘chase the algorithm’.
Long videos on Youtube overwhelm you with paid sponsorships and too much information.
But here’s the real truth:
Uploading your track isn’t promotion. And if you’re not actively building your presence, no one’s going to find your music - no matter how good it is.
Let’s break it down.
there is a 1/100 million chance someone discovers your music organically on Spotify (image source: Music Business Worldwide)
The Spotify Flood: Why Uploading Isn’t Enough
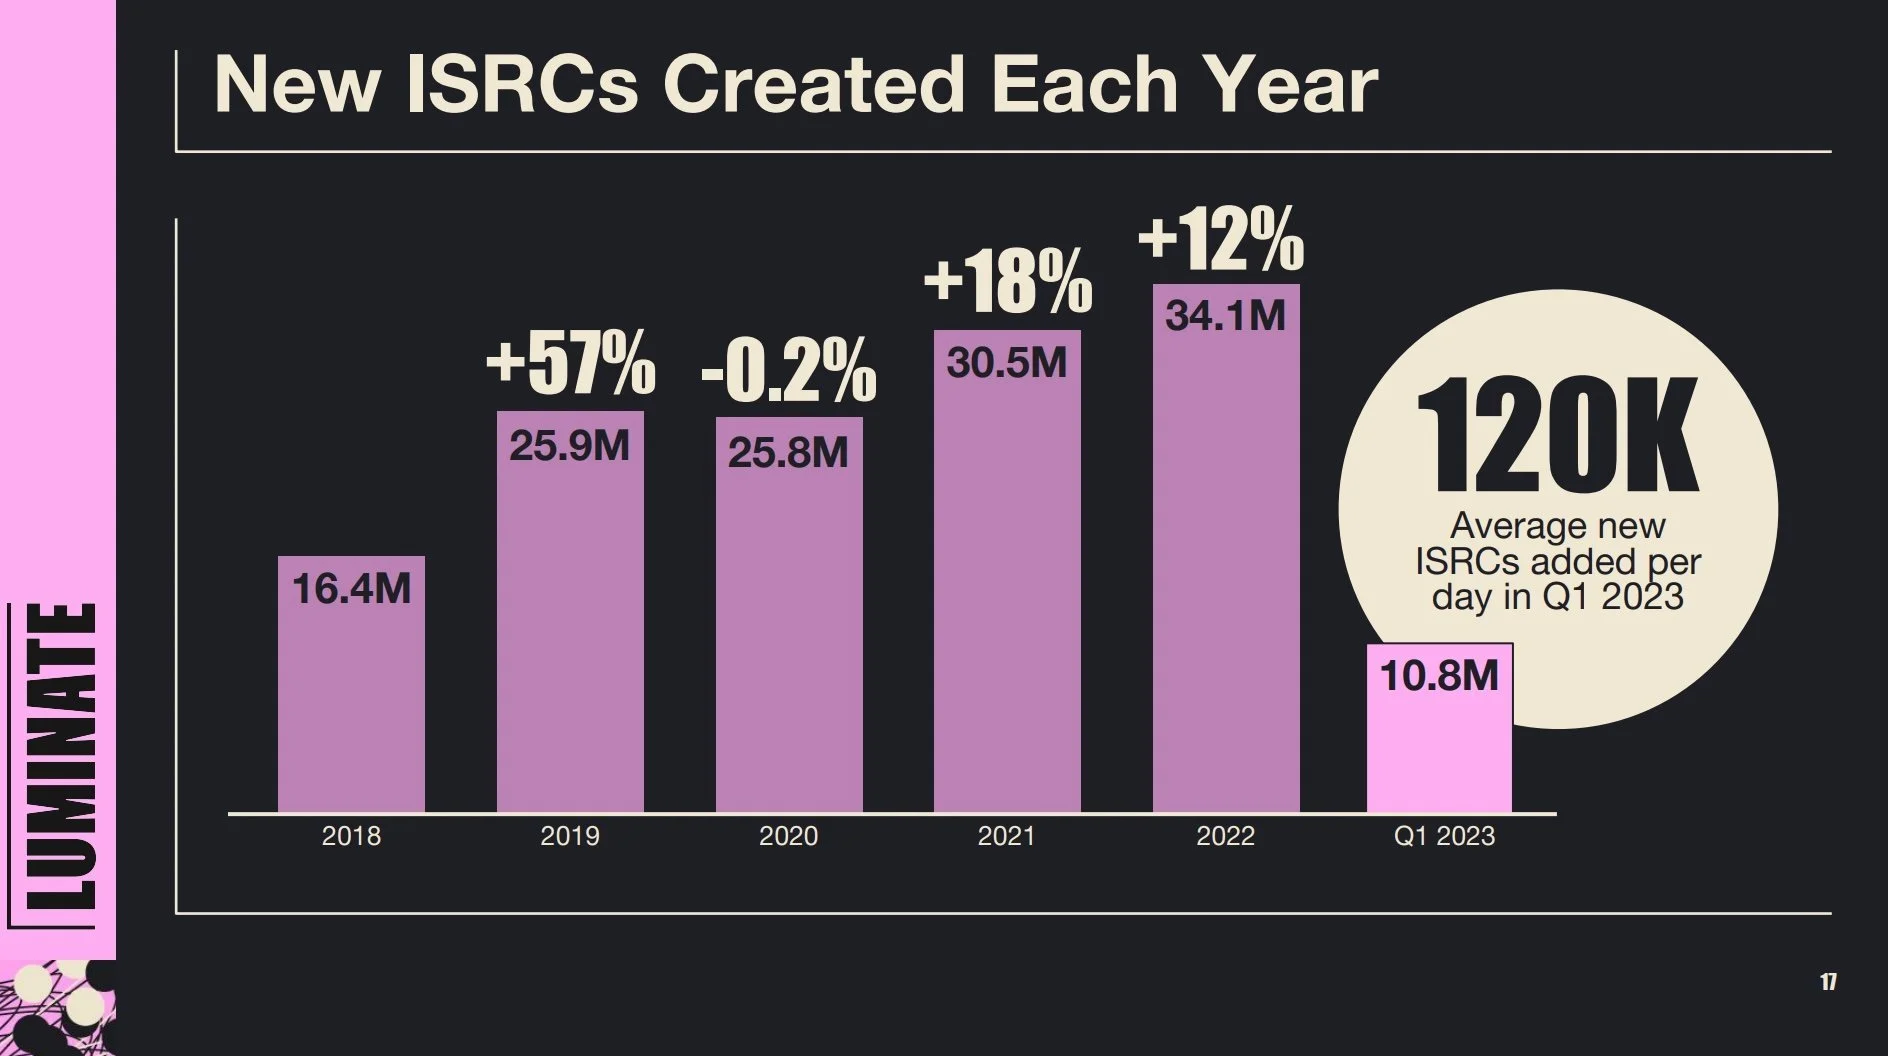
Over 120,000 songs are uploaded to Spotify every day. That’s one new track every second.
With that level of saturation, you can’t just drop a track and hope someone stumbles across it.
Spotify’s algorithm is designed to surface content that’s already getting attention elsewhere - especially on social media.
If you’re not actively promoting, you’re never going to show up in key playlists like:
Discover Weekly, Hot New Music, Fresh Finds, Daily Mix, Rising Stars, Radio
+ genre-specific recommended & editorial playlists.
Spotify isn’t a discovery platform.
It’s a hosting platform.
But can’t people just find my music on Spotify organically?
No.
There’s less than a 1 in 100,000,000 chance that a user on Spotify stumbles upon your track. About 3x less likely than getting struck by lightning…
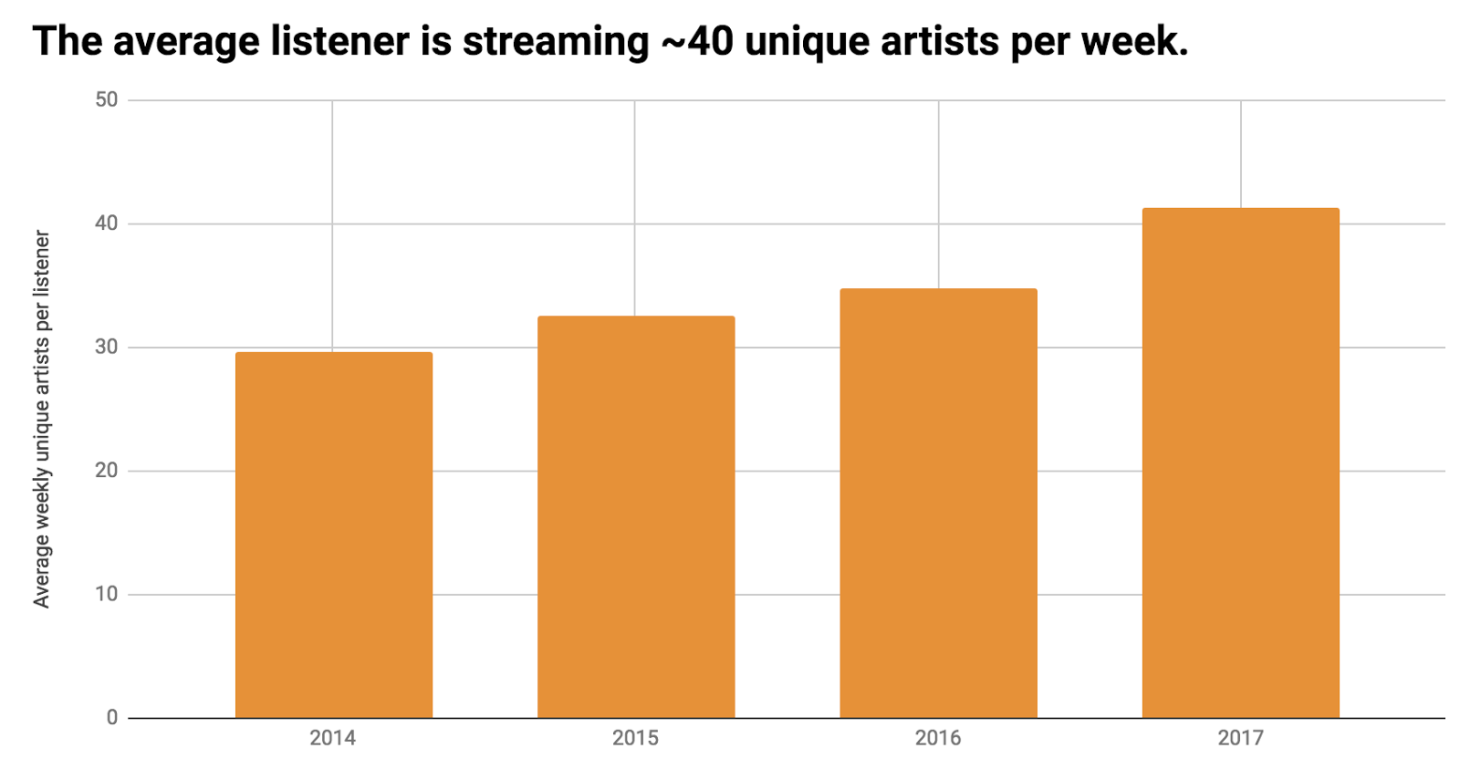
The average Spotify user listens to only ~40 unique artists per week. You have to compete with 11 million active artists on the platform (source: FlyPaper)
Posting ≠ Promotion
One of the biggest mistakes young producers make is thinking that posting a song on Instagram once is enough.
It’s not.
90% of Gen Z music discovery happens through social media first.
If you’re only using one platform, you’re missing most of your audience.
On average, every social media user needs to see you 3-10 times a week to remember you.
It takes up to 30 repetitions of a song via passive listening to make it memorable.
TikTok, YouTube Shorts, Instagram Reels, and even Discord are where your listeners are actually hanging out. Without multi-platform content, you’re practically invisible.
Posts don’t ‘just hit’ on the algorithms either.
And anyone who is telling you this isn’t being truthful.
Spotify follows the same principle - songs don’t just ‘blow up’.
The data that goes into the big playlist placements is all to do with you and how you present yourself.
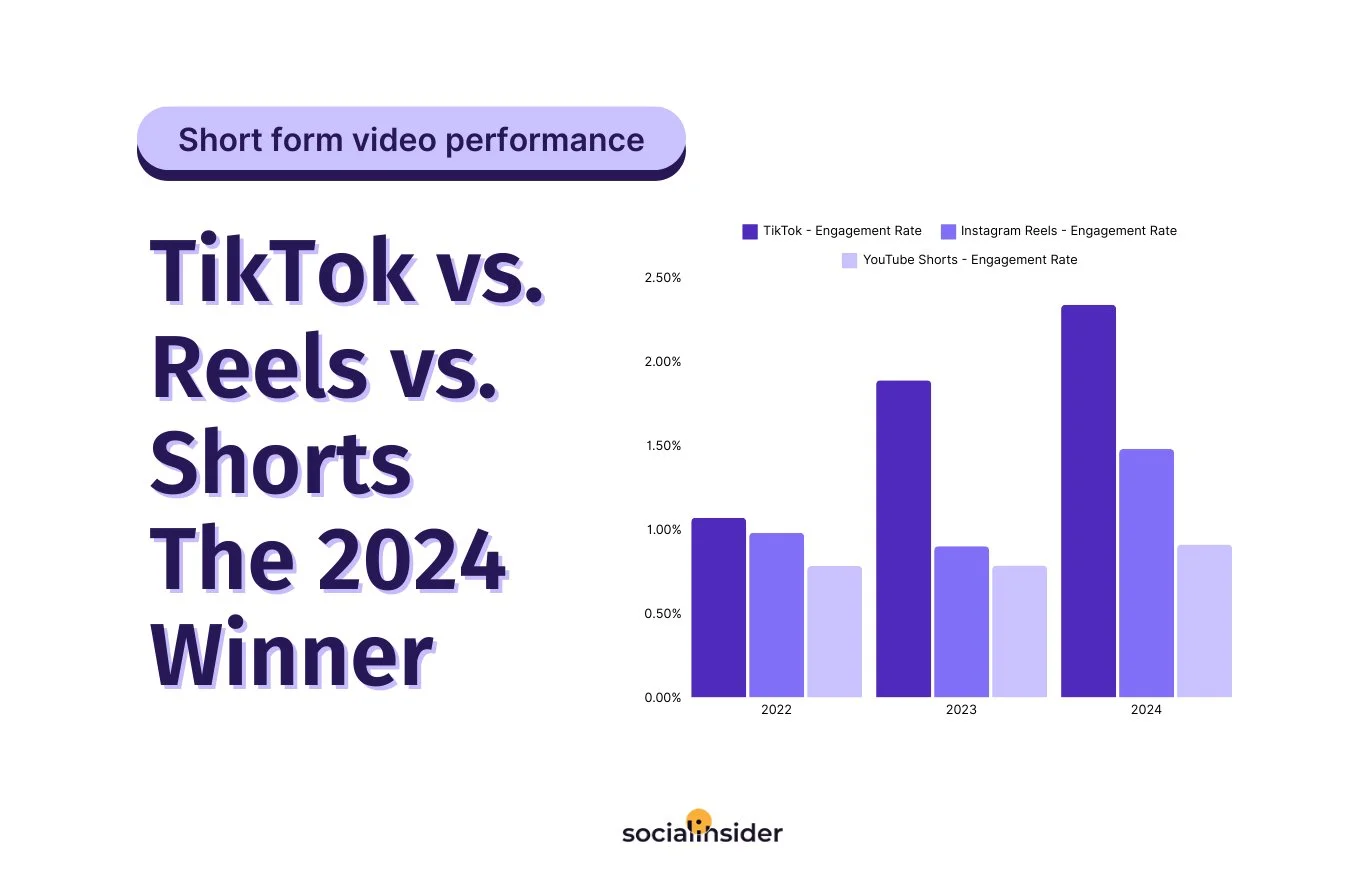
TikTok for the last 3 year has a higher engagement rate than any other social media platforms. (source: SocialInsider)
TikTok vs. Instagram
Instagram has recently become a very poor tool for promotion, especially within niche genres.
This is because Instagram has highly specialised algorithms, which creates narrow ‘artists only’ ‘closed’ networks of users. Most of your engagement in these ‘artist only’ circles will be other artists - not real organic fans/listeners.
“Why is no one finding my music” is a question thousands of artists are Googling right now. You’re not alone.
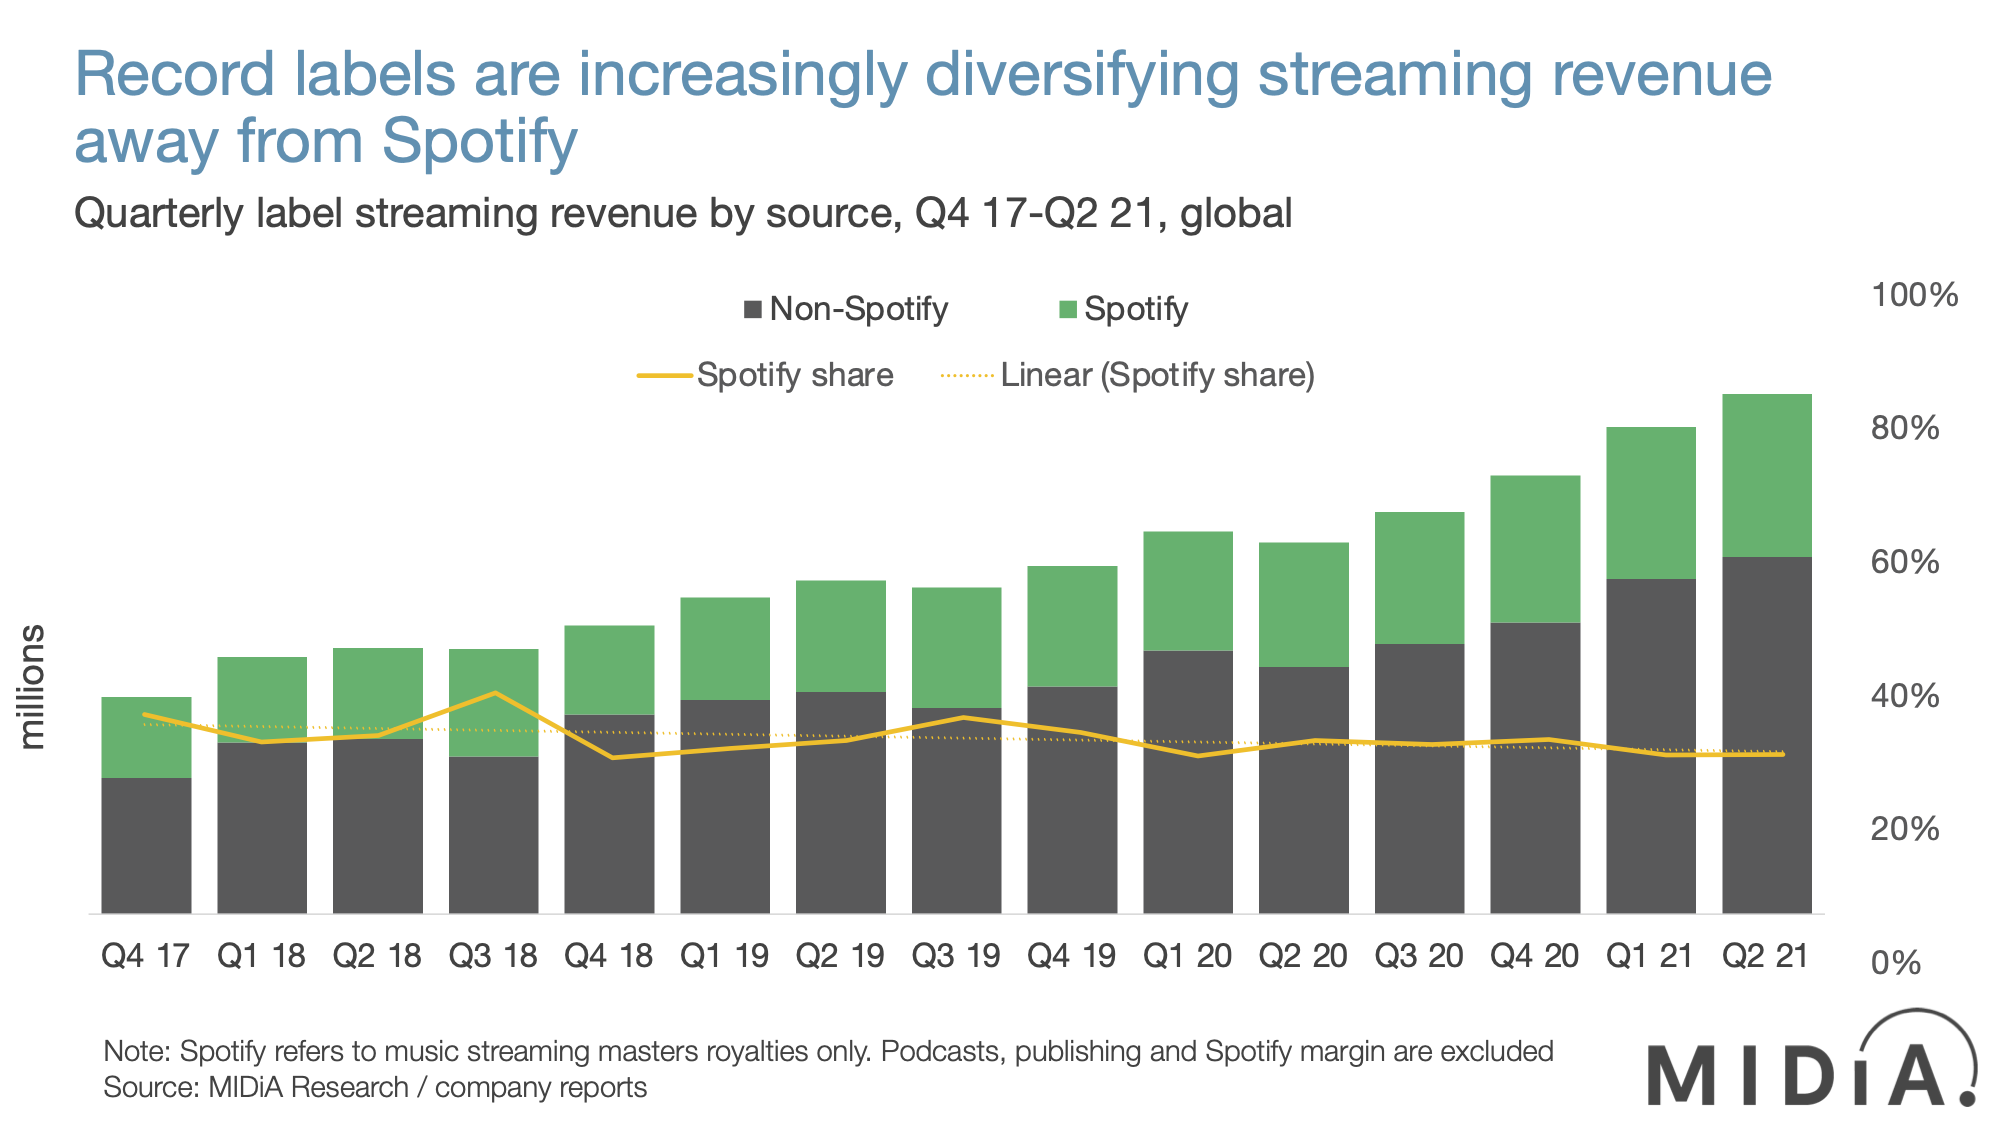
Spotify may be making more profit, but labels and artists are increasing moving away from the platform (source: MIDIA Research)
Show the Process, Not Just the Product
People don’t just want to hear your track.
They want to see how you made it.
And we’re not talking a screen-recorded FL Studio session with a trippy video filter on it…
We’d recommend including in your videos:
Your beat-building workflow
Gear breakdowns
Sampling tricks
Favourite samples
Music history (artist bios, famous events, festival horror stories, culture defining music moments)
Public beat-making sessions (like ‘beats in the wild’)
Behind-the-scenes photos of studio sessions
Behind-the-scenes setting up music video/live event
Pre-writing practices
This is the content that stops people scrolling.
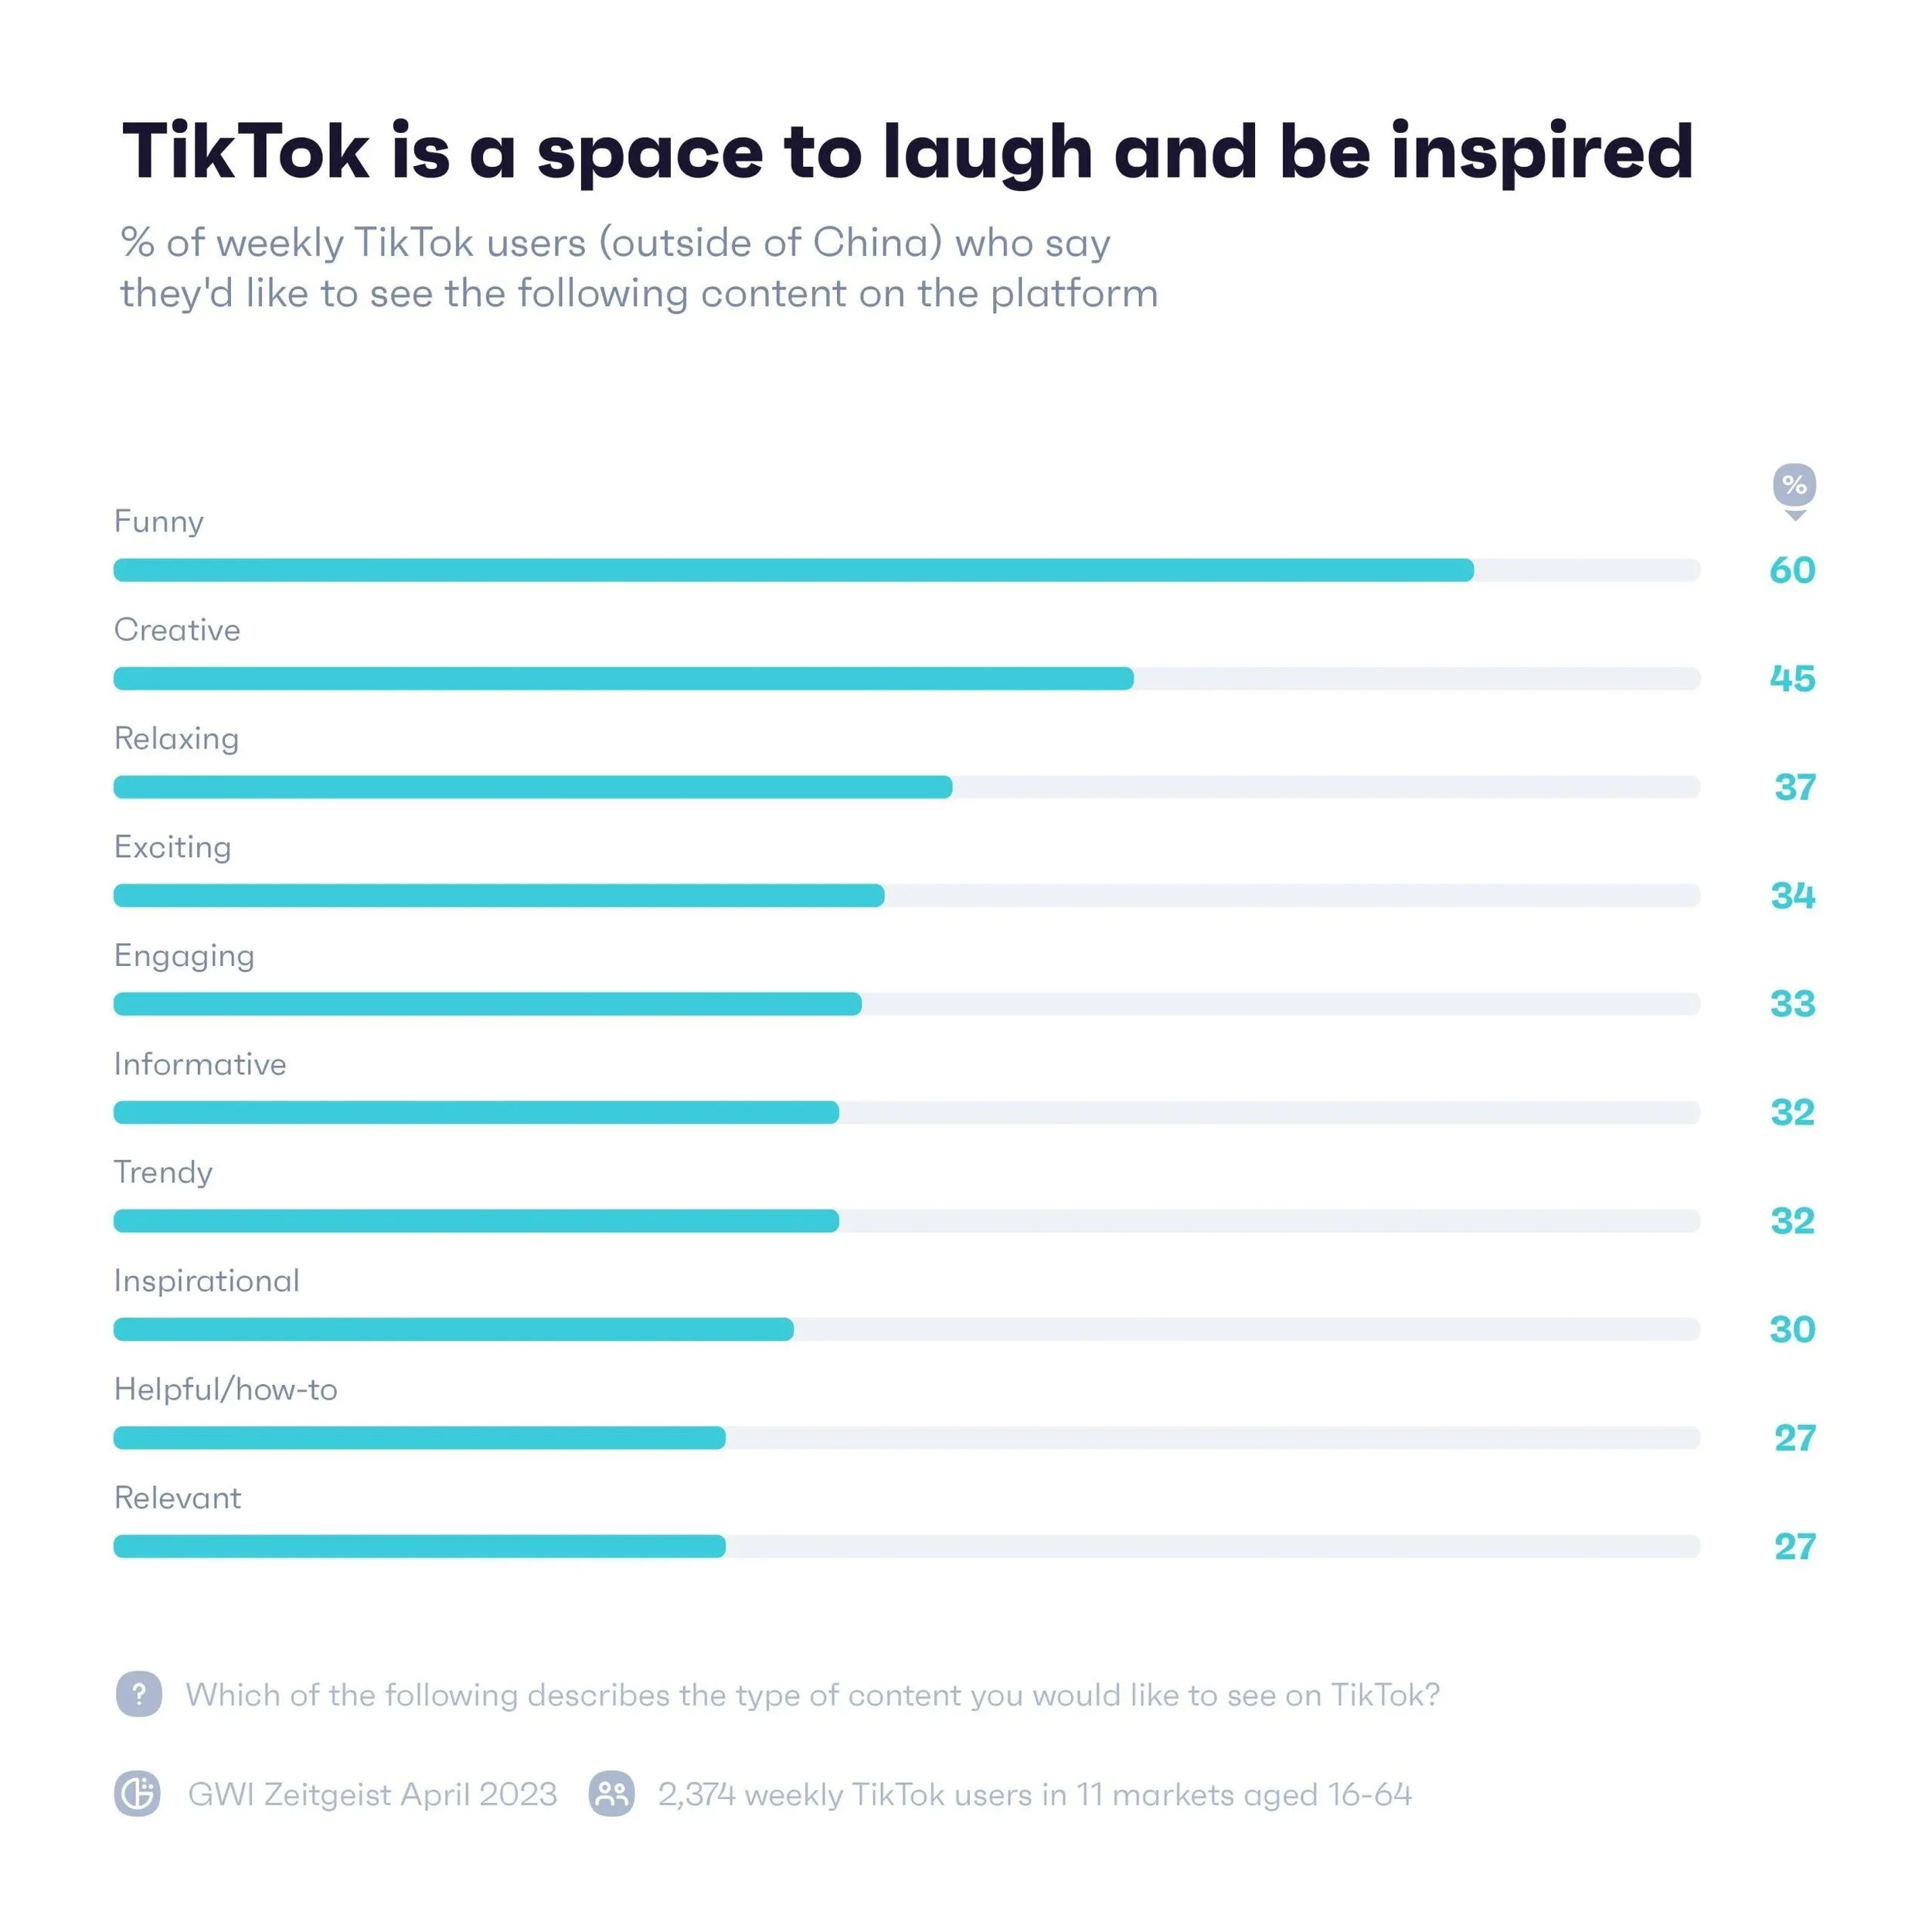
‘Relevant’ content is actually the least enjoyable to Social Media users - people would rather see something funny or creative (source: GWI)
If you’re just starting out (~1000 followers), start on TikTok.
TikTok has the highest engagement rate, highest daily usage and lowest ‘cost-per-click’ of Paid Ads across all major social media platforms.
Instagram is the second most useful for music producers & artists.
But, Instagram has an aging community.
It’s great for making connections and promoting products.
But not for growing a long-term, engaged following of listeners & fans.
People are 5x more likely to interact with you on Tiktok. Also, people spend around 3.5x longer on the TikTok app per day too.

People spend 4x longer on TikTok than on Instagram per day. (Source: UKOM via IPSOS)
Build Your Community: Don’t Wait for Them to Find You
If you’re not actively involved in producer communities, you’re missing the fastest growth path.
These spaces are where collabs, feedback loops, and real supportive communities are built.
By finding likeminded people online, you can collaborate on writing, promotion and get instant feedback on your ideas.
Don’t know where to begin? Googling “producer community on Discord” is a good place to start!
Multi-Platform or No Platform
Relying on a single social channel is limiting your reach.
You should:
Post beat snippets on TikTok
Upload breakdowns to YouTube Shorts
Engage on Discord servers
Re-share content on Instagram and Twitter/X
The more places you exist, the easier it is for people to discover you.
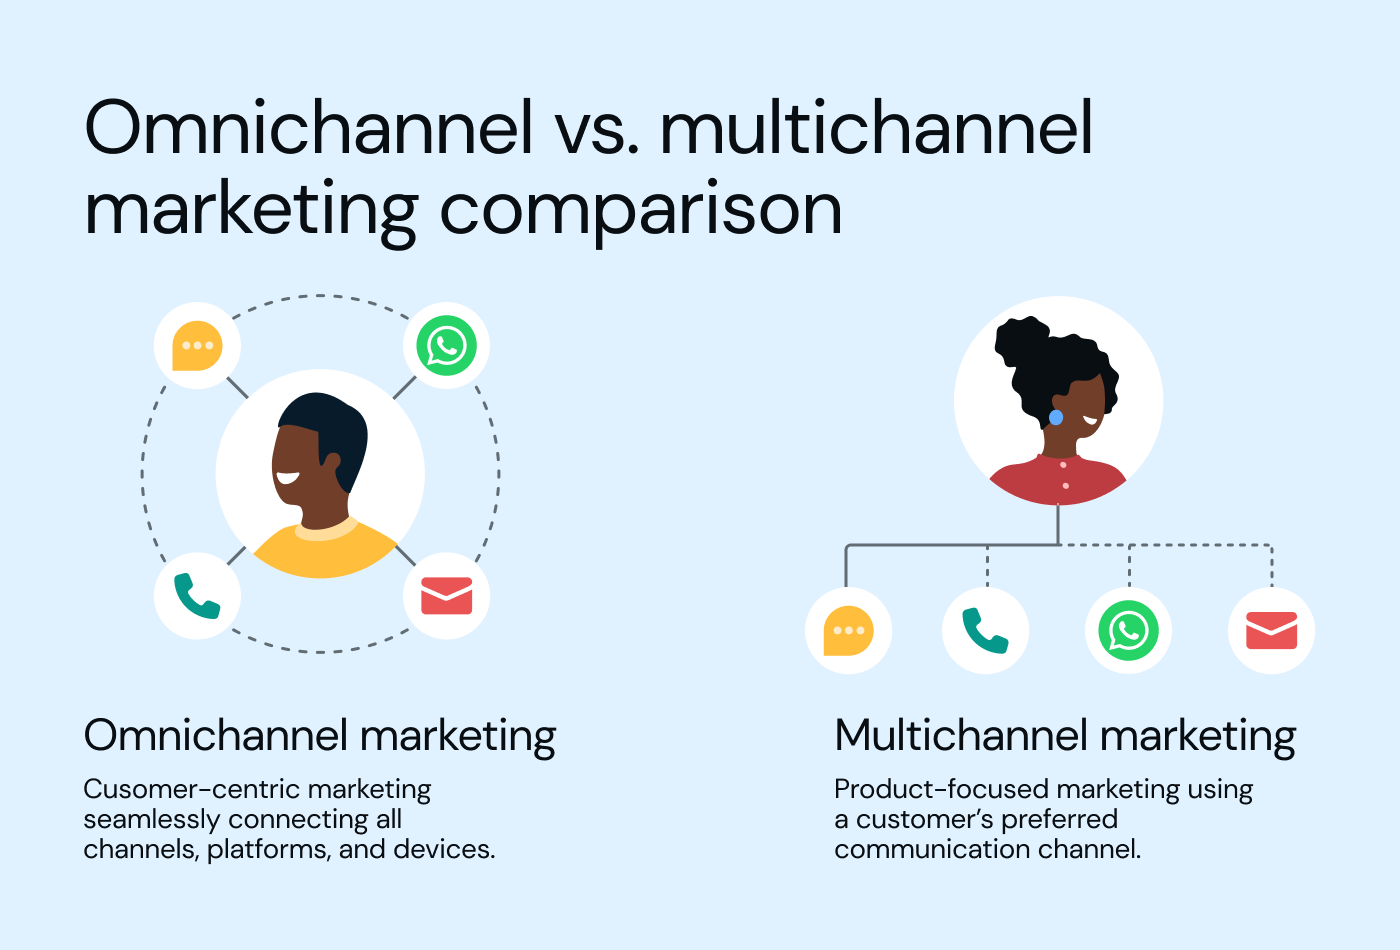
Regularly using a Discord across mutiple servers to promote your music is a form on Omnichannel marketing (source: Sinch)
Key Action Steps
Don’t just upload—actively promote.
2. Be visible on multiple platforms.
3. Show your face and your process.
4. Join Discord and talk to your scene.
5. Stay consistent—post often.
Your music deserves to be heard.
But in 2025, if you’re not promoting smart, you’re invisible.

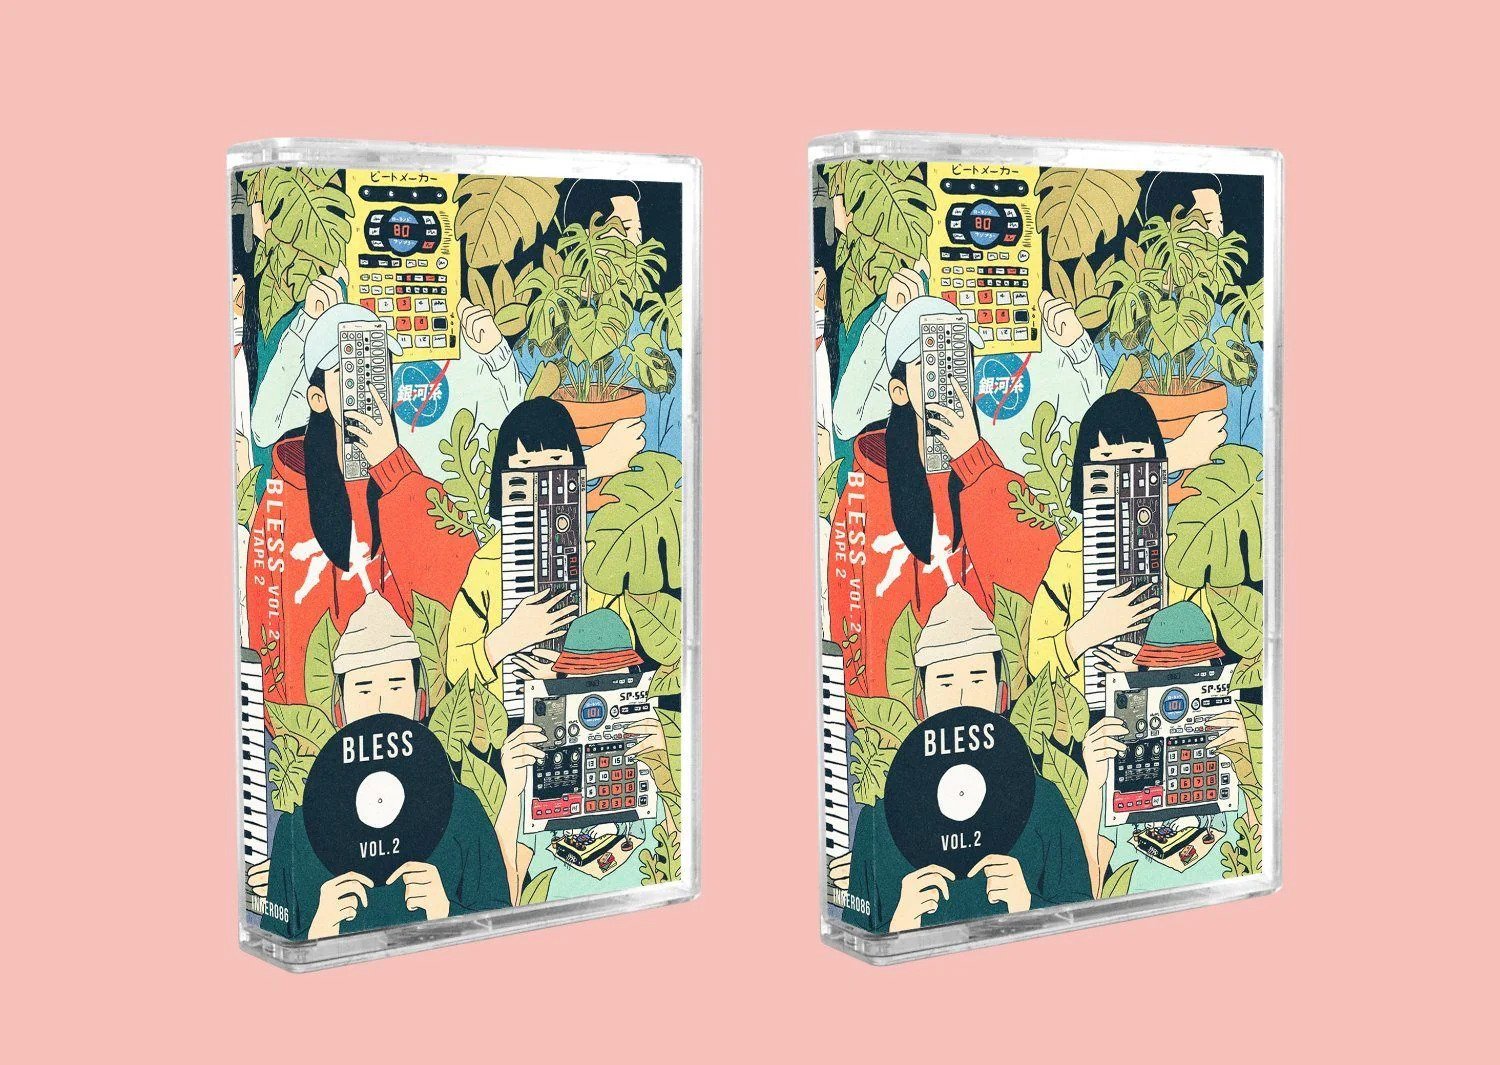
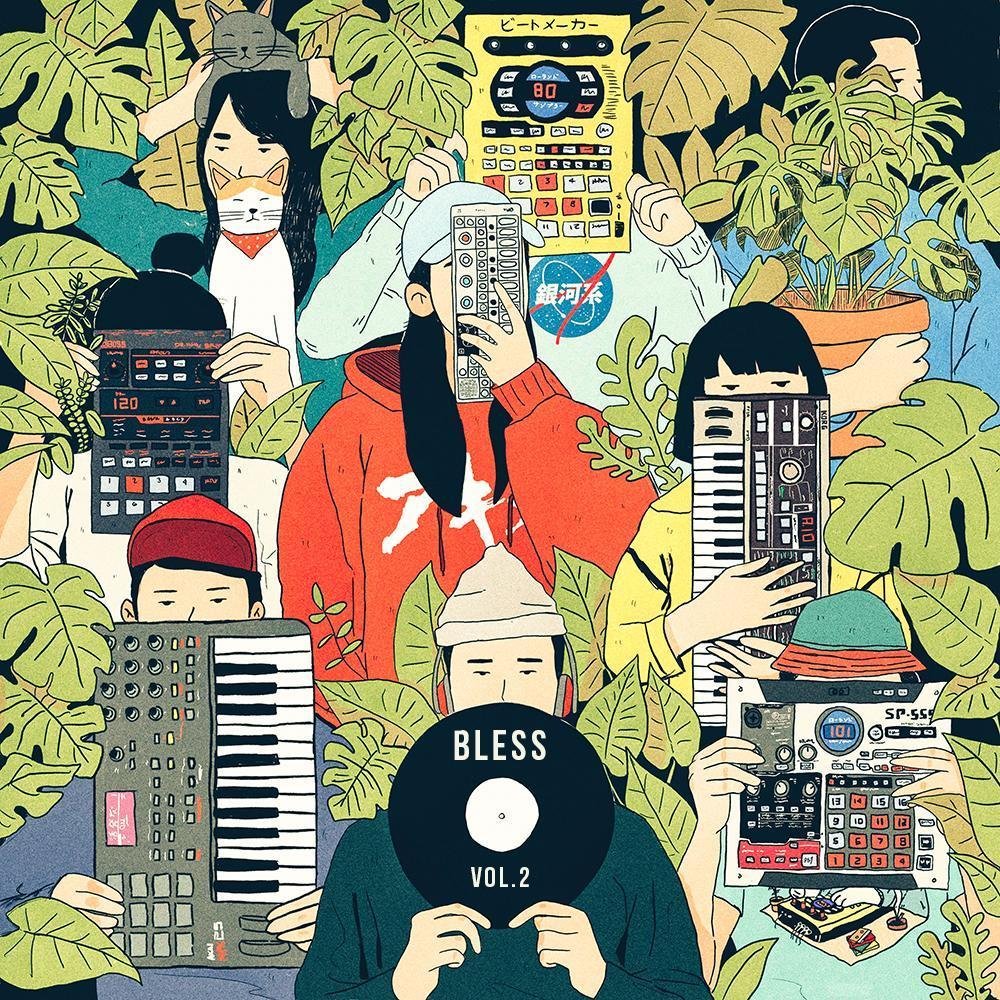
Release Good Music with Good People: An Interview with Inner Ocean Records
"In terms of how I run the label, the guiding force hasn’t changed since we started: release good music with good people."

Inner Ocean Records is a flagship label within the Lo-Fi/Downtempo space.
But take us back to the beginning…
What sparked Inner Ocean’s creation?
The label started with wanting to create our own community of artists and make a space for releasing music; that was flexible and adaptable to each artists needs. We love physical media, so we were inspired to design our own releases on CD/Cassette/Vinyl… and get them in the hands of fans around the world. We started with ambient and experimental music, then after a few years started releasing lofi, beats and hip-hop which lead us later towards jazz, soul, r&b as well.

Inner Ocean is regularly mentioned as a cornerstone of the lo-fi hip hop movement, with many classic albums in your discography.
Did you ever envision the impact you were going to have with Inner Ocean Records?
Short answer is no.
I’ve always just released projects that I like and tried to slowly build community along the way. I think it’s hard to grasp what impact you will have on a global online community, especially when you’re looking at it from the inside and just focusing on the next projects you’re working on.
From the early Inner Ocean era, what are 3 albums that you listen to still and excite you - even today?
Favourite albums from the early days in no particular order:


One of the first amazing releases we put out was by Iranian ambient artist Porya Hatami, his “Land” album is still one of my favourite go to ambient records.
It’s a stunning album.


Second, my good friend Dominic Pierce from Calgary, his album “Hoop Loops” is still a massive favourite.
His art direction, subtle humour and amazing production still holds up and will be a timeless classic.


Third, Brother Mynor “Celebrities Doin Thaangs”. I’ve never encountered another album quite like this one, it’s musically brilliant and hilarious.
Inner Ocean has a strong, distinct aesthetic…
What are your biggest influences/inspirations behind these unique designs and visual identity?
I like a lot of colour and artwork/designs that stand out.
My driving force is: I imagine what an album would look like if I saw it randomly in a record store, if the artwork would stand out to me enough to want to pick it up and see what it is then the artwork is a success to me.

For those looking to dive into the world of physical releases, what’s the most important bit of advice you’d give from your experience of running a record label?
If you’re starting out printing physical music, the artwork is absolutely essential!
At this point in history no one really “needs” physical media to listen to music, so now it’s more of a collectible luxury item. So you need to take the time to make sure you design it to be a standout in someone’s collection. Go the extra mile and spend a bit more to make sure the package is beautiful.
Ambient, lo-fi and the music industry in general has really evolved since Inner Ocean’s inception.
How have these changes impacted your approach to running the label?
I think you just have to keep a keen ear to the ground, and stay on top of the shifting landscape.
Don’t be afraid to try new ideas and follow your gut on your next steps. I’ve seen the rise and fall of many platforms, artists and labels. You know that everything is going to change eventually, so you just have to put out projects that you’ll look back on and be proud of.
In terms of how I run the label, the guiding force hasn’t changed since we started: release good music with good people.
Outside of your own releases, could you name some albums for us that changed the way you think about music?
In my youth in the 90’s, I grew up listening to alternative rock, punk, metal, etc.
Music wasn’t so accessible back then so you listened to what was around you and what the scene was. Somewhere around 2003-2004 I discovered an ambient artist Steve Roach and his album “Mystic Chords and Sacred Spaces”, it was a massive 4 disc album on CD (I have an autographed version).


There were several things about this album and the artist that stood out to me:
1) musically it was on the opposite side of the spectrum from everything I knew and when I heard it I was converted to an ambient music fan for life
2) the length of the album was insane and all the tracks flowed together into a seamless piece of music
3) looking through Roach’s catalog I discovered that he was self releasing several albums a year and still does that to this day.
He has a huge catalog and he was shipping out the CD’s himself from his home studio. That might not sound like a big deal today but in those days e-commerce and running your own online store was a new concept.
That was a big inspiration for me and how I started and still operate the label.

Similarly, around the same time I came across an album by John Frusciante that he released online for free called “From The Sounds Inside”, it was all recorded himself on a 4 track tape recorder. The songs are very lo fidelity, I think this was the first time I heard something that wasn’t professionally produced in a studio and realized that music made in your house in a very raw form was still amazing.
What’s one thing your listeners/followers wouldn’t expect about you?
I’ve been making ambient music in different ways and under different names since the early 2000’s.
I think some people might assume I also make beats, since that’s what our label is known for, but beats are not my forte.
Is there one big thing you’d like to achieve with your platform before the end of 2024?
This year we have partnered with a local business I Love You Coffee to have a record store within their cafe.
We’ve been slowly building it out but by the end of 2024 there will be several thousand LP’s and tapes to shop and dig through. We are also trying to partner with other independent labels to feature their albums in the store.
Could you give us a sneak preview of what Inner Ocean Records has planned for 2025?
I can’t say.
We’ll just keep doing our thing.


Find Inner Ocean Records on
Website | Spotify | Apple Music | Facebook | Youtube | Instagram | X | Bandcamp | Soundcloud
Who should we interview next?
~
Leave a comment below
~
Who should we interview next? ~ Leave a comment below ~

Magic in Small Things: An Interview with Flapjaques
“I think that I have a pretty bright and uplifted perspective of the world and see a lot of magic in small things / my day to day. I'm often a bit bummed out when others don't have that same lens, so my biggest influence right now is a drive to share that way of seeing things with others.”

Hey Flapjaques! For those who don’t know you, please introduce yourself.
Hi! :):) I'm Flapjaques, a Chicago based lofi producer, DJ, beatmaker, etc-
I'm not so particular about those sorts of labels these days, and they each sorta apply in some ways and sorta don't in others.
Call me the Chicago Lofi Authority <3
What’s your biggest influence for starting flapjaques?
This is such a difficult question to answer…
Right now, I think that I have a pretty bright and uplifted perspective of the world, and I see a lot of magic in small things / my day to day. I'm often a bit bummed out when others don't have that same lens, so my biggest influence right now is a drive to share that way of seeing things with others.
My influences creatively have always been from EDM more or less, a lot of my synth selection is inspired by Flume, xxyyxx, & Louis the Child, and from sampling by YehMe2 & Keys N Krates. I listened to Flume, YehMe2 (when he was still part of Flosstradamus), and xxyyxx in high school, and these three have always ended up being part of pretty much any sort of mood board or thing like that I've put together since.
Discovering and becoming a fan of Louis the Child later on I think is what I'd say fully motivated me to start actually making music and thinking about pursuing it in a serious way. By that time I had picked up guitar and some very basic DJing - their being a similar age and from a similar background to myself had made that lane feel a bit more realistic. Back then, I was mostly DJing and aimed to make synth-y electronic music similar to them.
My Hip Hop taste leading up to (and during) that period had been pretty basic I guess! Very Mac Miller & Chance the Rapper focused, and I'd say my interests in the genre branched from those two.
I have fond memories of scraping Datpiff for mixtapes to burn to CD for my car rides, however; and as I revisit mixtapes like Acidrap or Macadelic, albums like Faces, or some random Earl Sweatshirt tracks, I think a lot of those sounds stuck with and influence me in a subconscious way… at least in terms of my sound/sample selection and things like that.
Your music is very organic… What does your creative process look like?
It's funny you say this! My process is almost entirely sample-based these days, although I have gotten a bit better at writing and progressing more lush layers and simple top-lines over the years. I have frequent opportunities to work with talented composers & performers, spanning a variety of instruments and genres, so their skills are often the centre pieces of my collaborative work. I see my strongest ‘areas of expertise’ being on the drums, laying down background chords, layering textures/sfx shots I've gathered on a special harddrive for almost five years now… and more recently chopping up pretty much any kind of sample- more of a mood thing there.
With any project though, I almost always find something I like to start with, even if just a quick 2 second sample, and build everything else around it.
Your choice of performance hardware is the Roland SP-404 and SP-555… How have these two pieces of equipment affected how you make music?
Not really at all to be honest! Both are more performance mediums for me than anything else. I always intend to take some time to sit and cook with either, but I find it to be a bit tedious and ultimately less productive than other workflows I'm more comfortable in.
My thoughts here apply not only to the 404s & 555 but really to a lot of analog/more classic gear in general. I think it's a somewhat fun, albeit difficult decision of the modern producer to decide which of the more 'old school' workflows are beneficial and worth the payoff, and which aren't worth the effort.
It's sometimes a bit ‘trippy’ to be sitting in a studio setting, Youtube playlist in hand, with the LED display on the MPC screen looking up at me from my lap, wondering if the magic of the sampling workflow is a bit lost in this more modern flow… but more recently I like to think there's an awful lot of nuance & empowerment in it.
The 404's ability to run off batteries is something that offers a great deal of freedom. I hadn't made use of it for a regrettably long time, but it's become a great motivator for getting myself out of the house and into new & interesting locations for filming content. This has a somewhat subtle way of influencing my workflow, meaning if I'm looking forward to going somewhere in particular, I'll probably put together a small collection of tracks ahead of time to then perform there. Although sometimes, I change my mind about what I'd like to record last minute anyways.

You’ve kept up a steady stream of releases… Do you ever get ‘beat block’?
And how do you overcome that?
I can't say I really do anymore, or at least not recently enough that I remember. I'm fortunate to have both the time and energy to split up my overall workflow into different, smaller workflows, and I would say this is the driving practice that keeps me making music on an [almost] daily basis. I find chopping samples on the MPC to be really fun, and if nothing else, will often spend at least a whole evening cutting up a few samples to finish in a DAW later in the week.
There's always a bit of luck and magic to this particular workflow, so some weeks I may prep more than 10 of these little "sketches" before finally making it to DAW, others I may only get one or two. When this workflow gets tiring, or I run out of sketches to make into full beats, I'll then move into more traditional DAW-based workflows, often with files from collaborators or with loops I've written and set aside from my 3rd, far less frequent and least favourite variety of flow (melody writing day lol).
Apart from this, I guess being organized is both fun and practical!


Lately, I've had a lot of fun stepping back from my overall hustle every few months and putting together a new kit to guide my drum soundscape for upcoming projects. I'll usually base this on one-shots I hear in reference tracks that I've noted and plan to use later, and I suppose with each iteration of doing this I end up with sounds I put into different 'Flapjaques Kits'. This usually becomes the main folder I use for my drum selection. I remember a time where I'd do the opposite - make a point to always use a different snare in every beat for example - and I've found this newer approach to be more productive and also lead to a more cohesive sound for myself.
The ‘Flap’ kit is always on my MPC and makes my workflow much easier, which may be a big part of why it's so fun; things are almost ‘plug in and play’ in a sense. Those 'sketches' also allow me to do a bit of arranging in my head, to envision how the sections will loop & progress, so by the time I hit DAW, I already have a pretty solid sense of how the beat will go… and I just need to add some additional layers and textures. I mention this because even when not using my little sketch workflow, I've found it useful to engage in a similar practice of looping and listening back to melodies that collaborators have sent me the day before I start working on the track. The overall approach for me I guess is a lot of thought & planning… so that when it's time to execute, the energy is where I'd like it to be, and I already have a clearer sense of what I'd like to do [with the track].
You’ve created a strong and supportive group of listeners… Was this a conscious process?
Do you have any tips for cultivating a strong creative community?
Aw thank you!
I don't think it was much of a conscious process in the early stages or even last few years of my "career", which feels a bit weird to say still, but definitely has become more of a conscious process in this past year and moving forward.
From the start, I've always tried to be very responsive and available to both opportunities and conversations with other artists in the scene, both of which I think have been the driving factors in building the audience I have now. Like most Lo-Fi producers, I think the majority of my listeners are other producers or artists who, apart from enjoying what I do, may be seeking advice, as well as inspiration, friendship, or any variety of things really. I often think there's an interest in me beyond just what I'm publishing week-to-week on DSP's, or daily on Reels & TikTok. This is something I have always really embraced.
Ultimately, I think that what I'm doing right now is pretty achievable. Most people can emulate what i’ve done through consistency, as well as a willingness to be flexible with their idea of what their creative career will look like. Mine looks much different than I dreamed it would when I started (I think) 5 years ago now, but I wouldn't have it any other way. I think that with the tools, platforms and resources available, there really are enough ‘pieces of the pie’ to go around!
Who are 3 artists from your community that you think readers should check out?
Elan Brio was an artist I was listening to before I had started making music myself, and has remained one of my favorites to this day. Always has a solid knock & groove; Elan is a go to summer vibe for me.
Half Blue is an artist definitely keeping that rawer, sampled Jinsang & Nujabes era of production alive, love to see it out of the Midwest as well!
Milocero has been hitting my summer rotations a lot as well this year, bro goes crazy on the subs :)


What’s the most challenging thing you’ve had to overcome as an artist?
I think not overthinking things too much… kind of like how I've overthought my answer to this question and rewritten it a few times now lol!
I find myself in a sort of weird in-between these days, where I definitely want to be taken ‘seriously’ as an artist, but I don't always think my output is all so 'serious'. I hope to not come off the wrong way though - I think there's a great deal of freedom I've found in allowing myself to revisit samples & loops, play around with less productive workflows, and sometimes just see what happens.
For a long time, I had thought every end result needed to be a masterpiece, or at least I wanted to feel I had flipped a sample or built around a loop in the best way I ever possibly could. This often lead to a lot of meticulous worrying over small details, that now I look back, ultimately took away from the fun moments and vibes I capture now. It depends on the day, but most of my work as of late are just quick little bumps.
I haven't revisited too much of my own work (outside of the slowed reverb collection I've been slowly trickling out through the year) although I'd like to think I will one day; maybe when I feel like I truly have the freedom to take my time on a larger, more cohesive project. Something like a debut album? For now though, things stay quick and every day is new. It's a workflow I've grown pretty accustomed to over the past year and I wake up excited every day to do it.
What’s next for you in 2024?
Chicago Lofi Authority is my latest vision and the project I'm most excited about, for 2024 and years to come…
For now, it kind of just exists as branding for my releases & mixes with a more distinct Chicago style to them. I plan to have a 24/7 study station up by the school year on the Flapjaques Youtube Channel with a soundscape similar to the other mixes I've put out this year. This will probably be the point at which I start to include some other carefully handpicked artists in the CLA ecosystem.
For those who haven't visited the city, they can think of the style of beats featured as the more upbeat, productive, and uplifting sound; in contrast to the overwhelmingly relaxed and downtempo instrumental mixes currently available.
My latest mix, "lo-fi summer soul-fi chicago street race type beat mix", is my most exciting collection to date and reflec I plan to showcase. The mixes on my channel feature seamless transitions, similar to a DJ set, which is an aspect of them I've always taken a lot of pride in! The 24/7 station however will probably feel more akin to a traditional Lo-Fi radio. At this stage, I almost feel like I'm starting over and just spreading the word, but over time I plan for CLA to grow as an organization of midwestern artists that hosts lo-fi focused, hip-hop adjacent events throughout the city.
Apart from this, I plan to keep up my weekly release schedule of at least one new single each week, often a handful, and have a few larger bodies of work in the pipeline for later in the year, maybe 2025 ;)
Find Flapjaques on
Spotify | Youtube | Apple Music | Instagram | X | TikTok | Bandcamp | Soundcloud
Who should we interview next?
~
Leave a comment below
~
Who should we interview next? ~ Leave a comment below ~

Take Time to Hone Your Craft: An Interview with Ghost Phone
“The most challenging thing I've had to overcome as an artist is myself. Like a lot of people, I can be my own worst critic and put a lot of pressure on myself. I went in to this year determined to approach it differently and shake myself out of that mind set, I thought really hard about why I do this, what what I wanted to achieve and how I measure my own success.”

What is Ghost Phone all about?
That's an interesting question, I think Ghost Phone means different things to different people. Fundamentally I started it to join the dots between all the music I love, to merge US Rap and RnB sounds with UK Bass music. To push the limits of what RnB is and what it can be. It's very much an extension of my personality and my tastes. A personal project.
Ghost Phone has a really unique aesthetic.
What influenced you when you were putting together the concept for Ghost Phone?
There were lots of things that influenced the Ghost Phone aesthetic, some more overt than others. I'm certainly not the first to do it but I like that serious ‘music meets fun’ artwork vibe, the classic ‘Tom n Jerry’ records being a great example. I've always enjoyed pop art, so was fascinated by the idea of taking iconic imagery and making it your own.


On a deeper level I think the Ghost came about through a desire to not make everything about me. In recent years, everything is very much based on what you like look like and how you market yourself, and not so much the music. I get that it's kinda of necessary in the modern age but I didn't want to indulge that too much, so created a character instead. No shade to anyone that does do it that way, it's just not really for me.

You’ve had a strong influence on the Bristol & London underground electronic scene, while keeping a pretty low profile.
What is it about anonymity that creates so much hype in the UK underground scene?
I'm not sure I've had much in the way of influence to be honest - but I'm flattered you think so!
I don't hide the fact it's me… I just like to keep the information minimal if I can. People see an artist name or a tracklist and use this to decide whether they are going to listen or not, I hoped that doing it this way might encourage people to listen first and then decide.
I feel like anonymity can go either way, it can create real intrigue and mystique around what you do… or you can disappear in to obscurity. It's the risk you take when you do it that way.
Has it been difficult to promote the label without using social media? And what advice can you give people who don’t love promoting themselves digitally?
I do use social media but maybe not as intensely as others, I don't feel that pressure to ‘beat the algorithm’ and I'm not really a fan of content for contents sake. If I have a month without a show or a mix etc then I simply do not post anything and I'm fine with that. I like content that reveals something about the person doing it, that could be them talking about records they love, an insight in to their creative process, even them being funny (I love Luke Una's videos for this).
My advice to anyone who doesn't love promoting themselves online is to do what feels right and natural to you, there's no right or wrong way. just personal choice. Also, if you're a little camera shy (like me) you don't have to promote yourself necessarily, you can promote your art instead. You can post graphics, music videos, even sharing other peoples work can give people an insight in to you as an artist. Everyone wants to go from A-Z super quickly but it's not a race, I think it's important to take the time to hone your craft; build and connect with fans who genuinely rate what you do.
You’ve kept all of your releases solely on Bandcamp, with physical releases on limited-run vinyl.
What’s some advice for those who want to keep releases physical and stay away from digital streaming?
I do it that way for a few reasons. I've spent most of my life buying vinyl in record shops, so it's very much where I come from and what I know best. Its taken me a while to get my head around streaming and the benefits of it, if I'm being honest but it's something I'm starting to slowly delve in to.
My advice for anyone focussing physical products is that it's tough right now and to be prepared to not make a huge amount of cash. What you do get though, is a tangible item that you can keep forever. So it's swings and roundabouts.
What are 5 records that are essential to your collection?
1: Teedra Moses - Complex Simplicity


I love this album so much I named my pet tortoise after her. Every track bangs, it's perfection.
2: Snoop Doggy Dogg - Doggystyle


My dad used to play this in the car when I was young, it was my introduction to rap music. It also ignited my passion for p-funk, 80s groove and electro funk.
3: The Dream - Love Vs Money


Space-age RnB that still sounds fresh.
4: Nosaj Thing - Drift


I was a huge fan of the whole LA beats scene and Nosaj was up there with the best of them. Deep, melancholic business.
5: Yazoo - Upstairs at Eric's


Alison Moyets vocals sound so powerful and soulful on this album, truly sublime.
You create eclectic compilations of different genres, focusing on underground artists. How do you discover the music you want to release?
The music comes to me in different ways, some people send me stuff and sometimes I reach out to people. If I like thier work I won't necessarily go straight in asking for tracks but I will open up a dialogue, send them some music, tell them how much I love what they do and try and build some kind of relationship. If that develops in to a working relationship, then happy days! But if not, you've still made the connection with an artist you like and respect - which is still very much a win.
You’re working on your first solo release alongside Wilfy D … What inspired your new project?
Wilfy D is hands down one of the best producers operating in the UK right now, what he does transcends mere club tracks. He's writing actual songs. We have a new release coming very soon alongside a super talented up-and-coming London MC. We wanted to make a modern, vocal-led UK funky anthem that bangs in the club, but could also do bits on daytime radio. More to come on that very soon.
What’s the most challenging thing you’ve had to overcome as an artist?
The most challenging thing I've had to overcome as an artist is myself.
Like a lot of people, I can be my own worst critic and put a lot of pressure on myself. If I didn't have a gig for a month, it would be the end of the world and I felt as though I was failing. I went in to this year determined to approach it differently and shake myself out of that mindset… I thought really hard about why I do this, what what I wanted to achieve and how I measure my own success. I decided to not focus on the industry stuff so much and just create art that I'm happy with, learn new skills and progressing. I feel like as long as things are moving forward and I’m feeling creative and happy, then I've succeeded.
What’s one goal you want to achieve with Ghost Phone?
My primary goal with this project was to create something that is very me and kind of exist in my own lil’ lane and I feel like I've done that. However, I always want to grow and evolve, in the future I’d love to release full albums from artists with vocalists, full artwork etc.

And what is next for Ghost Phone in 2024?
Tell the people what you’ve got going on!
Ive spent most of this year getting my head in to production more. A massive shout out to my homies Wilfy and DJ Poleaxe, they have both taught me so much. I feel blessed to have such talented friends.
I've got my first beat tape dropping in the next few weeks, a couple of remixes, more releases, more shows and radio spots. I'm always putting in work and doing stuff because after all these years I still love it, It doesn't really feel like work. I'm gonna be doing this until I'm literally not able to anymore, I'm a lifer in this game.


Who should we interview next?
~
Leave a comment below
~
Who should we interview next? ~ Leave a comment below ~

Inspiration is Everywhere: An Interview with Bootleg Boy
“For finding the ideas/inspiration I’m a massive consumer of YouTube, anime, music etc. so I generally note down any ideas I have for videos, and the inspo can come from anywhere.”

We all know ‘The Bootleg Boy’... but how did it all begin? And why?
The bootleg boy started back in 2017. I was smoking at the time and used to love watching simpsonwave videos, they just felt nostalgic and chill. I’d been making videos on YouTube under other channels for a while but not particularly successfully, so decided to try a new channel making my own simpsonwave and it took off almost over night. Then I put hours into making more and more videos, despite not having the tools or skills to make them as well as other creators.
Bootleg Boy has transformed from a music sharing platform to a label and an artist persona… Has running one of the biggest platforms for lofi listeners changed how you view the genre?
I feel like I’ve been around this version of ‘Lofi’ from the early days. And I still love the old style, gritty beats using samples and capturing emotion. But I think it’s clear to everyone that ‘Lofi’ has changed and morphed into something different now, which is fine and natural with anything, but I definitely still miss those old-school feeling tracks. They’re still around, but a lot of the artists I grew with aren’t making that style anymore, so I definitely view it all with nostalgia-tinted glasses… and respect the producers that are staying true to the sound.
What’s one thing your listeners/followers wouldn’t expect about you?
I honestly think a lot of my listeners probably don’t realise how much music I produce and how much time I’ve been putting into the artist side of ‘bootleg’, but that’s totally fine I’m happy to keep the channel and my artist persona separate, to an extent. Most of my subscribers signed up for the mixes etc not me trying to push my own music, so I try to find a natural balance with how much of it I share through the channel/label.
What’s your creative process for making videos & music?
My creative process has changed a lot over the years.
With YouTube, I’ve found having specific schedules etc to stay consistent. But as for finding the ideas/inspiration, I’m a massive consumer of YouTube, anime, music etc. So I generally note down any ideas I have for videos, and the inspo can come from anywhere. Then I’ll make videos throughout the week and take ideas from my notes.
With producing music I try to be as fluid with it as possible, never forcing it and just making whatever style/genre I want at the time, whether I have any intention of releasing it or not. Playing around with different genres has been so important in me growing as an artist.
What’s one piece of advice you’d give to someone who wants to start a YouTube channel?
I’d probably say never underestimate how difficult YouTube is.
Most channels fail, especially if you just try to copy a successful channel. You have to focus on your USP and be true to yourself. Take inspiration from those that are doing well, but if you try and emulate it unnaturally your audience will feel that.
Is there an album that’s changed the way you think about music?
Untrue by Burial changed the way I viewed production completely. From showing me how to utilise texture, to the niche samples and even how important it can be to not focus on making things ‘perfect’. And I mean ‘perfect’ in the scientific sense, you don’t want to sterilise your music, the ‘human touch’ is something I’m always trying to bring out in my music.
What’s the most challenging thing you’ve had to overcome as an artist?
The hardest thing is learning the tools. I’ve always been quite creative, and for years I’ve been listening to submissions all day every day so I can really recognise what I like, and don’t like, immediately. But it’s taken years of practice (and tutorials) to actually be able to make my ideas a reality.
How do you stay dedicated to your project after almost 10 years of working on ‘The Bootleg Boy’?
I stay ‘dedicated’ by not being harsh on myself. Allowing myself the room to change styles/genres with whatever I feel like. Not chasing trends and forcing myself to do what gets the most views, just releasing the music I enjoy listening to and making the videos I like watching. Its selfish really, but I just make the content for myself, the fact other people want to consume it is just an added bonus.
What one thing you’d like to achieve with your platform?
I don’t think there’s one thing that would feel like ‘I’ve made it’, but just continuing to give a platform to small artists. Whenever I work with artists and they then get big later down the line, I feel proud to have recognised that and supported it, when others maybe wouldn’t have.
What’s next for you in 2024?
2024 has already been big for the label, it’s becoming a big focus for us. And then as a producer, I just want to collaborate with as many of my friends and artists I respect as possible.
Find The Bootleg Boy on
Youtube | Spotify (Artist) | Spotify (Playlist) | Apple Music | Instagram | X | Soundcloud |
Who should we interview next?
~
Leave a comment below
~
Who should we interview next? ~ Leave a comment below ~

Stay Consistent: An Interview With ohricky
“Being consistent is also difficult. Sometimes you don’t wanna make a beat video, or promote your music, but thats part of the game and I take it serious because I love what I do.“

What’s the thing that made you start making music?
I always wanted to sample. To me the art of taking music and repurposing it keeps it alive and honors those who created it. I used to work nightshift alot and I always had trouble sleeping. When you’re up late at night its nice to have something creative to fill your time.
What is your creative process?
I only sample music I like to listen to, then I use my samples to communicate emotions over my drums. I’m also obsessed with textures, so running my music through cassettes, vintage samplers, cassettes and cam corders is a way I feel intrigued by music. What can I do to make it sound dirty?
In every video you post, you always have incense burning…
What’s your favourite incense scent? And how did you get into the habit of combining it with your performances?
Man, I get a lot of questions about the incense… its actually kinda funny, I love incense because it reminds me of my grandma, but it also makes me feel at peace, and clean. I love candles too, but incense is more relaxing.
The smoke-shop next to my house has this one called dragons blood, smells wild, sandalwood second.

How do you handle creative block?
If the music isn’t fun, I just stop and put it down and go do something else. I love making beats, and if I’m not in love in the moment its not worth forcing. Go read a book, listen to another genre, go do some other creative thing. I always itch to cook up music so If I don’t feel it right at the moment, I know I will later.
A controversial question now, you make beats on lots of different equipment but what gear is your favourite and why?
My favorite piece of gear is the Pocket Operator. It doesn’t do more than any other sampler by a long shot, but Its always therapy when I use it. I can make beats on it mindlessly. These days I spend most of my time on my SP-404, I love that thing too, its been with me everywhere, in multiple countries too!
What’s an album recently which has changed the way you think about music?
Ziggy Stardust is an album I just fully heard this year and It completely blew my mind. Honestly kinda made me reconsider what I consider to be great music. It’s inspired me to learn more, I’ll always be a student in music and David Bowie makes em wanna be better, even as a beat head.
What has been the most challenging thing you’ve had to overcome as an artist?
Having to deal with rejection is hard as an artist. It takes time. I have been very blessed with people receiving my music well, I’ve been selling tapes and getting streams the past year or two but for most of the time I’ve been making beats (6 years), I haven’t had anyone interested.
Being consistent is also difficult. Sometimes you don’t wanna make a beat video, or promote your music, but thats part of the game and I take it serious because I love what I do.
What’s next for you in 2024?
Coming off of SPIRITS! Im very proud of what me and impreshn cooked up, the luv is real and People loved the tapes we did.
Up next is some work from myself and B4Lasers, another solo project, Bump Show Vol.2, more cassettes and some vinyl pressings!!!!

Find ohricky on
Instagram | TikTok | Spotify | Apple Music | Bandcamp | Soundcloud | Youtube
Who should we interview next?
~
Leave a comment
~
Who should we interview next? ~ Leave a comment ~

Don’t Ask, Just Give: An Interview with Amed One
‘There’s just a particular sound that comes with records, that warmth and crackle, it’s like a warm fire. Quite lovely.’

Why did you start making music?
I started making music really because I was bored. That’s not why I really started, but that’s what got me into it. I was going on a really long car drive and I was looking for apps to download to keep me entertained, I was going thru my dads purchased apps and I saw Beatmaker 2, sounded cool so I downloaded it. Definitely wasn’t an immediate click, I really didn’t use it that much until probably like 6 months later (as you probably know learning how to use a DAW is quite a pain). Once I had a lil understanding of it, it became a lot more fun to use, I was just doing it for fun and also because it’d be funny to have my friends rap over them - none of them were rappers but we’d make a few songs to have some fun. But time went on and I kept making more and more beats that I really enjoyed, and eventually I found myself making beats for hours a day. Then I started taking it a lil more seriously and eventually decided I was going to commit my life to beatmaking and take it to the end.

What is your creative process?
My creative process is pretty simple, I just look for a dope sample and then try and do something cool with it. Then I get some dope drums and see what I can do. It pretty much goes like that every time, I like to just find samples that really engage me, samples that catch my eye, and then just make something dope with it. The goal with my beats is to make fully completed tracks, ideally to put on a project. And I always strive to make bangers. Not just bangers, but the most exceptional bangers of all time. I’m pretty much always trying to make my next best track. And I really enjoy taking a track as far as I can. Doing everything there is to do until I don’t even know what else I could do.
You create all of your beats using vintage records. How did your love for vinyl start and what’s one record you couldn’t live without?

My love for vinyl really just started because that’s what authentic boom bap samples from. I just got a turntable and some records to make my beats more authentic, and then eventually just fell in love with the sound. There’s just a particular sound that comes with records, that warmth and crackle, it’s like a warm fire. Quite lovely. Over time I’ve just enjoyed that sound more and more, and recently I’ve been fully committed to only sampling from my own records. It took some time for me to get there, especially since youtube is so convenient, but it’s probably been a year at least that I’ve been on vinyl only, and now I could never go back. It’s just not the same.
One record I couldn’t live without would be 2001 - Deodato. Not because it’s my favorite album or artist, but because of what it represents. It was one of the first records I ever got, I used to only get records for a dollar and I actually found that one at the goodwill bins. When I first heard one of the tracks on there it blew my mind. Felt like I was tripping. That record signifies the start of my true love for vinyl and because of that it holds a special place in my heart.


We've worked together on a Sample Flip Competition a while ago and you've been releasing new sample packs ever since. What’s the secret of a great sample pack?
The number one secret. The number one secret.. I know it and I’m glad I do. The number one secret to a great sample pack is giving. Giving an experience beyond expectation. Not just giving some samples, but creating an experience that goes far beyond the price that money can even buy. And not just to make a better pack to get more sales, but to create a great pack as a donation to your community. A pack made with the intention of providing pure genuine value to the user. A gift that asks for nothing in return.

How do you handle creative block?
I just keep making beats really. Sometimes it’s hard, but it doesn’t stop me from making beats, it just makes it not so enjoyable. But in the sense of really getting over a creative block, I find that I’ve usually lost my original vision. I find that I’ve lost my true why for making beats, and when I do, I try my best to take it back to the start. I’ll usually go back and reread my goals, listen to the music that inspired me in the first place, and think about what it was in the past that really motivated me in the first place.
I find that creative block often happens because we make beats with the wrong intentions. Like making beats to impress people, or to get something out of it. Eventually as you do that it runs dry because it’s not genuine. Sometimes though, it’s just not clicking and I just need a break. If so, I’ll try to tap back into the vision, and then makes beats first thing the next morning, purely with the intention of doing it for myself and my own fulfilment from it.
Your Instagram page has a strong aesthetic theme. The community seem to really resonate with it. What advice would you give to artists who want to stand out on social media?
I would say stop taking advice and start experimenting. Just make a bunch of videos really, that’s the only way you can find your own style. You get an idea that sounds interesting so you explore it, and then you do this over and over and over again, until eventually your videos have a similar vibe to them and you find what works and what doesn’t. You also find what you like doing and what you don’t.
I would also recommend that you make the content for yourself. That you make videos that you think are dope, and you try to impress yourself with your content. And make the videos that you would enjoy watching. It’s funny to say but I love watching my own videos, and it makes sense because I make them for me. I’m the person I’m trying to please when I make the videos and as a result I am more pleased with the content. Which results in a more enjoyable content creating experience, and then as a result of that, people like watching my videos. They can see that it’s genuine and that it’s not trying to get followers or trick the viewer someway, it’s kind of just a fun way of sharing my music and artistic expression.
Another thing - don’t ask, just give. Provide value. And cut the fluff. I’ve learned that literally nobody cares, they just want the thing that your video provides so I get straight to the point. Like I’ll literally chop it down to the exact .1 second to get to the point faster. It’s a balance of making it for me and then optimizing it for growth, without sacrificing quality. And overall it’s about providing a great experience for myself first, and then the viewer. And likes and follows are never the goal, just the result.
Who are 3 artists from the community that you think readers should check out?
H. Potta for sure. Nastiest most authentic shit out there. For someone who wants another true boom bap experience, that’s a great place to start.
DJ Clif. Also some authentic boom bap shit. One of my favorites to see. Dope beats, and great cutz, real dope scratching, overall a favorite of mine.
Pink Siifu. My man just has a dope style. And authentic, I like the vibe he gives off. His music isn’t really that similar to what I go for, but I like his voice, would love to work with him and see what we could do.
One more - Wiseboy Jeremy. My guy has the voice. Dope style too, some authentik shit.


What’s an album recently which has changed the way you think about music?
Hmm that’s hard. Not quite as recent but I’ll just say it because it had a big impact on my view of albums. Damu The Fudgemunk - Spur Memento Trailer. Really great shit, but the thing that really hit for me was that the entire album is one experience. It’s not just a collection of songs, it’s clearly arranged into one work of art to be listened from start to finish and I love that. It changed the way I create my albums, and the way I think about creating songs in general. Not just a song but it’s an experience. A story through sound.
What has been the most challenging thing you’ve had to overcome as an artist?
The most challenging thing really has been keeping my visions and purpose. This past year it’s just been on and off, it comes and goes when it wants to. It doesn’t stop me from making beats, but I miss the early days when it was just so strong that I was passionate about my work all the time. Nowadays I’ll get into a thriving beatmaking state but it doesn’t last like I feel it used to. It’s hard to cultivate it as it’s not normally something you go out of your way to get, usually you make beats because you enjoy it, but it’s different when you’ve committed your life to musical expression; you do it regardless of whether you want to or not, it’s just what you do.
One more thing that’s similar, is keeping my intentions in check. Keeping my focus on the right things. It’s so easy to get distracted by money and followers and all that, it’s tempting. It’s good in balance, but maintaining that balance isn’t always easy.

What’s next for you in 2024?
What’s next for me in 2024, I’ve got a lot of plans. Probably should dial it down and focus on less, but that’s not my style, I like to do 10 things at once. Anyways the top 3 things I’m doing this year, 1) Releasing the next Basterd masterpiece - an album called Time. 2) Teaching and elevating my dawgs. I started a community where I teach homies interested in boom bap the secrets and help em level up. I just started this a lil under 2 months ago and I’m working on building this into something great, I’m liking where it’s going and so are the members, it’s nice. 3) Taking my website to the top. It’s where I host my sample packs, I’m looking to get more consistent with creating sample packs, it’s something I enjoy doing and it makes money while providing genuine value. It feels good to provide quality authentic boom bap samples since it’s so rare nowadays.

Who should we interview next?
~
Leave a comment below
~
Who should we interview next? ~ Leave a comment below ~
Commit to Content: An interview with Fuchi
“ Make those mistakes so you can learn and become better at it. If you sit there and wait for the right tool or the right time it’s just never going to happen. Everyone starts somewhere!”

Why did you start making music?
I have family members in the music industry on my mom’s side and instrumentalists on my dad’s. In the 90s I lived in New Jersey and frequented New York. My brother started rapping when I was like 7 in the 90s. My uncle on my mom’s side had the SP-12 and MPC-3K. So he, along with my uncle, put me onto so many obscure rappers and instrumentalists. I remember staying up late nights just to catch the Stretch and Bobbito show with my brother. Then visiting Fat Beats in the Village when I was a kid. Those things had a lasting impact on me.
So when I started making beats of my own in 2005 in Fruity Loops. I already knew I wanted to make hip hop beats for my brother to rap on. Then from there I started taking it seriously in 2009 when I met Andy (Ahrs Ahrtis) and Vic (Moby Vic) for the first time. Those dudes and RPDB have helped me come a long way when it comes to where I’m at as a musician today.
What is your creative process?
If I’m making sample based beats I like to always start with the sample. Then manipulate the sample as needed by pitching, filtering, chopping up, and adding FX. From there I’ll add drums and extra instruments.

If I’m looking to play synths I like to use Max for Live plugins like Euclidean Rhythms to come up with cool progressions. I’ll resample them onto some hardware then go from there. Once I determine the melodic section I’ll add the drum and bass to build up the rhythm section. Then from there once I’ve determined the key of the rhythm and melody I generally like to add chord progressions. My favorite synths to use are Analog Lab, TAL Juno clone, and Dexed the FM DX7 synth clone.
Your videos are inspiring loads of artists within the community. How do you keep your approach fresh, and avoid fatigue?
Thanks! I take time off from making music and pick up another hobby. Lately I’ve been getting into woodworking and gardening. Either that or I’ll take a trip somewhere I like visiting little beach towns here in Florida with my family.
Let’s get controversial. Beatmaking + production gear - which is your favourite and why?
Actually, I’ve been kind of selling off a lot of workstation based production gear lately. I started making beats on the MPC X and really felt like it’s the quickest way to get an idea out, when it comes to sampling… A lot of my workflow revolves around sampling. For me as a father, husband, and IT engineer, my time to create has become a lot more limited - so having something to get ideas out quickly is essential. So for me, the number one thing is being streamlined while keeping the same harmonics, warmth, mix, and dynamics in my final product.
My favorite production gear is the MPC X. But I use a lot of outside gear to sauce it up. With an example being the Ensoniq EPS or Akai S3000 for drums.
But I think the overall best production gear is the SP-404MK2.
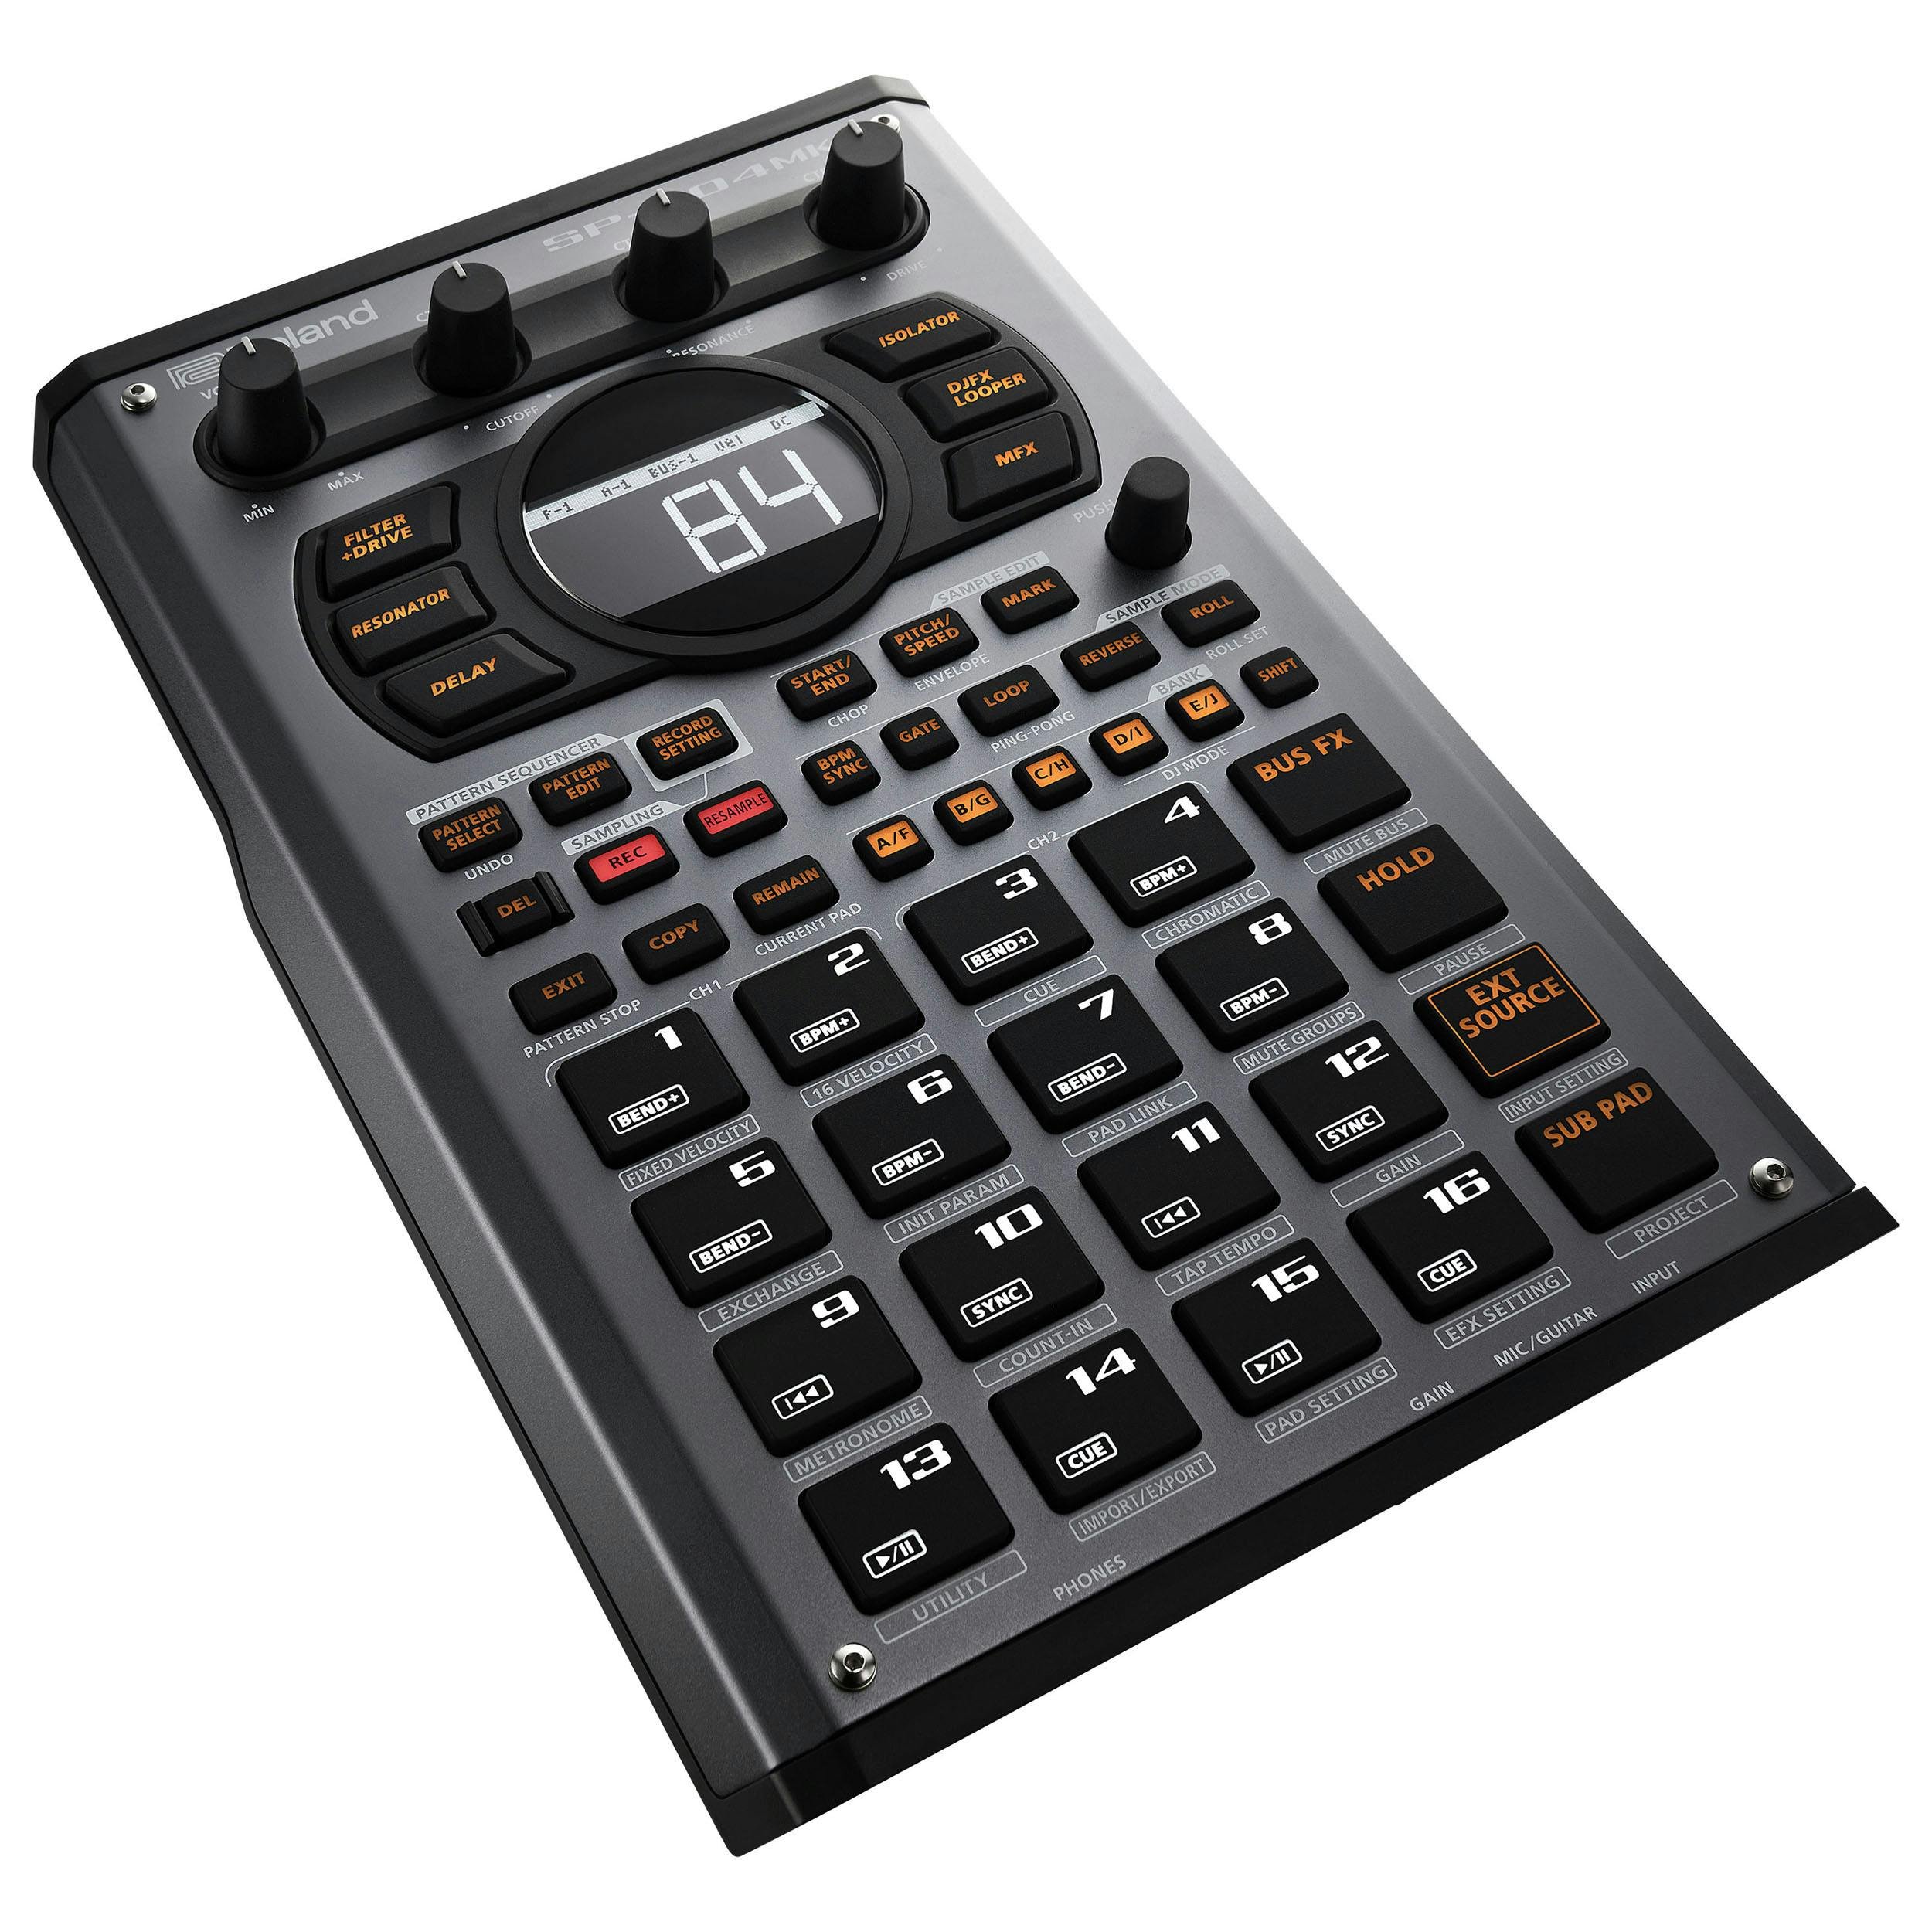
Roland’s new MKii model of the SP-404 sampling workstation credit: Roland
How do you handle creative block?
Take a break!
Do something else. Play sports, go workout, leave the crib for a bit, go help someone, go plant something, etc.
The stream of creative consciousness is always out there flowing. Recharge that antenna B!
Next, let’s talk consistency.
What advice would you give to artists who struggle to promote themselves on social media?
I can relate to those who struggle to promote themselves regularly. The motivation doesn’t always come naturally but here’s a method I’ve come up with to help stay the course and maintain consistency:

That’s great! Thanks Fuchi. Finally, what’s an album recently which has changed the way you think about music?
I recently got my son into Weezer’s blue album. We love listening to Buddy Holly and The Sweater Song.
There’s actually a running joke in my group chat that I only listen to music I was introduced to in 2014 and before and honestly it’s kinda true lol. I literally listen to the same albums on repeat and revisit them whenever.
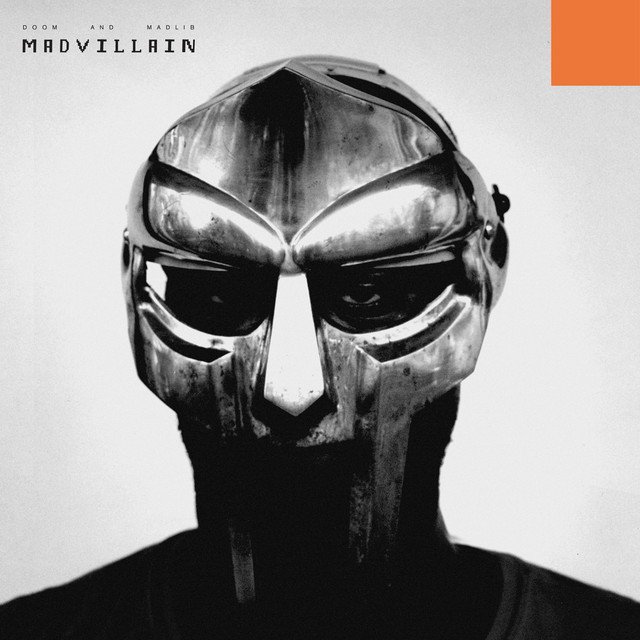
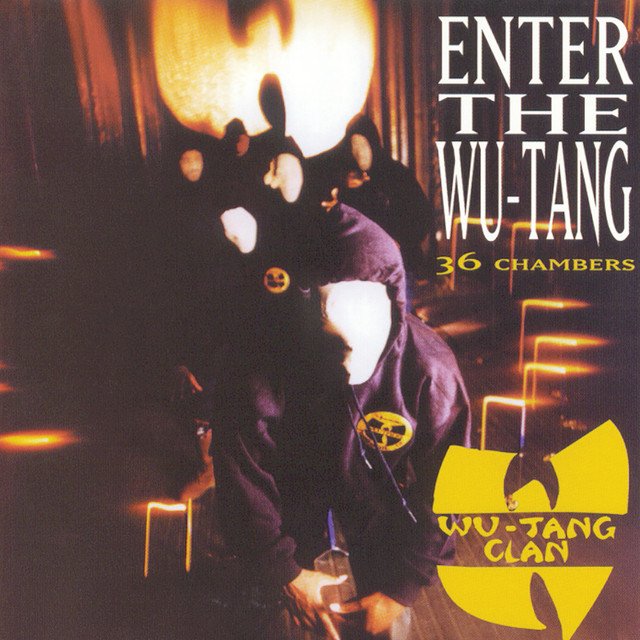
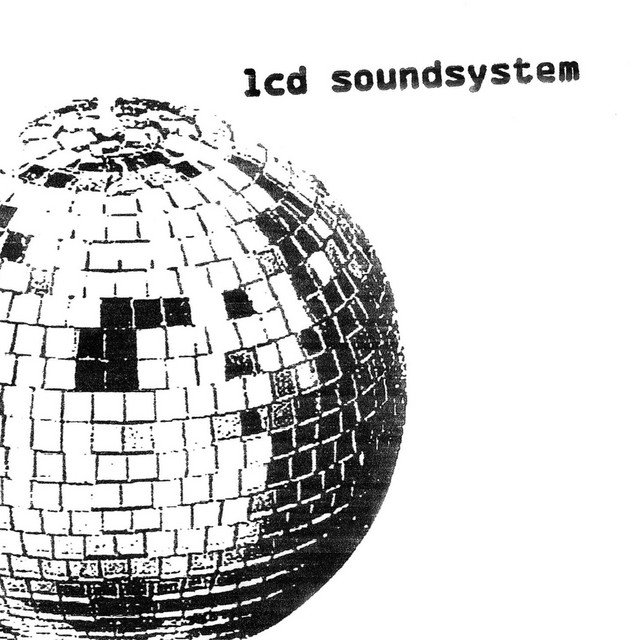
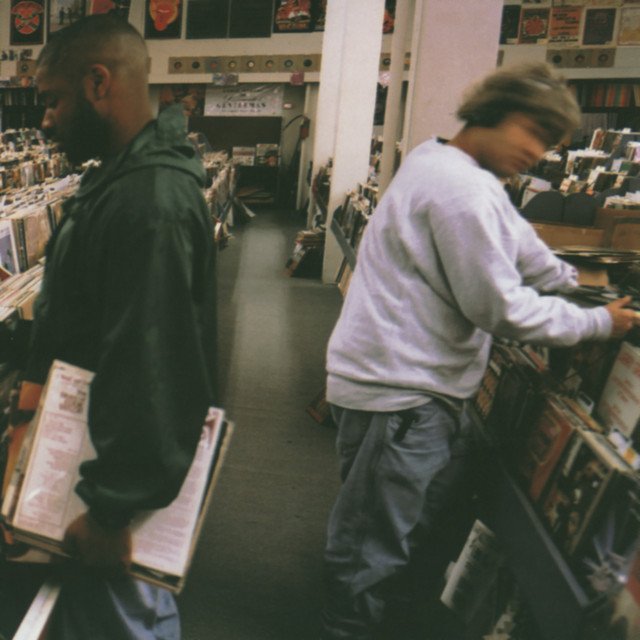
My personal top 5 in no order is. Madvillainy, 36 Chambers, LCD Soundsystem, Endtroducing, and Fourtet’s There Is Love in You.

What has been the most challenging thing you’ve had to overcome as an artist?
Promoting my music projects. In a timely and orderly fashion!
You’ve grown a dedicated and supportive community around your music - how did you first get into the scene and maintain such a strong connection to the community?
I’m super thankful that’s there people that even take the time to watch my content or listen to my projects. Especially when I would be making these tracks and buying all this music gear without anyone even knowing my music exists.
It all started with watching the reels 8greg2, ohricky, impreshn, and Q-noise would put out and thinking how cool it looked. Also lofivibe posts always got me super inspired. I wanted to be a part of that.
As far as maintaining, I’ve just been consistent with my online presence. I also keep in touch with a lot of the creatives I met in the community.
What’s next for you in 2024?
Got a project with my bro Moby Vic! Not sure if we’re calling it 200X or 20XX yet lol.
It’s always been a goal of mine to release music or be a part of music encompassing every genre that I love. So I made a trilogy of projects SMOKE!, TURISMO!, and now RUN! the last project in that trilogy. This project is mostly rap with vocal appearances from my brother Miguel (Vivid), my good friend Vic, Brandon (Ghouls Anonymous), and I.
Then I got a couple of beat tapes coming out. Days of Future Past will be a continuation of my comic book style beat tapes. This will feature unreleased beats that I made last year. Then lastly I’ll be dropping Vol. X, which will contain a lot of the beats I’ve been making this year. Most of the beats were made on the MPC X and a few on the PO-33.

Find Fuchi on
Instagram | Spotify | Apple Music | Bandcamp | Youtube | Soundcloud
Who should we interview next?
~
Leave a comment below
~
Who should we interview next? ~ Leave a comment below ~

Create For Yourself First: An interview with Kilroywash3r3
“My one piece of advice would be to make samples and sounds that you enjoy. Make the sample packs for yourself first.”
What’s the thing that made you start making music?
I moved to Alabama, and I had no friends. So I decided to start making music to fill up my free time, and it quickly became my favorite thing to do.
What does your creative process look like?
My creative process usually consists of opening up an Ableton project and immediately working on a drum groove. Once I get a groove I’m satisfied with, I find a sample and try to look for moments that stand out to me. If can find a moment that sticks out to me, I’ll either chop or loop the sample. If nothing grabs me in the sample, I’ll find another to mess around with. That’s about it.
We've worked together on a Sample Flip Competition a while ago. Since then, you've been hosting regular beat battles on Instagram with your sample packs.
What's one piece of advice you have for artists who want to start creating sample packs?
My one piece of advice would be to make samples and sounds that you enjoy. Make the sample packs for yourself first.
The names of the files in your sample packs… they’re always completely unhinged and hilarious! Where do you find the inspiration for these?
The names come from whatever is on my mind in the moment. I’m a very ‘scatter-brained’ person, so there is a bunch of stuff just floating around in my head.

How do you handle creative block?
I usually take a break, try to push through it, or try something completely new.
You've got a strong sense of style. What aesthetics and visuals inspire you?
I just really enjoy the aesthetics of the 90s, so tv shows, movies, and music videos from that era are what inspire me.
What has been the most challenging thing you’ve had to overcome as an artist?
Learning how to manage my time has been the most difficult thing for me as an artist, and it is something I have yet to overcome. Luckily, I’m getting better at managing my time and figuring out what is important.
What’s next for you in 2024?
I’m planning to get more music out this year. I have a project with Going Sumwhere that is very close to being complete. We just have a few things left. We’re actually planning to have some cassette tapes [for this album], so that is very exciting for me. I also just got a digitakt and I’ve been diving head first into it. There will be a lot more upbeat music made in this year for me.

Find Kilroywash3r3 on
Instagram | Spotify | Apple Music | Bandcamp | Youtube | Soundcloud | Website